



To replace the cylinder head gasket, you will need: torque wrench, wrenches «at 13», «at 17», «at 19», end heads «on 10», «at 13», «at 17», hex key «on 10», screwdriver.
1. Remove the decorative engine cover (see «Removal and installation of a decorative casing of the engine»).
2. Set the piston of the 1st cylinder to the TDC position of the compression stroke (see «Setting the piston of the first cylinder to the TDC position of the compression stroke»).
3. Reduce the pressure in the engine supply system if work is performed immediately after a trip (see «Reduced fuel pressure in the engine power system»).
4. Disconnect the wire from the terminal «minus» battery.
5. Drain the coolant (see «Coolant replacement»).
6. Remove the air filter (see «Removal and installation of the air filter»).
7. Disconnect from the throttle assembly the heating hoses, the small branch of the crankcase ventilation system, the adsorber purge, the air supply pipe, the connectors of the throttle position sensor and the idle speed controller (see «Removal and installation of the throttle assembly»).
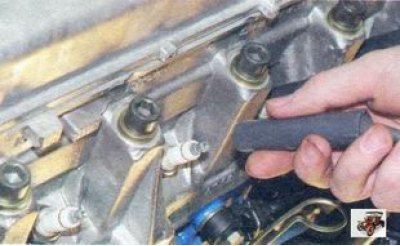
8. Disconnect tips of high-voltage wires from spark plugs.
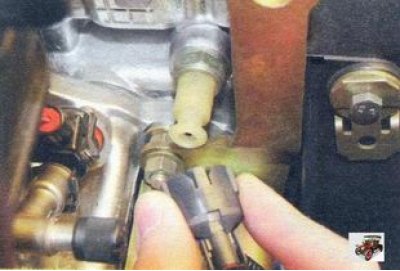
9. Disconnect wires from the gauge of an alarm lamp of an emergency drop in pressure of oil.
10. Disconnect wires from DTOZH (coolant temperature sensor) engine management systems and phase sensor.
11. Remove the cylinder head cover (see «Replacing the cylinder head cover gasket»).
12. Remove the front camshaft drive cover (see «Setting the piston of the first cylinder to the TDC position of the compression stroke»).
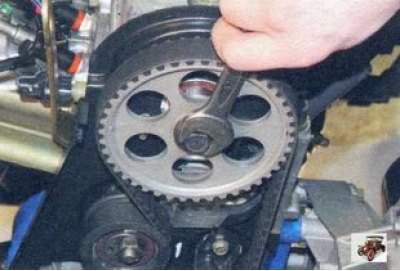
13. Loosen the camshaft sprocket bolt while holding the camshaft from turning (this can be done by inserting a large screwdriver or spudger into the holes in the pulley hub).
14. Remove the timing belt (see «Timing belt replacement (camshaft drive) and tension roller»).
15. Finally turn out a bolt of fastening of a pulley of a camshaft and remove a pulley.
16. Remove the rear camshaft drive cover (see «Water pump replacement»).
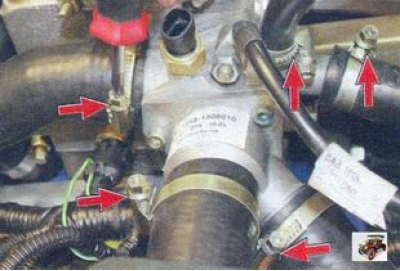
17. Loosen the clamps and disconnect the five hoses of the cooling system from the thermostat nozzles.
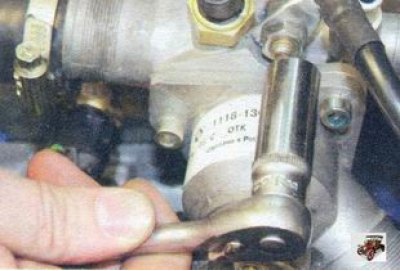
18. Turn away a nut of fastening of a tip «mass» wires and disconnect the wire.
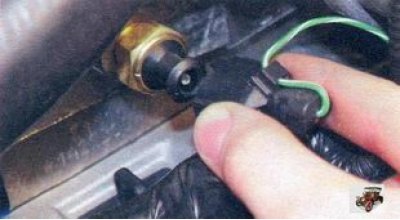
19. Disconnect a wire from the gauge of the index of temperature of a cooling liquid.
20. Disconnect the injector wiring harness connector and disconnect the fuel supply hose from the fuel rail tube (see «Removal and installation of the fuel rail»).
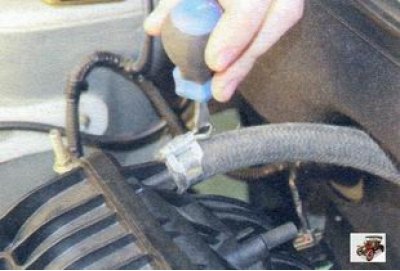
21. Disconnect the hose to the vacuum brake booster from the fitting of the intake module by loosening the clamp of its fastening.
22. Disconnect the upper ends of the spacers from the inlet pipe (see «Catalyst replacement»).
23. Disconnect the connectors of the oxygen concentration sensor wiring harnesses and remove their wire holders from the holes in the steering gear heat shield (see «Catalyst replacement»).
24. Disconnect the exhaust pipe of the additional muffler from the catalyst flange and disconnect the catalyst supporting bracket from the cylinder block (see «Catalyst replacement»).
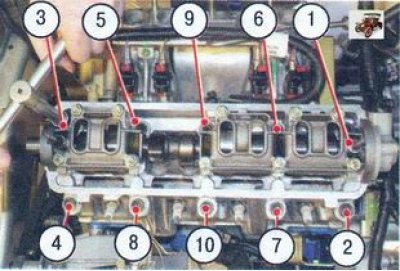
25. Loosen the ten cylinder head bolts in this order...
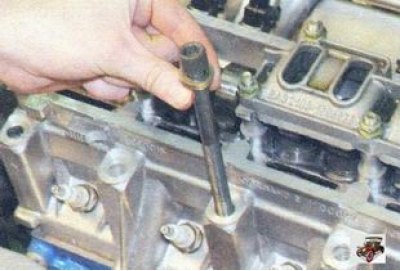
26.... then finally unscrew the cylinder head bolts and remove them together with the washers.
27. Remove the cylinder head. Cylinder head bolts stretch out with repeated use. Bolts whose length (head height not included) exceeds 135.5 mm, replace with new ones. Before installing the cylinder head, lubricate the bolts with a thin layer of engine oil.
28. Remove the cylinder head gasket.
29. Clean the mating surfaces of the block head and cylinder block (they must be dry and clean) and remove the oil from the threaded holes in the block for the cylinder head bolts.
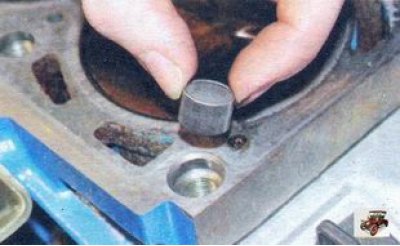
30. Check up presence of two adjusting plugs in nests of extreme openings of the block of cylinders under bolts of fastening of a head. If, when removing the cylinder head, the bushings remain in the head or come out of the block sockets, press them into the block until they stop.
31. Install a new head gasket on the cylinder block (the cylinder head gasket must be dry and clean) by mounting bushings. At the same time, the hole for the passage of oil in the gasket (with copper trim) should be between the 3rd and 4th cylinders.
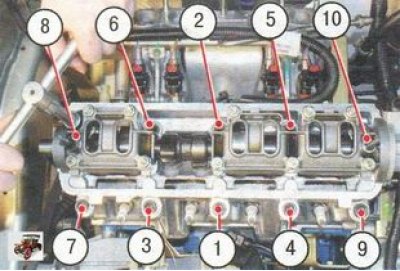
32. Install the head on the cylinder block, after making sure that the crankshaft and camshafts are in the TDC position (both valves of the 1st cylinder must be closed). Tighten the block head bolts in the following sequence in four steps:
- 1 - torque 20 Nm (2 kgf•m);
- 2 - torque 69.4-85.7 Nm (7.1-8.7 kgf•m);
- 3 - tighten the bolts by 90°;
- 4 - finally tighten the bolts by 90°.
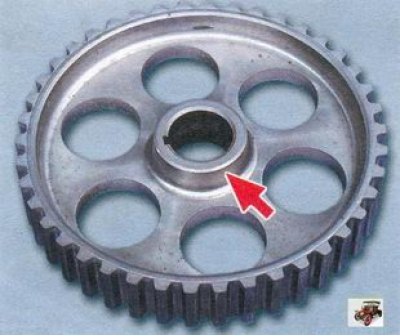
33. Install the removed parts on the cylinder head and connect hoses and wires to it in the reverse order of removal. Install the camshaft pulley with the protruding part of the hub towards the engine. Check and, if necessary, adjust the clearances in the valve drive (see «Valve clearance adjustment»). Adjust the tension of the camshaft drive belt (see «Timing Belt Tension Adjustment (camshaft drive)»).