
Car repair AvtoVAZ Car repair Renault Car repair Hyundai Car repair Ford Car repair Volkswagen Car repair Audi Car repair Chevrolet
English Русский
Български
Беларускі
Український
Српски
Hrvatski
Română
Polski
Slovenský
Magyar
articles sitemap contacts bookmark
LadaMan.ru


Kalina Granta Priora Vesta Largus XRAY
Kalina Sedan (2004-2013, VAZ-1118) Kalina Hatchback (2004-2013, VAZ-1119)

Replacing crankshaft seals (Kalina 1118)

  • Main
  • Kalina
  • Kalina Sedan
  • Power unit
  • Engine repair
  • Replacing crankshaft seals
0
The reason for the clutch discs becoming oily may be a leak in the primary shaft seal of the gearbox or the rear crankshaft seal.

Motor and transmission oils differ in smell, so with a certain amount of skill you can determine which of the seals has failed.

To replace the crankshaft seals on a vehicle, you will need: all the tools needed to remove the timing drive (see "Replacing the timing belt of the camshaft drive and the tension roller"), the rear cover of the timing drive (see "Removal and installation the oil pump"), cylinder head covers (see "Replacing the cylinder head cover gasket"), gearboxes (see "Removal and installation the gearbox"), clutches (see "Removal and installation the clutch"), flywheel (see "Removal, inspection and installation of the flywheel"), as well as a screwdriver and a hammer.

To replace the front crankshaft oil seal on a vehicle, perform the following work.

1. Disconnect the wire from the negative terminal of the battery.

2. Set the piston of the 1st cylinder to the TDC position of the compression stroke (see "Setting the piston of the first cylinder to the TDC position of the compression stroke").

3. Remove the timing belt (see "Timing Belt Replacement (camshaft drive) and tension roller").
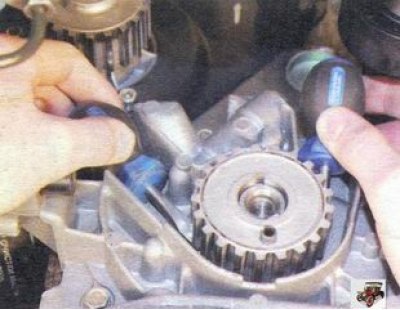
3. Remove the timing belt (see «Timing Belt Replacement (camshaft drive) and tension roller»).


4. Using two screwdrivers, remove the crankshaft toothed pulley.
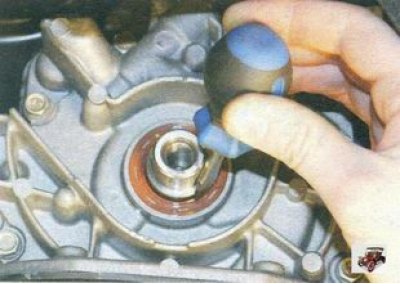


4. Using two screwdrivers, remove the crankshaft toothed pulley.


5. Using a screwdriver, remove the crankshaft oil seal from the oil pump cover.

6. Lubricate the working edge of the new oil seal with engine oil, install it in the oil pump cover, orienting the working edge inside the engine, and press the oil seal into the oil pump cover until it stops using a mandrel. As a mandrel, you can use a head from a tool kit of a suitable size or an old oil seal.

7. Install all removed parts and assemblies of the timing mechanism on the vehicle in the reverse order of removal.

8. Adjust the tension of the camshaft drive belts (see "Timing Belt Tension Adjustment (camshaft drive)") and generator (see "Checking the alternator drive belt tension and replacing it").

For replacement rear oil seal crankshaft, perform the following work.

1. Remove the gearbox from the vehicle (see "Removal and installation the gearbox").

2. Remove the clutch (see "Removal and installation the clutch").

3. Remove the flywheel (see "Removal, inspection and installation of the flywheel").
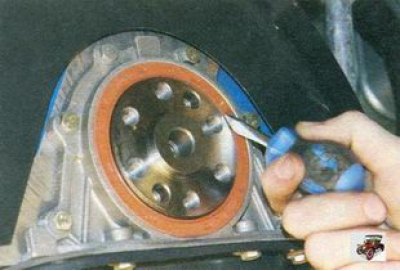
3. Remove the flywheel (see «Removal, inspection and installation of the flywheel»).


4. Using a screwdriver, remove the rear crankshaft oil seal.


5. Lubricate the working edge of the new crankshaft oil seal with engine oil...
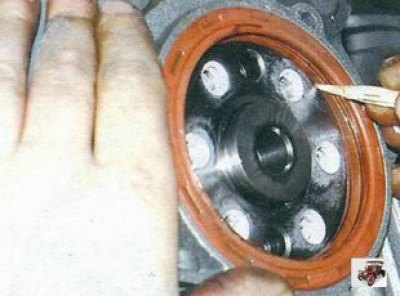
5. Lubricate the working edge of the new crankshaft oil seal with engine oil...


6. ...install the crankshaft oil seal into the cylinder block socket, orienting the working edge of the oil seal towards the inside of the engine, and carefully tuck the working edge of the oil seal onto the crankshaft journal.

7. Press the rear crankshaft oil seal into the socket until it stops, using the old oil seal as a mandrel.

8. Install the removed components on the vehicle in the reverse order of removal.

Note: When installing the flywheel, lubricate the threaded portion of the flywheel mounting bolts with Loctite thread locking compound or any similar anaerobic thread locking compound.


This article is available at russian, bulgarian, belarusian, ukrainian, serbian, croatian, romanian, polish, slovak, hungarian
This article has been reviewed: Daniil Markelov
Share with friends:
◀ Previous
Lada Kalina Sedan: Engine repair
Next ▶

Replacing the oil pan gasket
Replacing valve stem seals
Replacing the camshaft seal
Replacing the cylinder head gasket
Replacing the cylinder head cover gasket
Camshaft replacement
Replacing valve lifters
Disassembly, repair and assembly of the cylinder head
Lapping valves
Removal and installation the engine
More articles with information from manuals for Lada:

• Replacing the remote control battery Lada Granta 1 (2011-2023, VAZ-2190)
• Replacing camshaft seals Lada Priora 1 (2007-2018, VAZ-2170)
• Crankshaft Position Sensor — Checking and Replacing Lada Vesta 1 (2015-2023, VAZ-2180)
• Checking the level and replacing the engine oil and filter Lada Largus 1 (2012-2023)
• Bleeding the hydraulic brake system, replacing the fluid Lada X-Ray 1 (2015-2022)
Link to this article in various formats
Reviews and comments of visitors
No comments yet


Add up two numbers: 19 + 21


Kalina Sedan (2004-2013) 
  • General information
  • Vehicle device
  • Operation and maintenance
  • Faults en route
  • Power unit
  • Engine repair
  • Cooling and lubrication system
  • Exhaust system
  • Supply system
  • Ignition and control
  • Transmission
  • Clutch and drive shafts
  • Car gearbox
  • Chassis (running gear)
  • Front suspension
  • Rear suspension
  • Steering
  • Brake system
  • Body and interior
  • Exterior (external elements)
  • Interior (internal elements)
  • Doors, locks and windows
  • Electrical equipment
  • Equipment and devices
  • Power devices
  • Lighting and signaling
  • Heating and ventilation
Kalina Hatchback (2004-2013) 
  • General information
  • Vehicle Details
  • Maintenance
  • Troubleshooting
  • Power unit
  • Engine repair
  • Cooling system
  • Supply system
  • Control system
  • Exhaust system
  • Transmission
  • Clutch
  • Car gearbox
  • Drive shafts
  • Chassis (running gear)
  • Wheels and tires
  • Front suspension
  • Rear suspension
  • Steering
  • Brake system
  • Body and interior
  • Exterior (external elements)
  • Interior (internal elements)
  • Doors, locks and windows
  • Electrical equipment
  • Equipment and devices
  • Power devices
  • Lighting and signaling
  • Electrical circuits
LadaMan.ru © 2018–2026 | Mobile version | About Lada | Sitemap: EN BG BY UA RS HR RO PL SK HU | Contacts with admin | | Add to bookmarks
Kalina Hatchback (2004-2013) | Kalina Sedan (2004-2013) | Granta 1 (2011-2023) | Priora 1 (2007-2018) | Vesta 1 (2015-2023) | Largus 1 (2012-2023) | X-Ray 1 (2015-2022) |
This site uses cookies to ensure everything runs smoothly.