



Car engine repair Lada Kalina 1

Reference data (engines 1.4i 16V and 1.6i 16V)
Table 8.1.1. Basic data for monitoring, adjustment and maintenance Table 8.1.2. Tightening torques for threaded connections
Table 8.1.1. Basic data for monitoring, adjustment and maintenance Table 8.1.2. Tightening torques for threaded connections

Description of engine design
The car is equipped with a 16-valve engine model 11194 or 21126*. The engines are gasoline, four-stroke, four-cylinder in-line with overhead camshafts and liquid cooling. The cylinder block is cast...
The car is equipped with a 16-valve engine model 11194 or 21126*. The engines are gasoline, four-stroke, four-cylinder in-line with overhead camshafts and liquid cooling. The cylinder block is cast...

Checking the technical condition of the engine
The technical condition of the engine depends on the vehicle's mileage, the timeliness of periodic maintenance, the quality of the operating materials used, and the quality of the repairs performed....
The technical condition of the engine depends on the vehicle's mileage, the timeliness of periodic maintenance, the quality of the operating materials used, and the quality of the repairs performed....

Oil level — check
Recommendation. The check should be carried out 10-15 minutes after the engine has been stopped. Sequence of execution 1. Prepare the car for work (see " Preparing the car for maintenance and repair...
Recommendation. The check should be carried out 10-15 minutes after the engine has been stopped. Sequence of execution 1. Prepare the car for work (see " Preparing the car for maintenance and repair...

Engine Oil and Oil Filter — Replacement
The first oil change on a new or overhauled engine should be done after 2500-3500 km of mileage, then every 15,000 km. The volume of the lubrication system is 3.5 l. Recommendation. To remove oil...
The first oil change on a new or overhauled engine should be done after 2500-3500 km of mileage, then every 15,000 km. The volume of the lubrication system is 3.5 l. Recommendation. To remove oil...

Oil pressure — check
Recommendation. If the oil pressure warning light comes on while the engine is idling and warmed up to operating temperature, you must make sure that: a) the oil level in the engine oil pan is within...
Recommendation. If the oil pressure warning light comes on while the engine is idling and warmed up to operating temperature, you must make sure that: a) the oil level in the engine oil pan is within...

Engine trim panel — removal and installation
The decorative trim is held in place by four rubber couplings that fit onto the studs of the intake module cover. Removal 1. Prepare the car for work (see " Preparing the car for maintenance and...
The decorative trim is held in place by four rubber couplings that fit onto the studs of the intake module cover. Removal 1. Prepare the car for work (see " Preparing the car for maintenance and...

Compression in engine cylinders — check
To complete the work you will need an assistant and a compression gauge. Sequence of execution 1. Prepare the car for work (see " Preparing the car for maintenance and repair "). 2. Warm up the...
To complete the work you will need an assistant and a compression gauge. Sequence of execution 1. Prepare the car for work (see " Preparing the car for maintenance and repair "). 2. Warm up the...

Timing Belt — Checking Condition
The timing belt should be checked during vehicle maintenance - every 15,000 km. Recommendation. If, when the engine is running, a loud noise from a rotating bearing is heard in the area of the upper...
The timing belt should be checked during vehicle maintenance - every 15,000 km. Recommendation. If, when the engine is running, a loud noise from a rotating bearing is heard in the area of the upper...
Timing Belt — Replacement
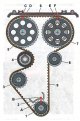
To perform the work you will need an assistant, and it is also desirable to have an inspection ditch. Recommendation. Since a timing belt break can cause collisions between the valves and pistons,...
To perform the work you will need an assistant, and it is also desirable to have an inspection ditch. Recommendation. Since a timing belt break can cause collisions between the valves and pistons,...

Timing Belt Tensioner and Guide Rollers — Checking and Replacing
Recommendation. If, when the engine is running, a loud noise from a rotating bearing is heard in the area under the front timing belt covers (see " Checking the technical condition of the engine "),...
Recommendation. If, when the engine is running, a loud noise from a rotating bearing is heard in the area under the front timing belt covers (see " Checking the technical condition of the engine "),...

Cylinder Head Cover — Removal, Cleaning Oil Deflector and Installation
Removal 1. Remove the air filter (see " Air filter - removal and installation "). 2. Remove the decorative engine cover (see " Engine trim panel - removal and installation "). 3. Remove the ignition...
Removal 1. Remove the air filter (see " Air filter - removal and installation "). 2. Remove the decorative engine cover (see " Engine trim panel - removal and installation "). 3. Remove the ignition...

Camshaft Seals — Replacement
To perform the work, you will need a special tool to hold the camshaft pulleys. Note: The work can be done without this device if you can unscrew the camshaft pulley mounting bolts. Sequence of...
To perform the work, you will need a special tool to hold the camshaft pulleys. Note: The work can be done without this device if you can unscrew the camshaft pulley mounting bolts. Sequence of...

Camshafts — Removal and Installation
Removal 1. Remove the camshaft pulleys (see " Camshaft Seals - Replacement "). 2. Remove the tension and guide rollers (see " Timing Belt Tensioner and Guide Rollers - Checking and Replacing "). 3....
Removal 1. Remove the camshaft pulleys (see " Camshaft Seals - Replacement "). 2. Remove the tension and guide rollers (see " Timing Belt Tensioner and Guide Rollers - Checking and Replacing "). 3....

Hydraulic tappets — removal and installation
Removal 1. Remove the camshafts (see " Camshafts - Removal and Installation "). When assembling, it is recommended to install the hydraulic tappets in their original places. 2. Using a magnet, remove...
Removal 1. Remove the camshafts (see " Camshafts - Removal and Installation "). When assembling, it is recommended to install the hydraulic tappets in their original places. 2. Using a magnet, remove...

Valve stem seals — replacement
Note: You can replace the valve stem seals without removing the head from the cylinder block. To de-compress the valves, you need a compressor and an adapter with a hose to pump air into the cylinder...
Note: You can replace the valve stem seals without removing the head from the cylinder block. To de-compress the valves, you need a compressor and an adapter with a hose to pump air into the cylinder...

Cylinder head — removal and installation
Note: The cylinder head can be removed as a complete unit with the camshafts and thermostat (to access the connecting rod and piston group, to replace the gasket, etc.). If the head is subject to...
Note: The cylinder head can be removed as a complete unit with the camshafts and thermostat (to access the connecting rod and piston group, to replace the gasket, etc.). If the head is subject to...

Cylinder head — checking and grinding valves
To complete the work you will need: a special template or a wide metalworking ruler; set of flat feeler gauges; valve grinding tool; lapping paste. Examination 1. Remove the cylinder head (see "...
To complete the work you will need: a special template or a wide metalworking ruler; set of flat feeler gauges; valve grinding tool; lapping paste. Examination 1. Remove the cylinder head (see "...

Front Crankshaft Oil Seal — Replacement
Removal 1. Remove the timing belt (see " Timing Belt - Replacement "). 2. Remove the toothed pulley from the crankshaft. 3. To avoid losing the key and damaging the new seal, use pliers to remove the...
Removal 1. Remove the timing belt (see " Timing Belt - Replacement "). 2. Remove the toothed pulley from the crankshaft. 3. To avoid losing the key and damaging the new seal, use pliers to remove the...

Flywheel — removal and installation
Removal 1. Remove the pressure and driven clutch discs (see " Clutch - replacement "). 2. Using any available method, mark the position of the flywheel on the shaft (this will make installation...
Removal 1. Remove the pressure and driven clutch discs (see " Clutch - replacement "). 2. Using any available method, mark the position of the flywheel on the shaft (this will make installation...

Rear Crankshaft Oil Seal — Replacement
Removal 1. Remove the flywheel (see " Flywheel - removal and installation "). When performing the following operation, be careful not to scratch the running surface of the crankshaft. 2. Using a...
Removal 1. Remove the flywheel (see " Flywheel - removal and installation "). When performing the following operation, be careful not to scratch the running surface of the crankshaft. 2. Using a...

Engine Oil Pan — Removal, Gasket Replacement and Installation
Removal 1. Remove the engine splash guard or crankcase protection (if installed). 2. Drain the oil from the engine (see " Engine Oil and Oil Filter - Replacement "). 3. Using a 10 mm socket wrench,...
Removal 1. Remove the engine splash guard or crankcase protection (if installed). 2. Drain the oil from the engine (see " Engine Oil and Oil Filter - Replacement "). 3. Using a 10 mm socket wrench,...

Oil intake — removal and installation
Removal 1. Remove the engine oil pan (see above, " Oil pan - removal, gasket replacement and installation "). 2. Using a 10 mm wrench, unscrew the two bolts 1 securing the oil intake to the main...
Removal 1. Remove the engine oil pan (see above, " Oil pan - removal, gasket replacement and installation "). 2. Using a 10 mm wrench, unscrew the two bolts 1 securing the oil intake to the main...

Oil pump — removal, inspection and installation
Removal 1. Remove the crankshaft toothed pulley and its key (see " Front Crankshaft Oil Seal - Replacement "). 2. Remove the crankshaft position sensor (see " Crankshaft Position Sensor - Removal,...
Removal 1. Remove the crankshaft toothed pulley and its key (see " Front Crankshaft Oil Seal - Replacement "). 2. Remove the crankshaft position sensor (see " Crankshaft Position Sensor - Removal,...

Piston rings and connecting rod bearings — replacement
Piston rings are replaced during repairs of the connecting rod and piston group, when they are worn out or damaged. Rings are also replaced during major engine repairs. To complete the job you will...
Piston rings are replaced during repairs of the connecting rod and piston group, when they are worn out or damaged. Rings are also replaced during major engine repairs. To complete the job you will...

Piston and connecting rod — replacement
Excessively worn pistons must be replaced. Replacement of the piston and connecting rod may be required if the valve collides with the piston, caused by a violation of the valve timing phases or a...
Excessively worn pistons must be replaced. Replacement of the piston and connecting rod may be required if the valve collides with the piston, caused by a violation of the valve timing phases or a...

Powertrain Mounts — Replacement
To complete the work you will need: height adjustable stand (for example, a screw jack); inspection pit or overpass. Left support Removal 1. Prepare the car for work (see " Preparing the car for...
To complete the work you will need: height adjustable stand (for example, a screw jack); inspection pit or overpass. Left support Removal 1. Prepare the car for work (see " Preparing the car for...

Features of the device and repair of modifications of the Lada Kalina car
Table 16.1. Modifications of the LADA KALINA car *Some cars were equipped with the 11183 engine. LADA KALINA family cars are produced with three body types: sedan, hatchback and station wagon, and...
Table 16.1. Modifications of the LADA KALINA car *Some cars were equipped with the 11183 engine. LADA KALINA family cars are produced with three body types: sedan, hatchback and station wagon, and...
Features of the 1.6i engine
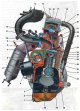
The eight-valve engine with a working volume of 1.6 liters is based on the VAZ-2111 engine. It has a cylinder block increased in height by 2.3 mm and an original crankshaft. The cylinder diameter...
The eight-valve engine with a working volume of 1.6 liters is based on the VAZ-2111 engine. It has a cylinder block increased in height by 2.3 mm and an original crankshaft. The cylinder diameter...

Engine lubrication system 1.6i — checking the oil level
Recommendation. The check should be carried out 10-15 minutes after the engine has been stopped. Sequence of execution 1. Prepare the car for work (see " Preparing the car for maintenance and repair...
Recommendation. The check should be carried out 10-15 minutes after the engine has been stopped. Sequence of execution 1. Prepare the car for work (see " Preparing the car for maintenance and repair...

Timing belt drive engine 1.6i — checking the condition and adjusting the tension
The timing belt should be checked during vehicle maintenance - every 15,000 km. To perform the work you will need a timing belt tensioner key. Sequence of execution 1. Prepare the car for work (see "...
The timing belt should be checked during vehicle maintenance - every 15,000 km. To perform the work you will need a timing belt tensioner key. Sequence of execution 1. Prepare the car for work (see "...

Timing Belt for 1.6i Engine — Replacement
It is advisable to work with an assistant. Removal 1. Remove the front timing belt cover (see above, " Timing belt drive engine 1.6i - checking the condition and adjusting the tension "). 2. Remove...
It is advisable to work with an assistant. Removal 1. Remove the front timing belt cover (see above, " Timing belt drive engine 1.6i - checking the condition and adjusting the tension "). 2. Remove...

1.6i Engine Timing Belt Tensioner Roller — Removal and Installation
Sequence of execution 1. Remove the front timing belt cover (see " Timing belt drive engine 1.6i - checking the condition and adjusting the tension "). Recommendation. When replacing the tension...
Sequence of execution 1. Remove the front timing belt cover (see " Timing belt drive engine 1.6i - checking the condition and adjusting the tension "). Recommendation. When replacing the tension...

1.6i Engine Camshaft Seal — Replacement
Sequence of execution 1. Remove the timing belt (see " Timing Belt for 1.6i Engine — Replacement "). 2. Using a 10 mm socket wrench placed on the nut securing the rear timing belt cover, hold the...
Sequence of execution 1. Remove the timing belt (see " Timing Belt for 1.6i Engine — Replacement "). 2. Using a 10 mm socket wrench placed on the nut securing the rear timing belt cover, hold the...

1.6i Engine Receiver — Removal, Seal Replacement and Installation
Removal 1. Remove the throttle assembly from the receiver flange studs without disconnecting the cooling system hoses from it (see " Throttle assembly - removal, gasket replacement and installation...
Removal 1. Remove the throttle assembly from the receiver flange studs without disconnecting the cooling system hoses from it (see " Throttle assembly - removal, gasket replacement and installation...

Fuel rail of the 1.6i engine — removal, disassembly, assembly and installation
The fuel rail is dismantled when it is necessary to remove the injectors, as well as in other cases during engine repair. Removal 1. Relieve the fuel pressure in the fuel line (see " Fuel Line -...
The fuel rail is dismantled when it is necessary to remove the injectors, as well as in other cases during engine repair. Removal 1. Relieve the fuel pressure in the fuel line (see " Fuel Line -...

1.6i Engine Intake Manifold and Exhaust Manifold Gasket — Replacement
To carry out the work, you will need an inspection pit or overpass. Removal 1. Prepare the car for work (see " Preparing the car for maintenance and repair "). 2. Using a 13 mm wrench, unscrew the...
To carry out the work, you will need an inspection pit or overpass. Removal 1. Prepare the car for work (see " Preparing the car for maintenance and repair "). 2. Using a 13 mm wrench, unscrew the...

1.6i Engine Cylinder Head Cover Gasket — Replacement
Removal 1. Prepare the car for work (see " Preparing the car for maintenance and repair "). 2. Remove the decorative engine cover. 3. Disconnect the drive cable from the throttle valve and move it...
Removal 1. Prepare the car for work (see " Preparing the car for maintenance and repair "). 2. Remove the decorative engine cover. 3. Disconnect the drive cable from the throttle valve and move it...

Adjusting the clearances in the timing drive of the 1.6i engine
Note: To compensate for thermal expansion of the valve stem, a gap is required between the camshaft lobe and the valve lifter. For intake valves, the clearance should be 0.15-0.25 mm, and for exhaust...
Note: To compensate for thermal expansion of the valve stem, a gap is required between the camshaft lobe and the valve lifter. For intake valves, the clearance should be 0.15-0.25 mm, and for exhaust...

1.6i Engine Camshaft — Removal and Installation
Removal 1. Remove the timing belt (see " Timing Belt for 1.6i Engine — Replacement "). 2. Unscrew nut 1 and bolt 2 of the upper fastening of the rear timing belt cover. 3. Disconnect the throttle...
Removal 1. Remove the timing belt (see " Timing Belt for 1.6i Engine — Replacement "). 2. Unscrew nut 1 and bolt 2 of the upper fastening of the rear timing belt cover. 3. Disconnect the throttle...

1.6i Engine Valve Caps — Replacement
To complete the work you will need: tin rod; magnet; tweezers; valve stem seal remover; cap pressing mandrel; valve spring compressor. Removal 1. Remove the camshaft (see " 1.6i Engine Camshaft -...
To complete the work you will need: tin rod; magnet; tweezers; valve stem seal remover; cap pressing mandrel; valve spring compressor. Removal 1. Remove the camshaft (see " 1.6i Engine Camshaft -...

Cylinder head of the 1.6i engine — removal and installation
Removal 1. Drain the coolant from the engine (see " Coolant - Replacement "). 2. Remove the high-voltage wire tips from the spark plugs. 3. Remove the cylinder head cover (see " 1.6i Engine Cylinder...
Removal 1. Drain the coolant from the engine (see " Coolant - Replacement "). 2. Remove the high-voltage wire tips from the spark plugs. 3. Remove the cylinder head cover (see " 1.6i Engine Cylinder...

Piston rings and connecting rod bearings for 1.6i engine — replacement
To perform the work you will need a mandrel for compressing piston rings. Removal 1. Remove the cylinder head (see " Cylinder head of the 1.6i engine - removal and installation "). 2. Remove the oil...
To perform the work you will need a mandrel for compressing piston rings. Removal 1. Remove the cylinder head (see " Cylinder head of the 1.6i engine - removal and installation "). 2. Remove the oil...

Piston and connecting rod of the 1.6i engine — replacement
To complete the work you will need: bore gauge; soft metal rod (∅ 21 mm). Disassembly 1. Remove the piston rings from the piston (see above). 2. Using an awl, pry up and remove the piston pin...
To complete the work you will need: bore gauge; soft metal rod (∅ 21 mm). Disassembly 1. Remove the piston rings from the piston (see above). 2. Using an awl, pry up and remove the piston pin...

High Voltage Wires — Checking and Replacing
To perform the test you will need a multimeter. Advice: To avoid mixing up the terminals on the ignition coil (ignition module), it is more convenient to replace high-voltage wires one by one....
To perform the test you will need a multimeter. Advice: To avoid mixing up the terminals on the ignition coil (ignition module), it is more convenient to replace high-voltage wires one by one....

1.6i Engine Spark Plugs — Replacement
Spark plugs should be replaced every 30,000 km or when they fail or the engine starts to idle unstably. On the 1.6i engine, you should use A17DVRM spark plugs or their foreign analogues - LR15YC...
Spark plugs should be replaced every 30,000 km or when they fail or the engine starts to idle unstably. On the 1.6i engine, you should use A17DVRM spark plugs or their foreign analogues - LR15YC...

Ignition coil of the 1.6i engine — checking and replacement
Tip: To quickly check the serviceability of the ignition system, you can use a spark indicator for engines with fuel injection. It is placed on the spark plug and a high-voltage wire is connected to...
Tip: To quickly check the serviceability of the ignition system, you can use a spark indicator for engines with fuel injection. It is placed on the spark plug and a high-voltage wire is connected to...
This section is available on russian, bulgarian, belarusian, ukrainian, serbian, croatian, romanian, polish, slovak, hungarian
More sections with information from manuals for Lada:
• Power unit: Engine repair Lada Granta 1 (2011-2023, VAZ-2190)
• Power unit: Engine repair Lada Priora 1 (2007-2018, VAZ-2170)
• Power unit: Engine repair Lada Vesta 1 (2015-2023, VAZ-2180)
• Power unit: Engine repair Lada Largus 1 (2012-2023)
• Power unit: Repair H4M engine Lada X-Ray 1 (2015-2022)
Link to this section in various formats
TEXTHTMLBB Code
- General information
- Vehicle device
- Operation and maintenance
- Faults en route
- Power unit
- Engine repair
- Cooling and lubrication system
- Exhaust system
- Supply system
- Ignition and control
- Transmission
- Clutch and drive shafts
- Car gearbox
- Chassis (running gear)
- Front suspension
- Rear suspension
- Steering
- Brake system
- Body and interior
- Exterior (external elements)
- Interior (internal elements)
- Doors, locks and windows
- Electrical equipment
- Equipment and devices
- Power devices
- Lighting and signaling
- Heating and ventilation
- General information
- Vehicle Details
- Maintenance
- Troubleshooting
- Power unit
- Engine repair
- Cooling system
- Supply system
- Control system
- Exhaust system
- Transmission
- Clutch
- Car gearbox
- Drive shafts
- Chassis (running gear)
- Wheels and tires
- Front suspension
- Rear suspension
- Steering
- Brake system
- Body and interior
- Exterior (external elements)
- Interior (internal elements)
- Doors, locks and windows
- Electrical equipment
- Equipment and devices
- Power devices
- Lighting and signaling
- Electrical circuits