
Removing
1. Remove the air filter (see «Air filter - removal and installation»).
2. Remove the engine trim (see «Decorative overlay of the engine - removal and installation»).
3. Remove the ignition coils (see «Ignition coils - check and replacement»).
4. Remove the intake module (see «Inlet module - removal and installation»).
5. Using an 8 mm socket wrench, unscrew the 15 bolts securing the cylinder head cover and remove the cover.
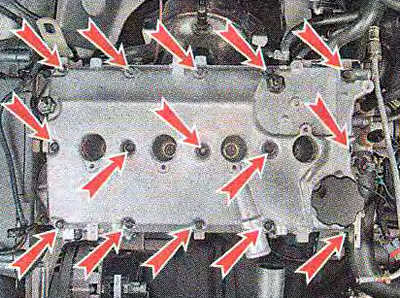
6. Remove the cover.
Comment. If necessary, use a 10 mm wrench to unscrew the fastening bolt and remove the bracket for fastening the wiring harness pads of the injectors and ignition coils from the block head cover. Also, if necessary, loosen the clamps and disconnect the hoses from the cover.
Flushing
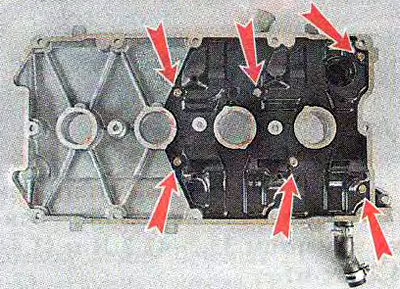
1. Using an 8 mm wrench, unscrew the six bolts securing the oil deflector.
2. Use a slotted screwdriver to wring out the retainers of the oil filler neck.
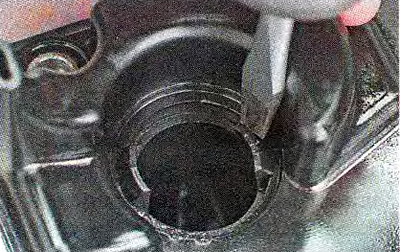
3. Remove the oil deflector from the cylinder head cover.
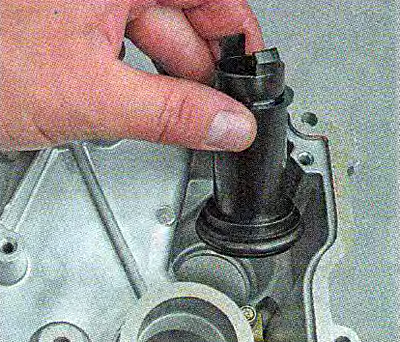
4. Shaking from side to side, remove the oil filler neck.
5. We wash the removed parts in kerosene, wipe with a clean cloth.
6. We assemble the head cover in reverse order. We tighten the bolts with a torque of 1.9-4.6 Nm (0.2-0.5 kgf·m)
Warning! Be sure to install lock washers under the bolt heads.
Installation
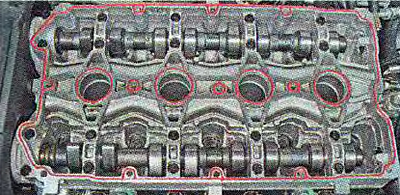
1. We clean the mating surfaces of the cover and bearing housing from sealant residues, degrease them with white spirit.
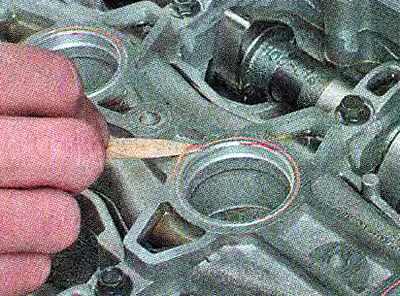
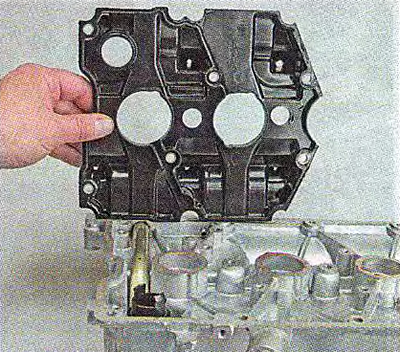
2. We apply a thin layer of heat-resistant sealant Loktite-574 or similar on the mating plane of the bearing housing in accordance with the diagram shown in the photograph.
Warning! When repairing the engine, do not use a sealant with a high content of silicone (silicon compounds), whose vapors can get through the crankcase ventilation system into the cylinders and further into the exhaust tract. Use a sealant that specifically states on the packaging that it is safe for the oxygen sensor.
3. Install the cover in place. We wrap the cover fastening bolts in the direction from the middle to the edges until the cover is pressed against the bearing housing. Finally tighten the bolts with a torque of 1.9-4.6 Nm (0.2-0.5 kgf·m).
4. Install the parts in the reverse order of removal.