
Car repair AvtoVAZ Car repair Renault Car repair Hyundai Car repair Ford Car repair Volkswagen Car repair Audi Car repair Chevrolet
English Русский
Български
Беларускі
Український
Српски
Hrvatski
Română
Polski
Slovenský
Magyar
articles sitemap contacts bookmark
LadaMan.ru


Kalina Granta Priora Vesta Largus XRAY
Priora 1 (2007-2018, VAZ-2170)

Replacing the cylinder head cover gasket (Priora 2170)

  • Main
  • Priora
  • Priora 1
  • Power unit
  • Engine repair
  • Replacing the cylinder head cover gasket
0
In the VAZ-21126 engine, the joint between the cover and the cylinder head is sealed with a sealant applied to the mating surfaces of the parts.

If the oil leak from under the cylinder head cover cannot be eliminated by tightening the cover mounting nuts, replace the sealing layer of sealant.

You will need: an 8 mm socket wrench, 10 mm and 13 mm wrenches, flat-head and Phillips-head screwdrivers, nippers or a knife.
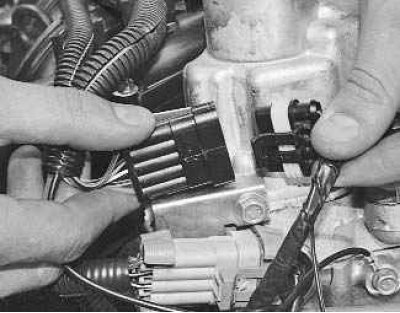
1. Disconnect the ignition coil wiring harness connectors…
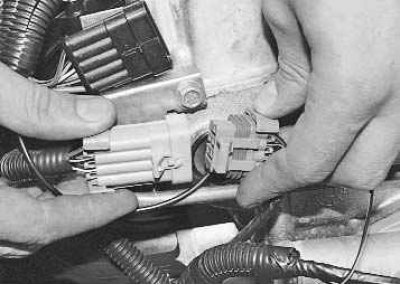

1. Disconnect the ignition coil wiring harness connectors…

2. …and the injector wiring harness.
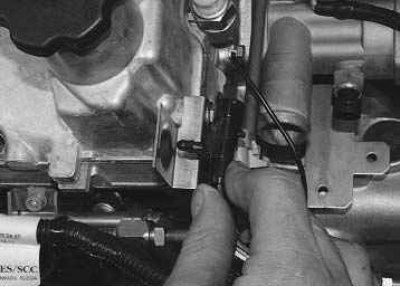

2. …and the injector wiring harness.

3. Using your fingers to squeeze the latches, disconnect the ignition coil wiring harness…


3. Using your fingers to squeeze the latches, disconnect the ignition coil wiring harness connector...
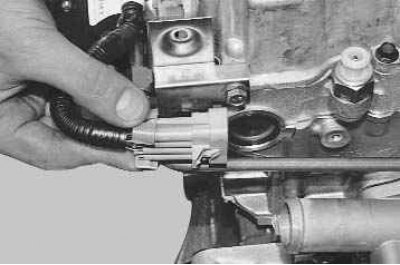


4. …and the injector wiring harness connector from the front bracket.
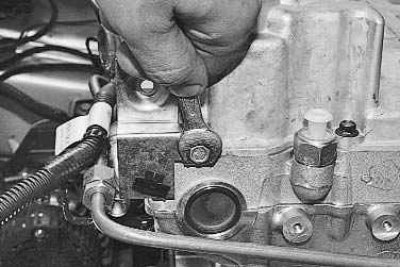

4. …and the injector wiring harness connector from the front bracket.

5. Unscrew the mounting bolts with a 10 mm spanner and remove the front...
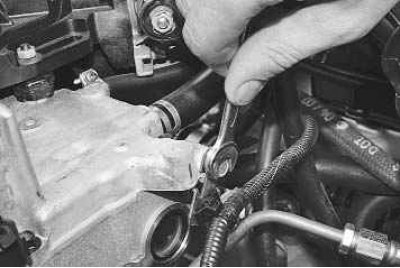

5. Unscrew the mounting bolts with a 10 mm spanner and remove the front...

6. ...and rear brackets.
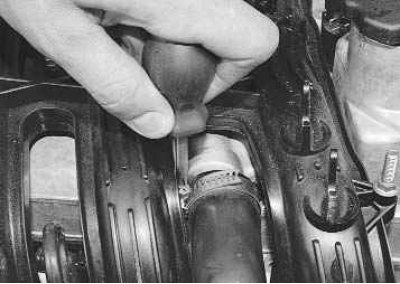

6. ...and rear brackets.

7. Loosen the clamp..
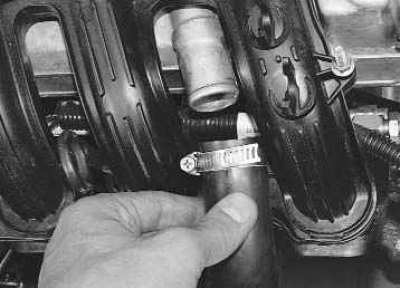

7. Loosen the clamp..


8. …and remove the crankcase ventilation system exhaust hose from the cylinder head cover pipe.
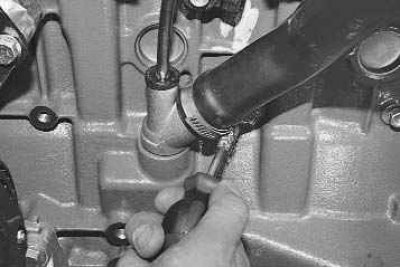

8. …and remove the crankcase ventilation system exhaust hose from the cylinder head cover pipe.

9. Loosen the clamp..
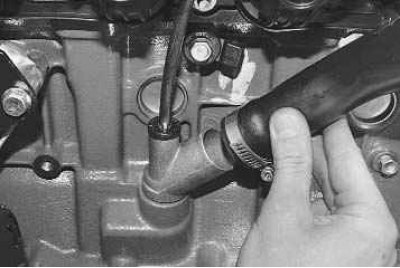

9. Loosen the clamp..

10. …and remove the crankcase ventilation system exhaust hose from the cylinder block pipe.
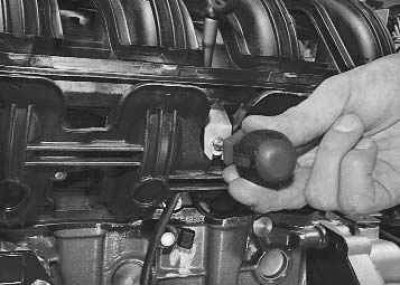

10. …and remove the crankcase ventilation system exhaust hose from the cylinder block pipe.

11. Remove the screw securing the oil level indicator (dipstick) guide bracket…
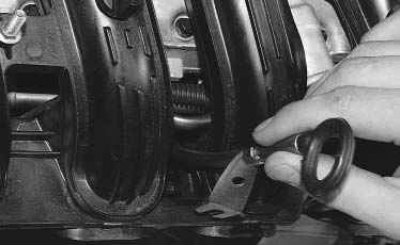

11. Remove the screw securing the oil level indicator (dipstick) guide bracket…


12. …and remove the guide together with the pointer.
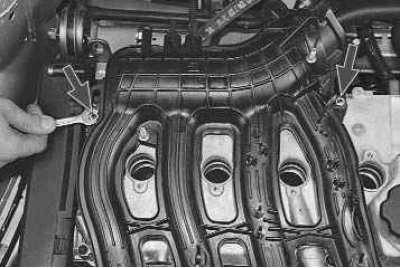

12. …and remove the guide together with the pointer.

13. Using a 10 mm spanner, unscrew the two nuts securing the intake manifold to the cylinder head…


13. Using a 10 mm spanner, unscrew the two nuts securing the intake manifold to the cylinder head cover.
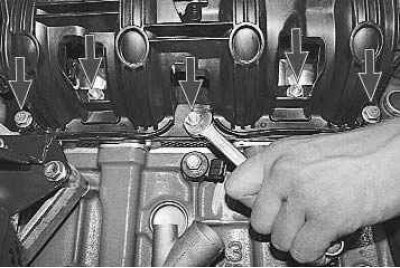
14. Using a 13 mm spanner, unscrew the three nuts and remove the two bolts securing the intake…


14. Using a 13 mm spanner, unscrew the three nuts and remove the two bolts securing the intake manifold to the cylinder head…
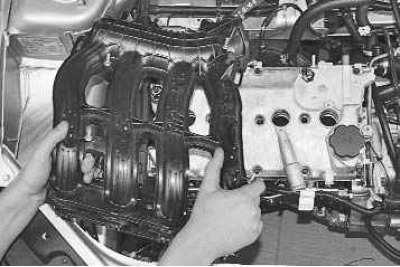
15. …and remove the intake manifold.

15. …and remove the intake manifold.


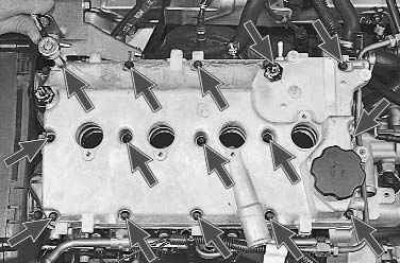
16. Using an 8 mm socket wrench, unscrew the fifteen cylinder head cover mounting bolts...
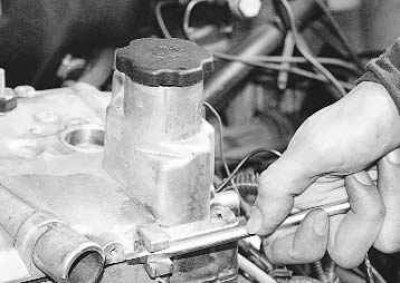

16. Using an 8 mm socket wrench, unscrew the fifteen cylinder head cover mounting bolts...

17. ...push the cover away from the cylinder head using the protrusions located along its…


17. ...push the cover away from the cylinder head using the protrusions located along its perimeter...
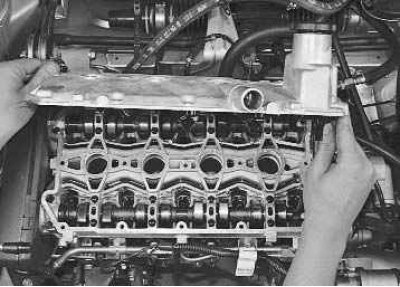
18. ...and remove the lid.

18. ...and remove the lid.

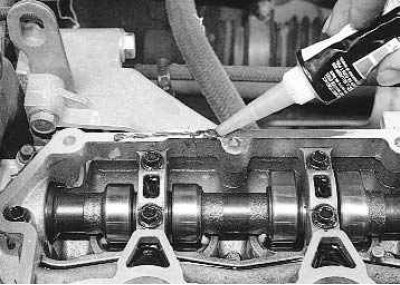
Note: Before installing the cover, clean the mating surfaces of the cylinder head and cover from…


Note: Before installing the cover, clean the mating surfaces of the cylinder head and cover from old sealant and degrease them. Apply a thin layer of sealant to the mating surface of the cylinder head.


19. Install the parts in reverse order.


This article is available at russian, bulgarian, belarusian, ukrainian, serbian, croatian, romanian, polish, slovak, hungarian
This article has been reviewed: Vladislav Voloshin
Share with friends:
◀ Previous
Lada Priora 1: Engine repair
Next ▶

Features of engine disassembly
Replacing the powertrain mounts
Replacing the timing belt and tension roller
Setting the piston of the first cylinder to the TDC position
Removal and installation the engine mudguard
Replacing the cylinder head gasket
Replacing valve stem seals
Replacing camshaft seals
Replacing the front crankshaft oil seal
Replacing the rear crankshaft oil seal
More articles with information from manuals for Lada:

• Replacing the cylinder head cover gasket Lada Kalina Sedan (2004-2013, VAZ-1118)
• Cylinder Head Cover Gasket — Replacement Lada Granta 1 (2011-2023, VAZ-2190)
• Cylinder Head Cover — Removal, Cleaning Oil Deflector and Installation Lada Vesta 1 (2015-2023, VAZ-2180)
• Replacing the cylinder head cover gasket Lada Largus 1 (2012-2023)
• Assembly of the engine cylinder head Lada X-Ray 1 (2015-2022)
Link to this article in various formats
Reviews and comments of visitors
No comments yet


Add up two numbers: 30 + 32


Priora 1 (2007-2018) 
  • General information
  • Vehicle device
  • User manual
  • Faults en route
  • Maintenance
  • Power unit
  • Engine repair
  • Cooling and lubrication system
  • Supply system
  • Exhaust system
  • Transmission
  • Clutch
  • Car gearbox
  • Drive shafts
  • Chassis (running gear)
  • Car suspension
  • Steering
  • Brake system
  • Body and interior
  • Exterior (external elements)
  • Interior (internal elements)
  • Doors, locks and windows
  • Electrical equipment
  • Equipment and devices
  • Power devices
  • Lighting and signaling
  • Cooling and heating
  • Electrical circuits
LadaMan.ru © 2018–2026 | Mobile version | About Lada | Sitemap: EN BG BY UA RS HR RO PL SK HU | Contacts with admin | | Add to bookmarks
Kalina Hatchback (2004-2013) | Kalina Sedan (2004-2013) | Granta 1 (2011-2023) | Priora 1 (2007-2018) | Vesta 1 (2015-2023) | Largus 1 (2012-2023) | X-Ray 1 (2015-2022) |
This site uses cookies to ensure everything runs smoothly.