



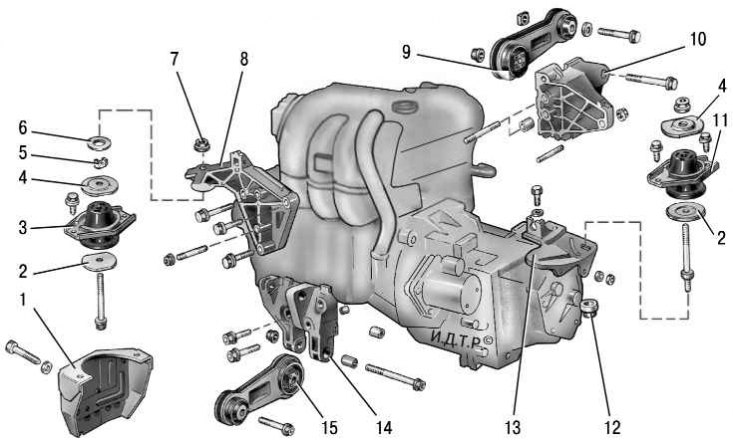
Figure 5.5. Powertrain suspension: 1 – bracket on the right side member of the body; 2 – lower cushion limiter; 3 – upper support cushion; 4 – upper cushion limiter; 5 – cushion mounting nut; 6 – spacer washer; 7 – support mounting nut; 8 – front support bracket; 9 – left support bar; 10 – left support bracket; 11 – rear support cushion; 12 – nut with washer; 13 – rear support bracket; 14 – bracket of the right lower support; 15 – right support bar
The powertrain suspension parts are shown in the figure 5.5.
You will need: wrenches "13", "15", "17", a jack or similar lifting mechanism.
1. Raise the front of the vehicle on stands or lift the vehicle on a lift.
2. Remove the engine splash guard (see "Removing and installing the engine mudguard").
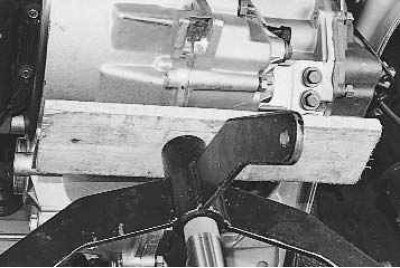
3. Before removing the rear support cushion of the power unit, install a jack or hydraulic stand under the gearbox housing (see photo).
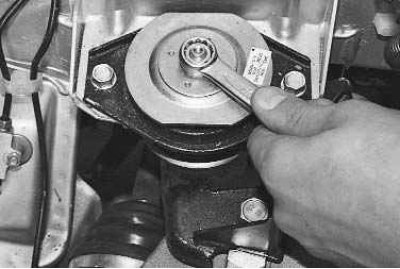
4. To replace the rear support cushion, use a 15 mm wrench to unscrew the nut securing the support to the bracket.
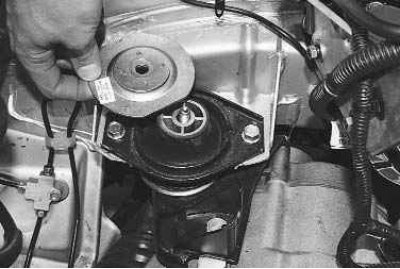
5. Remove the upper cushion stop.
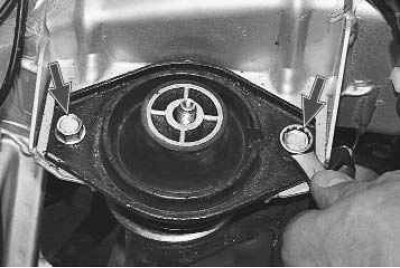
6. Using a 13 mm spanner, unscrew the two bolts securing the rear support cushion to the body...
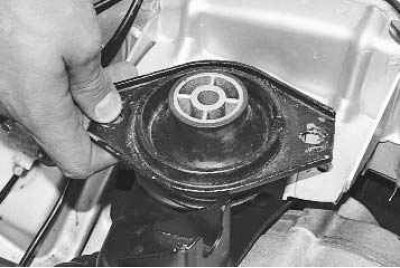
7. …and remove the pillow.
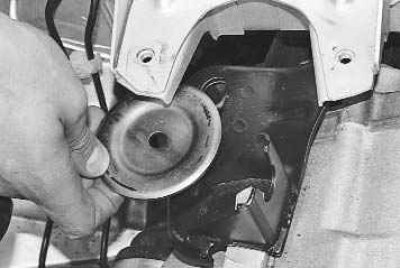
8. Remove the lower cushion stop.
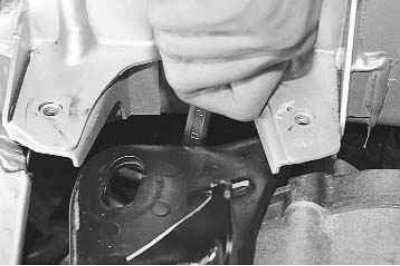
9. To replace the rear support bracket, use a 13 mm wrench to unscrew the two nuts securing the bracket to the rear of the gearbox housing…
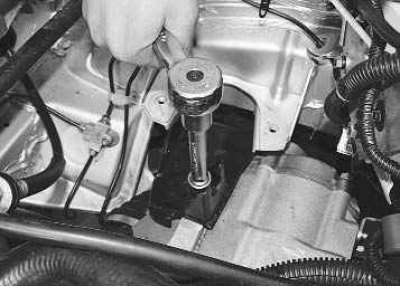
10. …unscrew the upper mounting bolt with a 13 mm socket wrench and remove the bracket.
11. Install the bracket and rear powertrain support cushion in the reverse order of removal.
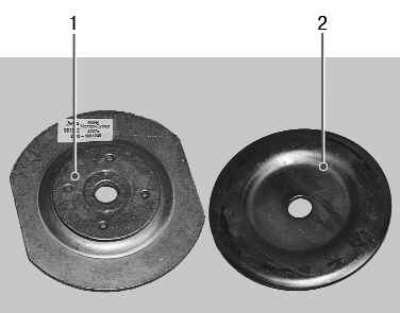
Note: The upper 1 and lower 2 rear support cushion stops have different shapes. Do not mix them up when installing.
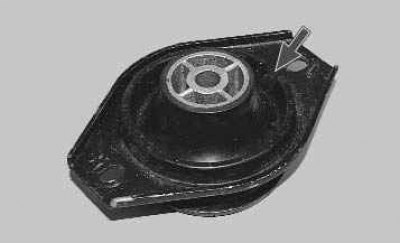
Note: Install the support cushion with the conical part facing up and the cutout facing the front of the vehicle.
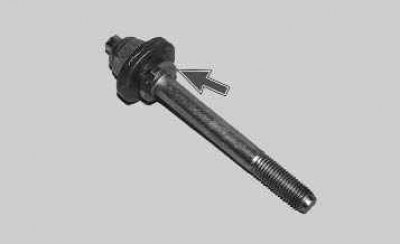
Note: Install the support cushion mounting pin with the flange facing down.
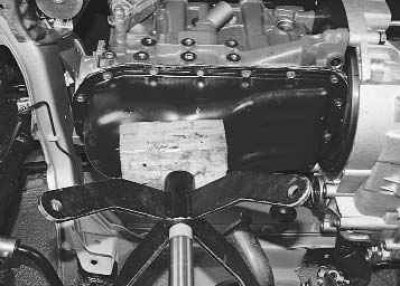
12. Before removing the front powertrain support cushion, install a jack or support under the engine oil pan.
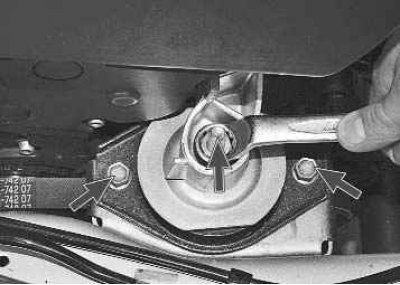
13. Using a 17 mm wrench, unscrew the nut securing the front support cushion to the bracket and use a 13 mm wrench to unscrew the two bolts securing the cushion to the body. Remove the cushion stops and the cushion itself.
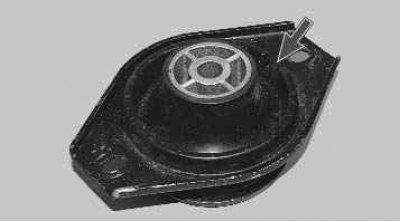
14. Install the front engine mount cushion in the reverse order of removal, with the conical part facing up and the cutout facing the rear of the vehicle.
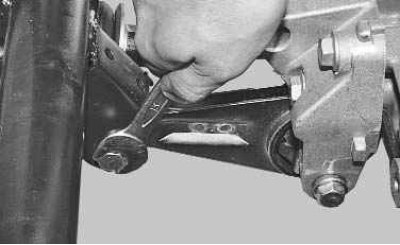
15. To replace the right support rod, use a 15 mm spanner to unscrew the rod mounting bolt to the cross member (the generator has been removed for clarity)…
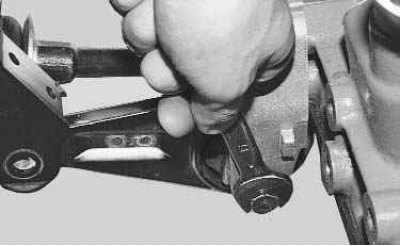
16. …and to the support bracket…
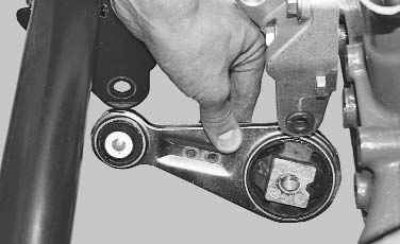
17. …then remove the barbell.
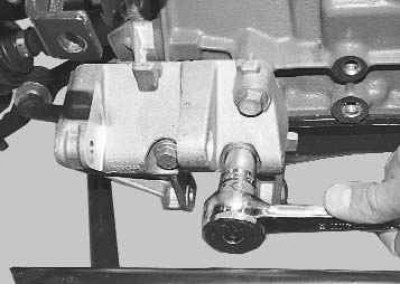
18. To replace the right support bracket, which is also the generator bracket, remove the generator (see "Removing and installing the generator", p. 212), use a 15 mm socket wrench to unscrew the three bolts securing the bracket to the cylinder block…
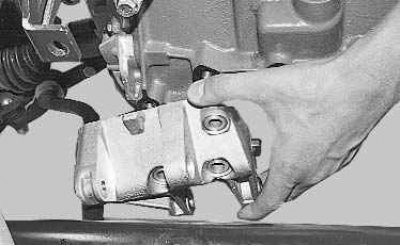
19. …and remove the bracket.
20. Install the parts in the reverse order of removal.
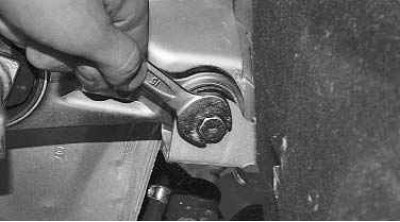
21. To replace the left support rod, use a 15 mm spanner to unscrew the rod mounting bolt to the body…
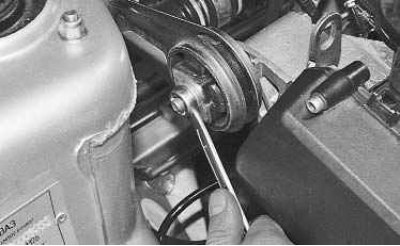
22. …use a 15 mm wrench to unscrew the nut securing the rod to the support bracket and remove the rod.
23. Install the rod in the reverse order of removal.
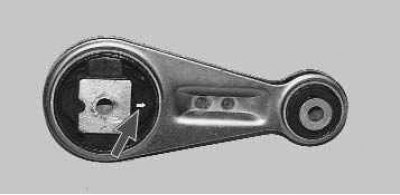
Note: Install the right and left engine mount rods with the arrows on the rubber pads pointing away from the engine.