Car repair AvtoVAZ Car repair Renault Car repair Hyundai Car repair Ford Car repair Volkswagen Car repair Audi Car repair Chevrolet
English Русский
Български
Беларускі
Український
Српски
Hrvatski
Română
Polski
Slovenský
Magyar
articles sitemap contacts bookmark
LadaMan.ru


Kalina Granta Priora Vesta Largus XRAY
Granta 1 (2011-2023, VAZ-2190)

Powertrain Mounts — Replacement (Granta 2190)

  • Main
  • Granta
  • Granta 1
  • Power unit
  • Engine repair
  • Powertrain Mounts — Replacement
0
Contents: Right support ⇣ Left support ⇣ Rear support ⇣
To complete the work you will need:
  • height adjustable stand (for example, a screw jack);
  • inspection pit or overpass.

Right support


Removal


1. Prepare the car for work ("Preparing the car for maintenance and repair").

2. Remove the central part of the engine mudguard ("Checking the technical condition of the engine") or crankcase protection (if installed).

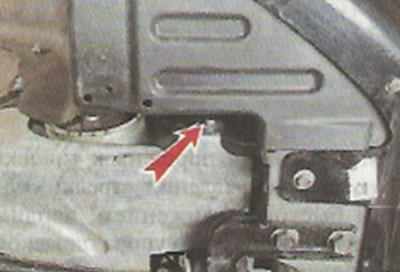
3. Using an 8 mm wrench, unscrew the front screw...

3. Using an 8 mm wrench, unscrew the front screw...


...and the rear mount of the right side of the engine mudguard.
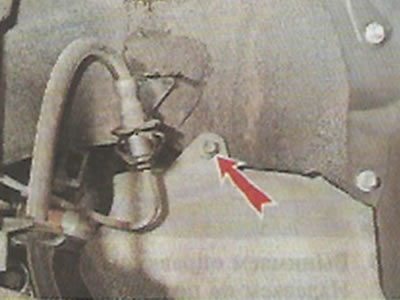
...and the rear mount of the right side of the engine mudguard.


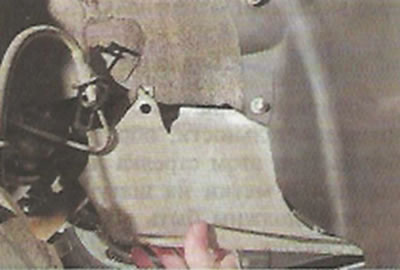
4. Remove the right part of the mudguard.

4. Remove the right part of the mudguard.


5. After unscrewing the screws, move the front part of the fender liner or remove the front fender liner ("Front fender liner - removal and installation").


6. Place a height-adjustable support (jack) under the engine and lift the engine slightly, relieving the right support.

7. Using the TORX E14 key, unscrew the two bolts securing the support to the bracket.
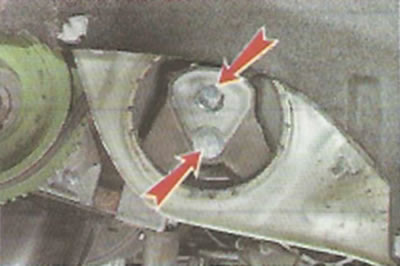
7. Using the TORX E14 key, unscrew the two bolts securing the support to the bracket.


8. Using a 17 mm socket wrench, unscrew the bolt and two nuts securing the support to the body.
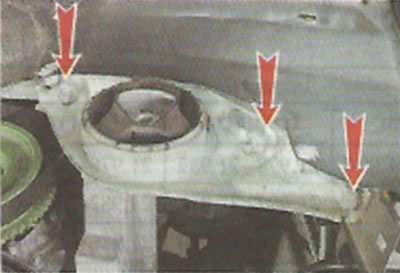
8. Using a 17 mm socket wrench, unscrew the bolt and two nuts securing the support to the body.


9. Remove the support from the studs.
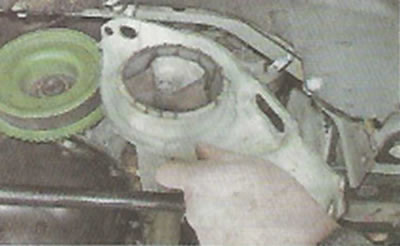
9. Remove the support from the studs.


8. If necessary, use a 17 mm socket wrench to unscrew the three bolts securing the support bracket to the engine and remove the bracket.


Installation


We install the new support in the reverse order.

Left support


We replace the left support in the same way as the right one (see above). If necessary, use a 17 mm socket wrench to unscrew the three nuts securing the support bracket to the gearbox and remove the bracket.
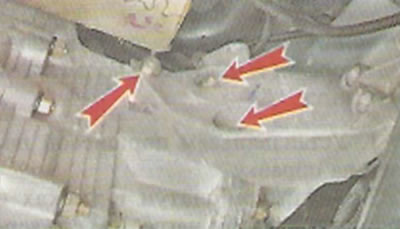
We replace the left support in the same way as the right one (see above). If necessary, use a 17 mm…


Rear support


Removal


1. Prepare the car for work ("Preparing the car for maintenance and repair").

2. Install a height-adjustable stand (jack) under the gearbox housing.

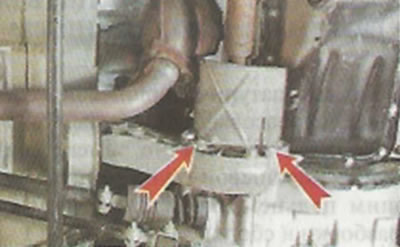
3. Using a 17 mm socket wrench, unscrew the two nuts securing the support to the body 1. On the support, lower the rear part of the power unit by 10-15 mm. Using a 19 mm wrench, unscrew bolt 2 securing the support to the bracket.
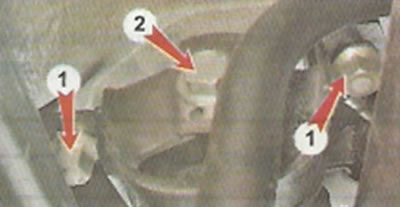
3. Using a 17 mm socket wrench, unscrew the two nuts securing the support to the body 1. On the…


4. Remove the support.

5. If necessary, remove the support with the bracket, use a 10 mm wrench to unscrew the two bolts and remove the protective screen.


5. If necessary, remove the support with the bracket, use a 10 mm wrench to unscrew the two bolts…


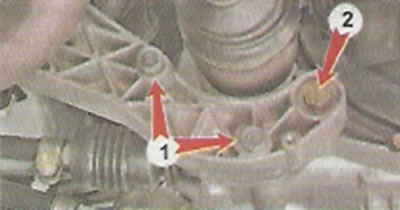
6. Unscrew the three bolts securing the support bracket to the gearbox housing: two bolts 1 with a 17 mm wrench and one bolt 2 with a 19 mm wrench.

6. Unscrew the three bolts securing the support bracket to the gearbox housing: two bolts 1 with a…


5. Remove the rear support bracket.

Installation


We install the rear support in the reverse order.


This article is available at russian, bulgarian, belarusian, ukrainian, serbian, croatian, romanian, polish, slovak, hungarian
This article has been reviewed: Polina Kudryashova
Share with friends:
◀ Previous
Lada Granta 1: Engine repair
 

Connecting rod and piston group with pressed-in pin
Connecting rod and piston group with a floating pin
Piston rings and connecting rod bearings — replacement
Oil pump — removal, inspection and installation
Oil intake — removal and installation
 
More articles with information from manuals for Lada:

• Powertrain Mounts — Replacement Lada Kalina Hatchback (2004-2013, VAZ-1119)
• Replacing the powertrain mounts Lada Priora 1 (2007-2018, VAZ-2170)
• Powertrain Mounts — replacement Lada Vesta 1 (2015-2023, VAZ-2180)
• Left Powertrain Mount — Removal and Installation Lada Largus 1 (2012-2023)
• Powertrain — removal Lada X-Ray 1 (2015-2022)
Link to this article in various formats
Reviews and comments of visitors
No comments yet


Add up two numbers: 22 + 44


Granta 1 (2011-2023) 
  • User manual
  • Governing bodies
  • Vehicle operation
  • Maintenance
  • Radio receiver
  • Radio receiver (option)
  • Power unit
  • Engine repair
  • Control system
  • Supply system
  • Cooling system
  • Exhaust system
  • Transmission
  • Clutch
  • Car gearbox
  • Drive shafts
  • Chassis (running gear)
  • Wheels, tires and hubs
  • Front suspension
  • Rear suspension
  • Steering
  • Brake system
  • Body and interior
  • Exterior (external elements)
  • Interior (internal elements)
  • Doors, locks and windows
  • Heating and ventilation
  • Electrical equipment
  • Equipment and devices
  • Power devices
  • Breakers and switches
  • Lighting and signaling
  • Electrical circuits
LadaMan.ru © 2018–2026 | Mobile version | About Lada | Sitemap: EN BG BY UA RS HR RO PL SK HU | Contacts with admin | | Add to bookmarks
Kalina Hatchback (2004-2013) | Kalina Sedan (2004-2013) | Granta 1 (2011-2023) | Priora 1 (2007-2018) | Vesta 1 (2015-2023) | Largus 1 (2012-2023) | X-Ray 1 (2015-2022) |
This site uses cookies to ensure everything runs smoothly.