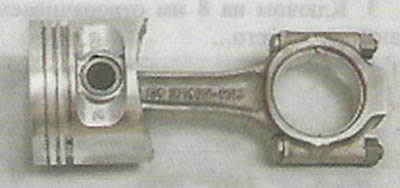
Warning! The parts of the connecting rod and piston group with a floating pin are not interchangeable with the parts of the connecting rod and piston group with a pressed pin. 3 the same cylinder block can be installed with any of the two connecting rod and piston groups.
You will need a piston pin press tool, a piston pin driver and a blow dryer to complete the job (thermal gun).
Disassembly
1. Remove the piston rings from the piston («Piston rings and connecting rod bearings - replacement»).
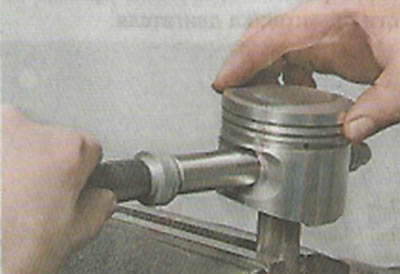
2. Using a tool, we press out the piston pin.
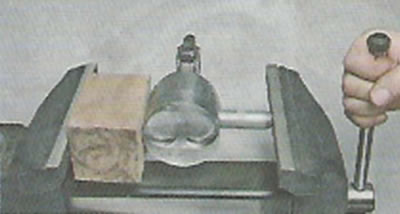
3. In the absence of a special device, the finger can be pressed out in a vice using a mandrel. As a stop, we use a wooden block of sufficient thickness with a finger hole drilled in it.
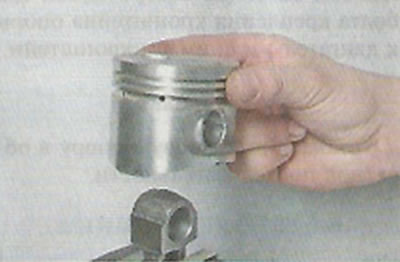
4. Remove the piston from the connecting rod.
Assembly
We select the piston to the cylinder and the pin to the piston in the same way as shown in section 8.1.26.1 (see above).
Warning! Pistons and connecting rods of the same weight class must be installed in the engine.
1. Install the piston pin on the mandrel.
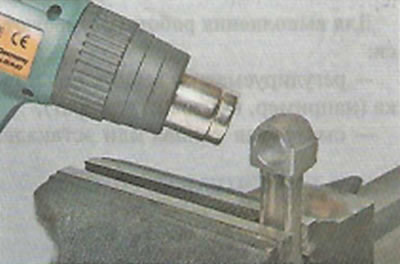
2. We clamp the connecting rod in a vice and heat its upper head with a thermal gun to a temperature of 200-250°C.
3. We put a piston on the upper head of the connecting rod and center their holes with a mandrel.
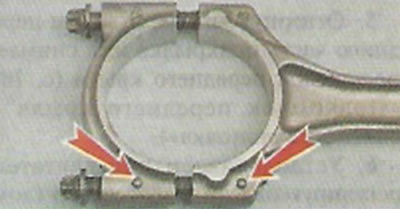
Warning! When assembling the connecting rod with the piston, make sure that the markings on the connecting rod and the markings on the piston are on the same side.
4. Pressing the piston against the connecting rod head in the direction of the arrow, in one quick movement, insert the finger into the holes for emphasis with the mandrel into the piston.
5. We take out the mandrel from the finger.
6. We put rings on the piston and install the piston in the cylinder («Piston rings and connecting rod bearings - replacement»).
Assembly
We assemble the piston with the connecting rod in the reverse order of disassembly. In this case, the arrow on the bottom of the piston and the marks on the connecting rod and its cover must be facing the same direction.