



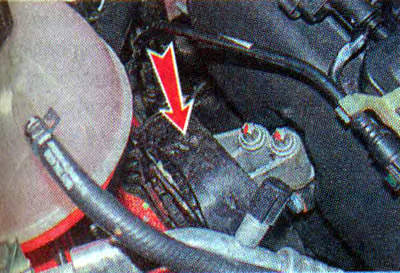
...and on the left side of the engine compartment.
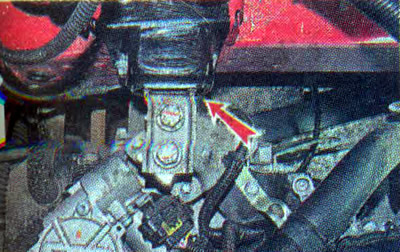
The left support is attached to the side member with four bolts. The support is attached to the gearbox bracket with two bolts. The bracket itself is secured to the gearbox housing with three bolts. Access to the left support is blocked by the battery shelf.
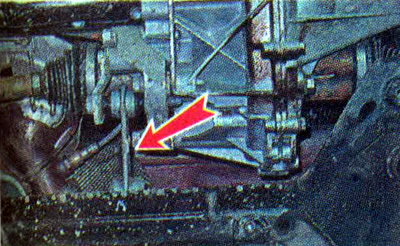
To reduce vibrations of the power unit when the engine is running and when the car is moving over uneven surfaces, an additional rear support is installed below. It is a rod that connects the gearbox to the subframe.
Increased vibration and knocking when the engine load increases may indicate a fault in one or more supports (at the moment of starting or sudden acceleration of the car). The supports cannot be repaired and are replaced if they fail.
The condition of the rear support can be checked by shaking it with a mounting blade in the longitudinal and transverse directions.
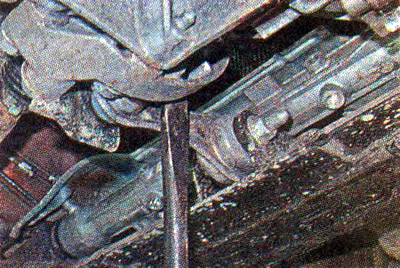
The technical condition of the supports can be assessed visually. When checking, it is especially important to carefully inspect the rubber elements of the supports.
Supports whose rubber has tears, cracks or is severely deformed must be replaced.
It is also necessary to replace the support, which has fatigue cracks in the metal elements.
Warning! When replacing the supports, care must be taken as the work involves lifting the power unit.
Replacing the right support
The need for replacement is determined during the inspection of the technical condition of the engine (see "Engine - technical condition check"). The right support is attached to the side member with two bolts, and to the engine with three bolts.
To complete the work you will need a height-adjustable stand or a jack.
1. Place the vehicle on an inspection ditch or overpass (see "Preparing the car for maintenance and repair").
2. Remove the engine splash guard (see "Engine Mudguard - Removal and Installation").
3. Place a jack under the right side of the engine. Having slightly raised the engine with a jack, we unload the right support of the power unit.
4. Using a 16 mm socket wrench, unscrew the two bolts securing the support to the body.
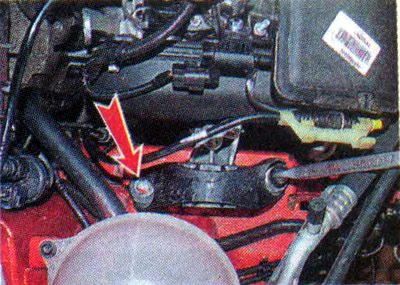
5. Raise the right side of the engine slightly with a jack so that the right support rises above the side member.
6. Using a TORX E12 socket wrench, unscrew the two bolts securing the support to the engine bracket.
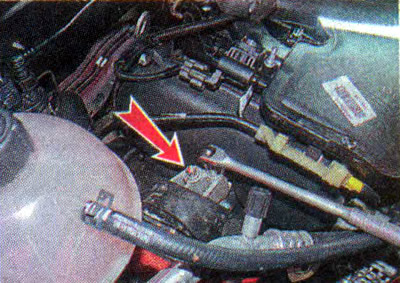
7. Remove the support.
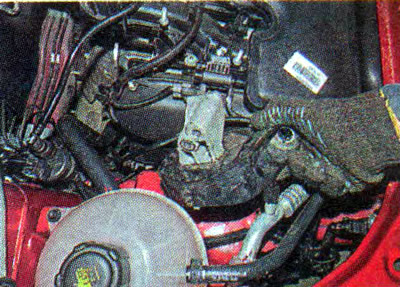
8. Install the new support in the reverse order. Tighten the support mounting bolts to a torque of 53–71 Nm.
Replacing the left support
The need for replacement is determined during the inspection of the technical condition of the engine (see "Engine - technical condition check").
To complete the work you will need a height-adjustable stand or a jack.
1. Prepare the car for work (see "Preparing the car for maintenance and repair").
2. Remove the engine splash guard (see "Engine sump splash guard - removal and installation").
3. Place a stand or jack under the gearbox. Having slightly raised the gearbox on the jack, we unload the left support of the power unit.
4. Remove the battery (see "Battery - Removal and Installation").
5. By squeezing the clamps, we release the three wire harness holders, removing them from the holes in the battery shelf.
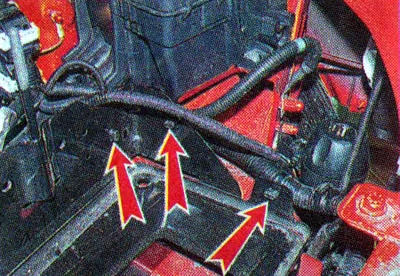
6. Under the shelf, using a 10 mm socket wrench with an extension, unscrew the four bolts securing the shelf to the body side member (they are not visible in the photo).
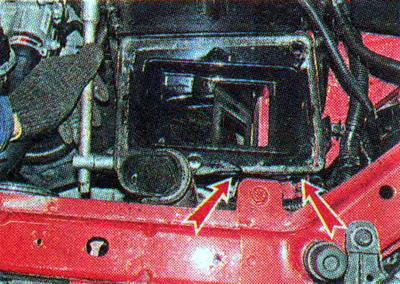
7. Remove the battery shelf.
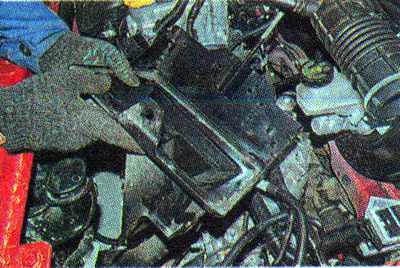
8. Using a 16 mm wrench, unscrew the four bolts securing the right support to the body.
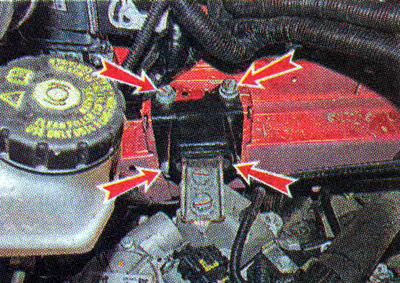
9. Using a jack, slightly lift the left side of the power unit so that the left support no longer rests on the body side member.
10. Using an 18 mm wrench, unscrew the two bolts securing the support to the gearbox bracket.
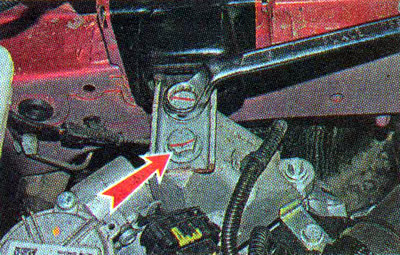
11. Remove the left support.
12. Install the new support in the reverse order. Tighten the support mounting bolts to the gearbox bracket to a torque of 90-120 Nm. Tighten the support mounting bolts to the body to a torque of 53-71 Nm. Tighten the battery shelf mounting bolts to a torque of 10 Nm.
Replacing the rear support
The need for replacement is determined during the inspection of the technical condition of the engine (see "Engine - technical condition check").
To carry out the work, you will need an inspection pit or overpass.
1. Prepare the car for work (see "Preparing the car for maintenance and repair").
2. Remove the engine splash guard (see "Engine Mudguard - Removal and Installation"),
3. Treat the threaded part of the rear support bolt of the power unit with penetrating liquid.
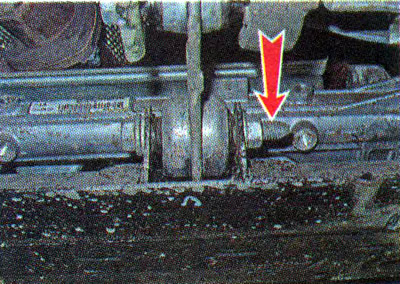
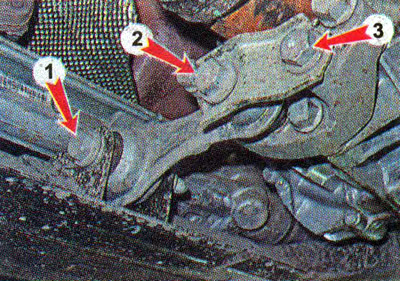
4. Using an 18 mm open-end wrench, unscrew the nut on bolt 1 securing the rear support to the subframe, holding the bolt from turning with a wrench of the same size. Using an 18 mm wrench, unscrew bolt 2 securing the support to the gearbox bracket. Using the same key, loosen the tightening of bolt 3 securing the rear support bolt bar.
5. Remove the rear support mounting bolt.
6. Remove the rear support.
7. Install the support in reverse order. Tighten the mounting bolts to a torque of 90-120 Nm.
20.10.2025 08:58