
Car repair AvtoVAZ Car repair Renault Car repair Hyundai Car repair Ford Car repair Volkswagen Car repair Audi Car repair Chevrolet
English Русский
Български
Беларускі
Український
Српски
Hrvatski
Română
Polski
Slovenský
Magyar
articles sitemap contacts bookmark
LadaMan.ru


Kalina Granta Priora Vesta Largus XRAY
Vesta 1 (2015-2023, VAZ-2180)

Piston and connecting rod — replacement (Vesta 2180)

  • Main
  • Vesta
  • Vesta 1
  • Power unit
  • Engine repair
  • Piston and connecting rod — replacement
0
Contents: Disassembly ⇣ Examination ⇣ Assembly ⇣
Excessively worn pistons must be replaced. Replacement of the piston and connecting rod may be required if the valve collides with the piston, caused by a violation of the valve timing phases or a broken timing belt.

To complete the work you will need a bore gauge and a piston ring mandrel.

Disassembly


1. Remove the piston rings from the piston (see "Piston rings and connecting rod bearings - replacement").

2. Using an awl or a screwdriver with a thin blade, pry up and remove the piston pin retaining ring from the groove.
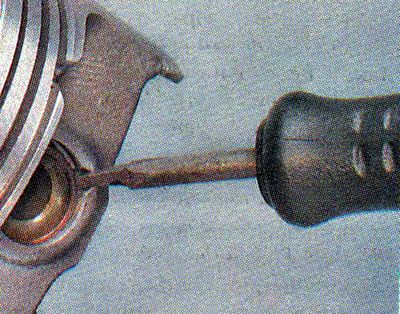
2. Using an awl or a screwdriver with a thin blade, pry up and remove the piston pin retaining ring…


Recommendation. If the grooves of the retaining rings are dented, nicked, and the rings are not securely fixed in them, the piston should be replaced.


3. Using a soft metal rod with a diameter of 16-18 mm, push out the piston pin and remove the piston from the connecting rod.
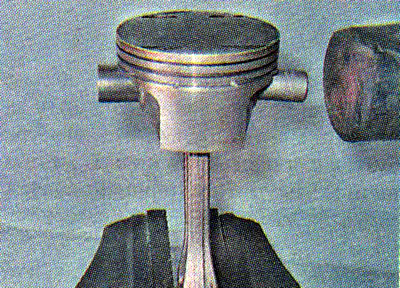
3. Using a soft metal rod with a diameter of 16-18 mm, push out the piston pin and remove the…


Examination


In new engines, the clearance between the piston and the cylinder is 0.025-0.045 mm and is set by installing pistons of the same class as the cylinders. The piston and cylinder class are designated by Latin letters which are stamped on the lower mating surface of the cylinder block...
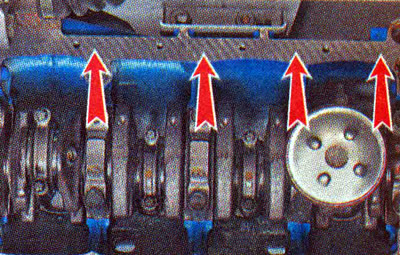
In new engines, the clearance between the piston and the cylinder is 0.025-0.045 mm and is set by…


...and on the piston bottom. The arrow on the piston points towards the front end of the crankshaft.
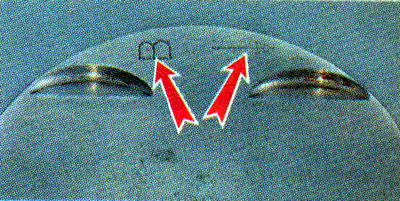
...and on the piston bottom. The arrow on the piston points towards the front end of the crankshaft.


Note: For information on how to use the bore gauge, see the enclosed instructions or special literature.


1. Using a bore gauge, check the wear of the cylinder walls.
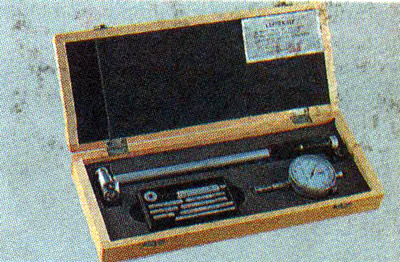
1. Using a bore gauge, check the wear of the cylinder walls.


We take measurements in four zones (3, 10, 60 and 112 mm from the top edge of the cylinder) in the longitudinal and transverse directions of the engine. The upper belt does not wear out the cylinder. Based on the difference in bore gauge readings in different zones, we determine the degree of wear of each cylinder.


2. Using a micrometer to measure the diameter of the piston skirt, we determine its wear.

If the maximum wear is 0.7-5 mm or more, it is necessary to bore the cylinders and install pistons of a repair size, or replace the cylinder block and install new pistons.

In new engines, the clearance between the piston and the cylinder is 0.025-0.045 mm and is set by installing pistons of the same class as the cylinder class.

Assembly


We assemble the piston with the connecting rod in the reverse order of disassembly. In this case, the arrow on the piston bottom and the marks on the connecting rod and its cover should face the same direction.
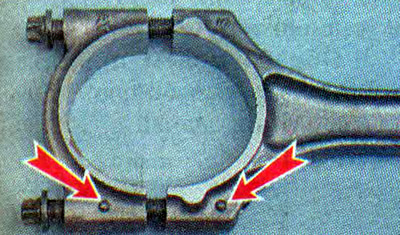
We assemble the piston with the connecting rod in the reverse order of disassembly. In this case,…


This article is available at russian, bulgarian, belarusian, ukrainian, serbian, croatian, romanian, polish, slovak, hungarian
This article has been reviewed: Kirill Dementyev
Share with friends:
◀ Previous
Lada Vesta 1: Engine repair
Next ▶

Piston rings and connecting rod bearings — replacement
Oil pump — removal, inspection and installation
Oil intake — removal and installation
Engine Oil Pan — Removal, Gasket Replacement and Installation
Rear Crankshaft Oil Seal — replacement
Powertrain Mounts — replacement
More articles with information from manuals for Lada:

• Piston rings and connecting rod bearings — replacement Lada Kalina Hatchback (2004-2013, VAZ-1119)
• Piston rings and connecting rod bearings — replacement Lada Granta 1 (2011-2023, VAZ-2190)
• Setting the piston of the first cylinder to the TDC position Lada Priora 1 (2007-2018, VAZ-2170)
• Wiring diagram for connecting audio system speakers Lada Largus 1 (2012-2023)
• Disassembling the engine connecting rod and piston group Lada X-Ray 1 (2015-2022)
Link to this article in various formats
Reviews and comments of visitors
No comments yet


Add up two numbers: 39 + 20


Vesta 1 (2015-2023) 
  • General information
  • Governing bodies
  • User manual
  • Maintenance
  • Troubleshooting
  • Power unit
  • Engine repair
  • Control system
  • Supply system
  • Cooling system
  • Exhaust system
  • Transmission
  • Clutch
  • Mechanical gearbox
  • Automatic gearbox
  • Drive shafts
  • Chassis (running gear)
  • Wheels, tires and hubs
  • Front suspension
  • Rear suspension
  • Steering
  • Brake system
  • Body and interior
  • Exterior (external elements)
  • Doors, locks and windows
  • Heating and ventilation
  • Electrical equipment
  • Equipment and devices
  • Power devices
  • Breakers and switches
  • Lighting and signaling
  • Electrical circuits
LadaMan.ru © 2018–2026 | Mobile version | About Lada | Sitemap: EN BG BY UA RS HR RO PL SK HU | Contacts with admin | | Add to bookmarks
Kalina Hatchback (2004-2013) | Kalina Sedan (2004-2013) | Granta 1 (2011-2023) | Priora 1 (2007-2018) | Vesta 1 (2015-2023) | Largus 1 (2012-2023) | X-Ray 1 (2015-2022) |
This site uses cookies to ensure everything runs smoothly.