Car repair AvtoVAZ Car repair Renault Car repair Hyundai Car repair Ford Car repair Volkswagen Car repair Audi Car repair Chevrolet
English Русский
Български
Беларускі
Український
Српски
Hrvatski
Română
Polski
Slovenský
Magyar
articles sitemap contacts bookmark
LadaMan.ru


Kalina Granta Priora Vesta Largus XRAY
Kalina Sedan (2004-2013, VAZ-1118) Kalina Hatchback (2004-2013, VAZ-1119)

1.6i Engine Valve Caps — Replacement (Kalina 1119)

  • Main
  • Kalina
  • Kalina Hatchback
  • Power unit
  • Engine repair
  • 1.6i Engine Valve Caps — Replacement
0
Contents: Removal ⇣ Installation ⇣
To complete the work you will need:
  • tin rod;
  • magnet;
  • tweezers;
  • valve stem seal remover;
  • cap pressing mandrel;
  • valve spring compressor.

valve spring compressor.


Removal


1. Remove the camshaft (see "1.6i Engine Camshaft - Removal and Installation").

2. Using a magnet, remove the tappets with adjusting washers from their seats in the cylinder head.
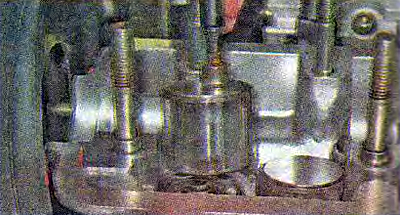
2. Using a magnet, remove the tappets with adjusting washers from their seats in the cylinder head.


3. To install the tappets in their original places, mark them or lay them out in the order of their location in the engine.

4. Unscrew the spark plug of the cylinder, and replace the oil scraper cap on the valve (see "1.6i Engine Spark Plugs - Replacement").

5. Insert the tin rod into the spark plug hole so that its end is under the plate of the corresponding valve.
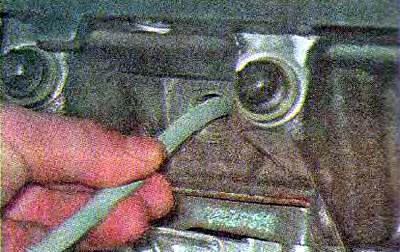
5. Insert the tin rod into the spark plug hole so that its end is under the plate of the…


6. Install the valve spring compressor tool onto the cylinder head studs.


7. We rest the cup of the device against the spring plate.

Warning! When performing the following operation, do not scratch the walls of the tappet seat hole in the cylinder head with the valve spring compressor.


8. Pressing the valve spring compressor handle, compress the valve springs.

9. Keeping the springs compressed, use tweezers to remove two crackers.
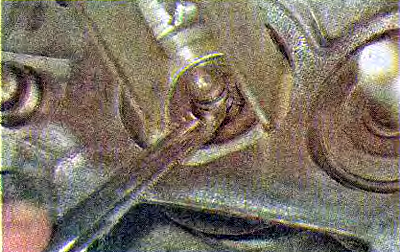
9. Keeping the springs compressed, use tweezers to remove two crackers.


10. Smoothly release the springs and remove the valve spring compressor.

11. Remove the spring plate using tweezers.
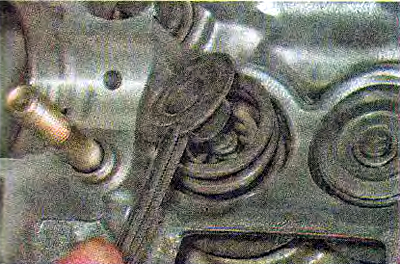
11. Remove the spring plate using tweezers.


12. We take out the outer...
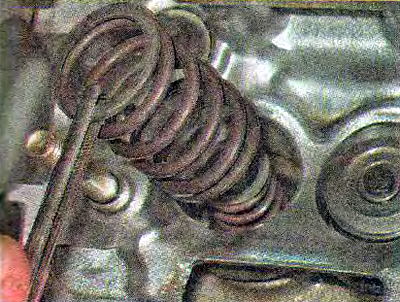
12. We take out the outer...


[Information taken from the website LADAMAN.ru]


...and the internal valve spring.
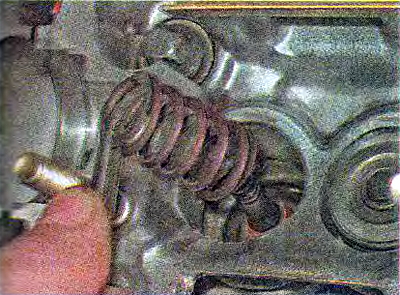
...and the internal valve spring.


13. Install the puller grip on the oil scraper cap.
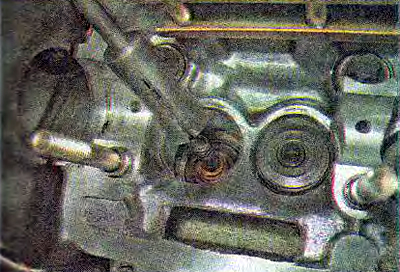
13. Install the puller grip on the oil scraper cap.


14. Press the cap.

15. If necessary, remove the spring support washer.
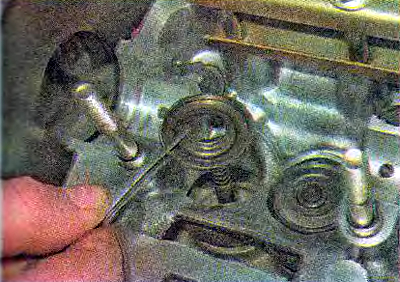
15. If necessary, remove the spring support washer.


Installation


1. Install the spring support washer (if it was removed).

2. Apply clean engine oil to the working edge of the new cap and the valve stem.


3. Place a special plastic mandrel on the valve stem (included in the new caps kit) so that it covers the grooves on the rod.
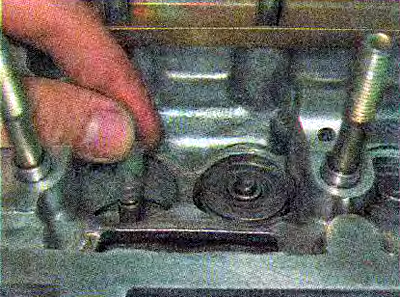
3. Place a special plastic mandrel on the valve stem (included in the new caps kit) so that it…


4. Put the cap on the valve stem.

4. Put the cap on the valve stem.


Note: If there is no mandrel, the cap should be put on very carefully so as not to cut the edge on the sharp edges of the grooves. Before installation, the spring can be removed from the cap.


5. Using light hammer blows on the mandrel, press the cap onto the valve sleeve.

Tip: To press the cap on, you can use a socket wrench with a deep twelve-sided head of 11 mm or a hex head of 12 mm.


6. Remove the plastic frame.

7. Install the springs, spring plate and crackers in the reverse order of removal.

8. Similarly, replace the oil seals of the remaining valves of the first and fourth cylinders (their pistons are in the TDC position), then we turn the engine crankshaft 180° and replace the valve caps of the second and third cylinders.

9. Install the removed parts in the reverse order of disassembly, then adjust the timing belt tension (see "Timing belt drive engine 1.6i - checking the condition and adjusting the tension").


This article is available at russian, bulgarian, belarusian, ukrainian, serbian, croatian, romanian, polish, slovak, hungarian
This article has been reviewed: Polina Kudryashova
Share with friends:
◀ Previous
Lada Kalina Hatchback: Engine repair
Next ▶

1.6i Engine Camshaft — Removal and Installation
Adjusting the clearances in the timing drive of the 1.6i engine
1.6i Engine Cylinder Head Cover Gasket — Replacement
1.6i Engine Intake Manifold and Exhaust Manifold Gasket — Replacement
Fuel rail of the 1.6i engine — removal, disassembly, assembly and…
Cylinder head of the 1.6i engine — removal and installation
Piston rings and connecting rod bearings for 1.6i engine — replacement
Piston and connecting rod of the 1.6i engine — replacement
High Voltage Wires — Checking and Replacing
1.6i Engine Spark Plugs — Replacement
More articles with information from manuals for Lada:

• Starting the engine Lada Granta 1 (2011-2023, VAZ-2190)
• Description, dimensions and engine compartment of the car Lada Priora 1 (2007-2018, VAZ-2170)
• Starting the engine from additional power sources Lada Vesta 1 (2015-2023, VAZ-2180)
• Electrical wiring diagram of the 8-valve engine harness Lada Largus 1 (2012-2023)
• Engine Evaporative Canister Purge Valve — removal and installation Lada X-Ray 1 (2015-2022)
Link to this article in various formats
Reviews and comments of visitors
No comments yet


Add up two numbers: 49 + 45


Kalina Sedan (2004-2013) 
  • General information
  • Vehicle device
  • Operation and maintenance
  • Faults en route
  • Power unit
  • Engine repair
  • Cooling and lubrication system
  • Exhaust system
  • Supply system
  • Ignition and control
  • Transmission
  • Clutch and drive shafts
  • Car gearbox
  • Chassis (running gear)
  • Front suspension
  • Rear suspension
  • Steering
  • Brake system
  • Body and interior
  • Exterior (external elements)
  • Interior (internal elements)
  • Doors, locks and windows
  • Electrical equipment
  • Equipment and devices
  • Power devices
  • Lighting and signaling
  • Heating and ventilation
Kalina Hatchback (2004-2013) 
  • General information
  • Vehicle Details
  • Maintenance
  • Troubleshooting
  • Power unit
  • Engine repair
  • Cooling system
  • Supply system
  • Control system
  • Exhaust system
  • Transmission
  • Clutch
  • Car gearbox
  • Drive shafts
  • Chassis (running gear)
  • Wheels and tires
  • Front suspension
  • Rear suspension
  • Steering
  • Brake system
  • Body and interior
  • Exterior (external elements)
  • Interior (internal elements)
  • Doors, locks and windows
  • Electrical equipment
  • Equipment and devices
  • Power devices
  • Lighting and signaling
  • Electrical circuits
LadaMan.ru © 2018–2026 | Mobile version | About Lada | Sitemap: EN BG BY UA RS HR RO PL SK HU | Contacts with admin | | Add to bookmarks
Kalina Hatchback (2004-2013) | Kalina Sedan (2004-2013) | Granta 1 (2011-2023) | Priora 1 (2007-2018) | Vesta 1 (2015-2023) | Largus 1 (2012-2023) | X-Ray 1 (2015-2022) |
This site uses cookies to ensure everything runs smoothly.