
1. Disconnect the wire from the terminal «minus» battery.
2. For convenience, remove the air filter (see «Removal and installation of the air filter»).
3. Remove the starter (see «Removal and installation of a starter»).
4. Raise the car on a lift or hang out its front part and place it on reliable supports (if you work on a viewing hole).
5. Remove the left side of the engine mudguard (see «Removal and installation of a mudguard of the engine»).
6. If the gearbox is removed for repair, drain the oil from it (see «Changing the oil in the gearbox»).
7. Turn out four bolts of fastening of a forward cover of a crankcase of coupling and remove a cover of a crankcase of coupling.
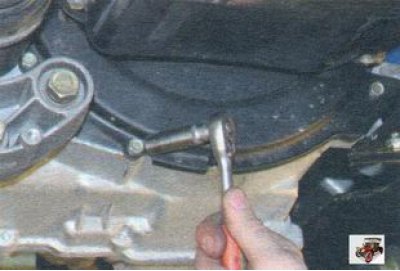
8. Disconnect the front suspension arms from the steering knuckles, to do this, unscrew the two bolts securing the ball bearings to the steering knuckles on both sides of the car.
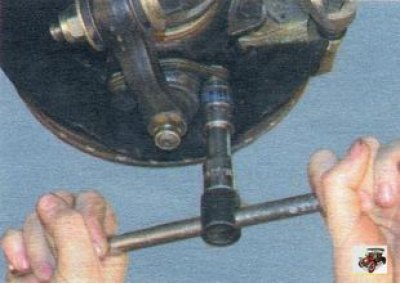
9. Leaning the mounting blade on the gearbox housing, squeeze out the inner hinges of the left...
10.... and right front wheel drive. Move the front wheel drives away from the gearbox by moving the respective front suspension struts outward.
11. Disconnect the harness connectors from the reverse light switch, from the reverse gear lock solenoid, and from the speed sensor.
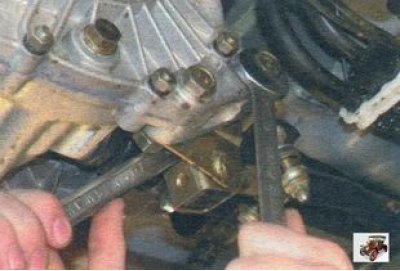
12. Turn away nuts of two bolts of fastening of an arm of jet draft to a transmission, take bolts and take down jet draft together with an arm.
13. Mark in any way the mutual position of the reactive thrust of the gearbox control and the shank of the hinge of the gearshift rod in order to maintain the adjustment of the drive during reinstallation.
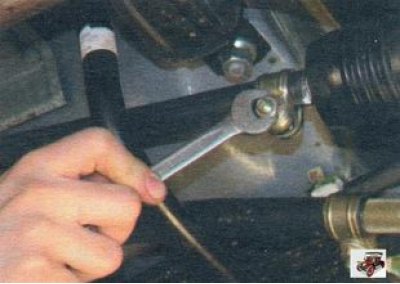
14. Loosen the nut of the coupling bolt of the clamp of fastening of the reactive thrust of the transmission control and disconnect the reactive draft from the hinge of the gearshift rod.
15. Disconnect the lower end of the clutch cable from the gearbox (see «Replacing the clutch release cable»).
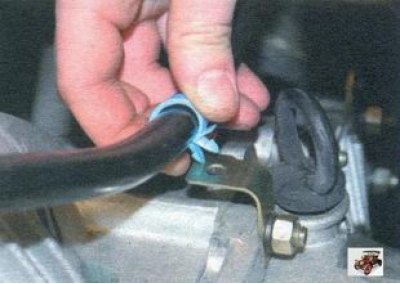
16. Disconnect from the bracket located on the gearbox next to the hole for the oil level gauge, the throttle cable holder.
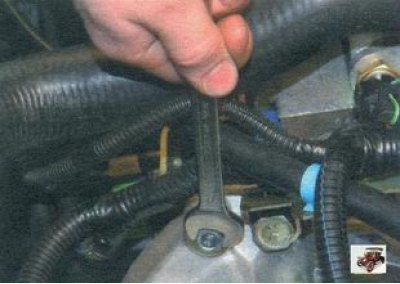
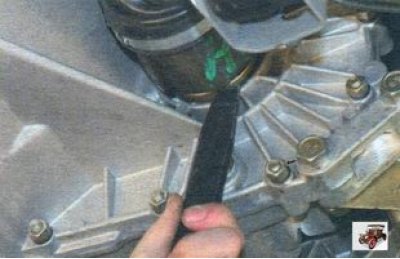
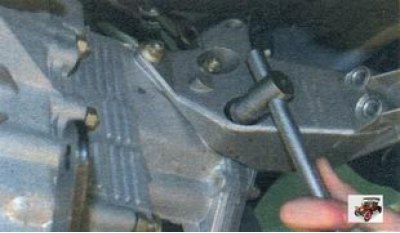
17. Turn out a back bolt of fastening of an arm of the coil of ignition.
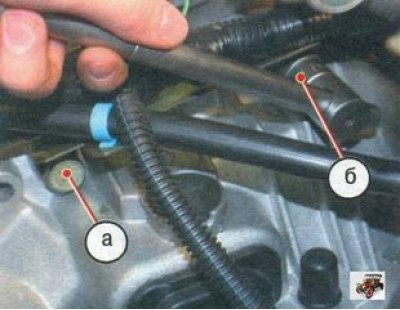
18. Turn out two top bolts of fastening of a transmission to the engine, at the same time fastening the second supporting arm. Bolt A (front in the direction of travel of the vehicle) - short, bolt b - long. Take the throttle cable with the bracket to the side.
19. Securely support the engine or hang it out using a hoist. 20. Disconnect the left extension bracket from the body (see «Replacing the brace and brace mounting brace»), without disconnecting the stretch from it. Move the brace together with the bracket to the side and secure in any way possible (for example, by tying with a wire).
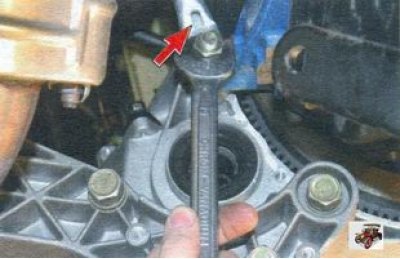
21. Turn away a nut of the lower right fastening of a transmission to the engine and remove the lower end of an inlet pipe spacer from a hairpin (shown by arrow). If necessary, loosen the top nut of this spacer.
22. Establish a reliable support under a transmission.
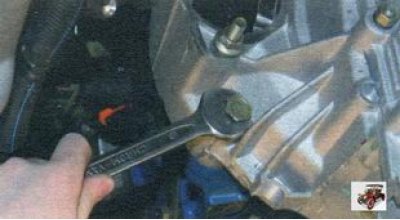
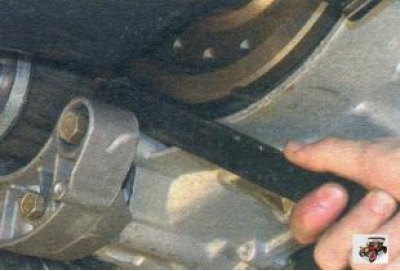
23. Turn out a bolt of the left lower fastening of a transmission to the engine.
24. Turn out two bolts of fastening of a pillow of the left support of the power unit to an arm of a support...
25.... unscrew the three nuts securing the bracket to the gearbox, remove the spring washers installed under the nuts and remove the bracket.
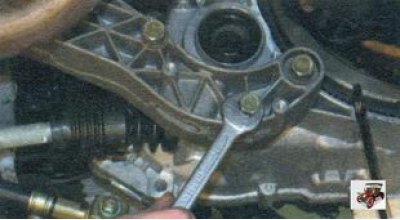
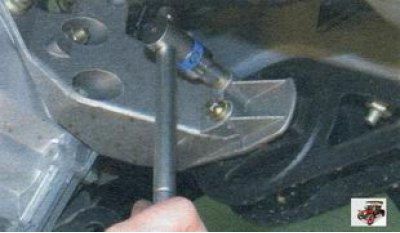
26. Turn out three bolts of fastening of an arm of a back support of the power unit to a transmission.
27. Move the gearbox as far back as possible (the input shaft must disengage). While holding the gearbox, remove the support and remove the gearbox from under the vehicle.
28. Establish on the car a transmission and all removed details, and knots in an order, the return to removal.
29. If necessary, restore the initial setting of the clutch release cable (see «Replacing the clutch release cable») and adjust the gearbox control actuator (see «Gearbox control drive adjustment»).
30. Fill transmission oil into the gearbox (see «Changing the oil in the gearbox»).