
Car repair AvtoVAZ Car repair Renault Car repair Hyundai Car repair Ford Car repair Volkswagen Car repair Audi Car repair Chevrolet
English Русский
Български
Беларускі
Український
Српски
Hrvatski
Română
Polski
Slovenský
Magyar
articles sitemap contacts bookmark
LadaMan.ru


Kalina Granta Priora Vesta Largus XRAY
Kalina Sedan (2004-2013, VAZ-1118) Kalina Hatchback (2004-2013, VAZ-1119)

Replacing gearbox seals (Kalina 1118)

  • Main
  • Kalina
  • Kalina Sedan
  • Transmission
  • Car gearbox
  • Replacing gearbox seals
0
For replacement on the car seals of internal constant velocity joints (CV joints) drain the oil from the gearbox (see "Gearbox oil change").

1. Disconnect the front wheel drives from the gearbox (see "Removal and installation the gearbox").
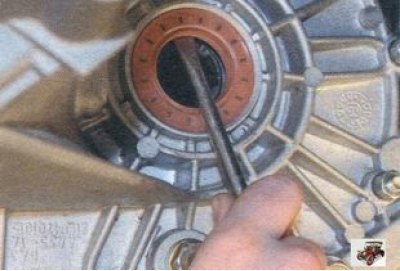
1. Disconnect the front wheel drives from the gearbox (see «Removal and installation the gearbox»).


2. Using a screwdriver, remove the inner joint seal from the gearbox housing.

3. Press in the new seal using a suitable mandrel until the working edge rests against the inside of the gearbox. An old oil seal can be used as a mandrel.
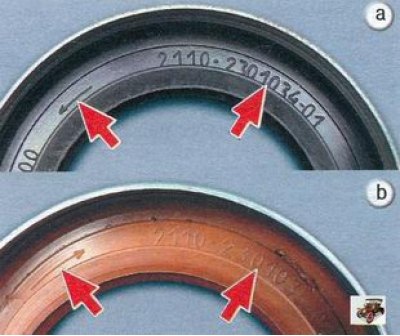
3. Press in the new seal using a suitable mandrel until the working edge rests against the inside…


Note: The oil scraper notches on the right and left inner joint seals are directed in different directions.


4. Install all removed parts and assemblies on the vehicle in the reverse order of removal.

The reason for the clutch discs becoming oily may be a leak in the primary shaft seal of the gearbox or the rear seal of the crankshaft.


Motor and transmission oils have different smells. Therefore, with a certain amount of skill, you can determine by smell which of the seals is defective: the primary shaft seal or the rear crankshaft seal.

For replacement primary shaft seal it is necessary to remove the gearbox from the car (see "Removal and installation the gearbox").

To replace the gearbox primary shaft seal, you will need: the same tools as for replacing the clutch release bearing (see "Replacing the clutch release bearing"), as well as a 10 mm spanner and a screwdriver.

1. Remove the clutch release bearing (see "Replacing the clutch release bearing").
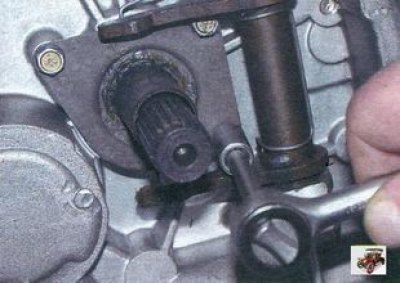
1. Remove the clutch release bearing (see «Replacing the clutch release bearing»).


2. Remove the three guide bushing mounting bolts (spring washers are installed under the bolt heads). Remove the guide bushing.
2. Remove the three guide bushing mounting bolts (spring washers are installed under the bolt…


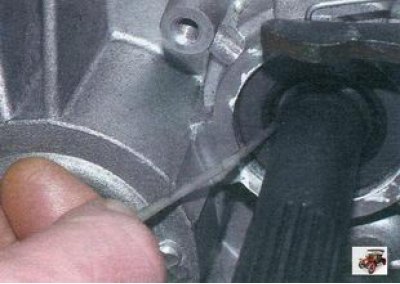
3. Using a thin wire hook or a screwdriver, remove the input shaft seal. Press in the new seal using a suitable mandrel. The working edge of the primary shaft seal must be directed towards the inside of the gearbox.


4. Install the removed parts on the vehicle in the reverse order of removal.

Gear shift rod seal can be replaced directly on the vehicle.

To replace the gearshift rod seal on a car, you will need: a 10 mm spanner, a thin chisel, a hammer, and a mandrel for pressing in the seal.

1. Disconnect the transmission control rod from the gearshift rod joint (see "Removal and installation the gearbox").
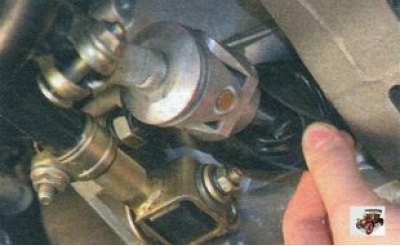
1. Disconnect the transmission control rod from the gearshift rod joint (see «Removal and…


2. Remove the mudguard from the hinge and slide it over the gear shift rod.
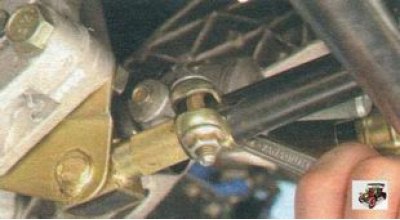
2. Remove the mudguard from the hinge and slide it over the gear shift rod.


3. Unscrew the bolt securing the hinge to the gearshift rod and remove the hinge.
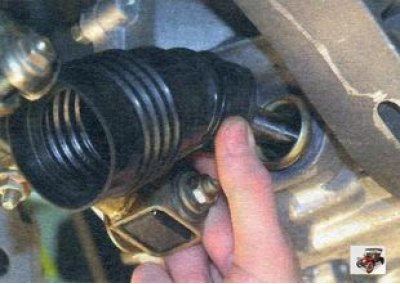
3. Unscrew the bolt securing the hinge to the gearshift rod and remove the hinge.


4. Remove the mudguard.
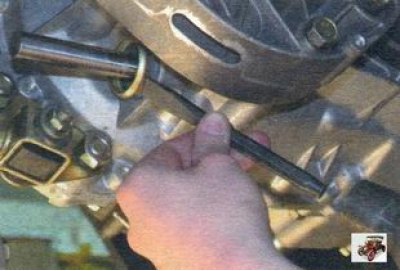


4. Remove the mudguard.


5. Resting a chisel on the flange of the rod seal collar, carefully press the collar out of the gearbox housing using a hammer...
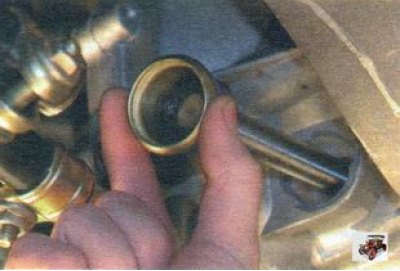
5. Resting a chisel on the flange of the rod seal collar, carefully press the collar out of the…


6. ...and remove it from the rod together with the seal.
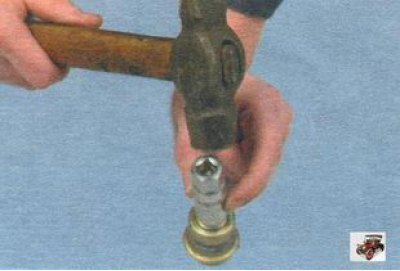
6. ...and remove it from the rod together with the seal.


7. Using a suitable mandrel (you can use the head from the tool kit) press out...
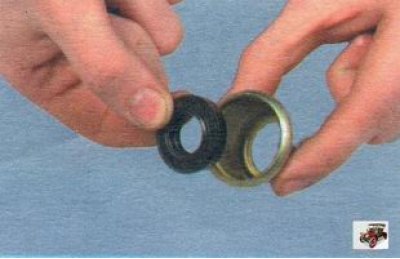
7. Using a suitable mandrel (you can use the head from the tool kit) press out...


8. ...and remove the gearshift rod seal from the housing.


9. Press the new gearshift rod seal into the housing until the working edge stops inside the gearbox.

10. Lubricate the working edge of the oil seal with transmission oil and, using light hammer blows, press the sleeve together with the oil seal into the gearbox housing until it stops.

11. Install all removed parts and assemblies on the vehicle in the reverse order of removal.

12. If necessary (if marks were not applied before disassembly) adjust the gearbox control drive (see "Adjusting the gearbox control drive").


This article is available at russian, bulgarian, belarusian, ukrainian, serbian, croatian, romanian, polish, slovak, hungarian
This article has been reviewed: Daniil Markelov
Share with friends:
◀ Previous
Lada Kalina Sedan: Car gearbox
Next ▶

Gearbox oil change
Gearbox malfunctions, their causes and solutions
Design features, gearbox device
Removal and installation the gearbox
Disassembly and assembly of the gearbox and defect detection of its parts
Repair of the secondary shaft of the gearbox
Repair of the primary shaft of the gearbox
Gearbox synchronizer repair
More articles with information from manuals for Lada:

• Replacing the remote control battery Lada Granta 1 (2011-2023, VAZ-2190)
• Replacing gearbox seals Lada Priora 1 (2007-2018, VAZ-2170)
• Replacing the battery in the remote control Lada Vesta 1 (2015-2023, VAZ-2180)
• Replacing the outer CV joint and boot of a car with a JR5 gearbox Lada Largus 1 (2012-2023)
• Troubleshooting the gearbox Lada X-Ray 1 (2015-2022)
Link to this article in various formats
Reviews and comments of visitors
No comments yet


Add up two numbers: 50 + 48


Kalina Sedan (2004-2013) 
  • General information
  • Vehicle device
  • Operation and maintenance
  • Faults en route
  • Power unit
  • Engine repair
  • Cooling and lubrication system
  • Exhaust system
  • Supply system
  • Ignition and control
  • Transmission
  • Clutch and drive shafts
  • Car gearbox
  • Chassis (running gear)
  • Front suspension
  • Rear suspension
  • Steering
  • Brake system
  • Body and interior
  • Exterior (external elements)
  • Interior (internal elements)
  • Doors, locks and windows
  • Electrical equipment
  • Equipment and devices
  • Power devices
  • Lighting and signaling
  • Heating and ventilation
Kalina Hatchback (2004-2013) 
  • General information
  • Vehicle Details
  • Maintenance
  • Troubleshooting
  • Power unit
  • Engine repair
  • Cooling system
  • Supply system
  • Control system
  • Exhaust system
  • Transmission
  • Clutch
  • Car gearbox
  • Drive shafts
  • Chassis (running gear)
  • Wheels and tires
  • Front suspension
  • Rear suspension
  • Steering
  • Brake system
  • Body and interior
  • Exterior (external elements)
  • Interior (internal elements)
  • Doors, locks and windows
  • Electrical equipment
  • Equipment and devices
  • Power devices
  • Lighting and signaling
  • Electrical circuits
LadaMan.ru © 2018–2026 | Mobile version | About Lada | Sitemap: EN BG BY UA RS HR RO PL SK HU | Contacts with admin | | Add to bookmarks
Kalina Hatchback (2004-2013) | Kalina Sedan (2004-2013) | Granta 1 (2011-2023) | Priora 1 (2007-2018) | Vesta 1 (2015-2023) | Largus 1 (2012-2023) | X-Ray 1 (2015-2022) |
This site uses cookies to ensure everything runs smoothly.