



To perform the work, you will need an inspection pit or overpass, and a device for hanging the power unit.
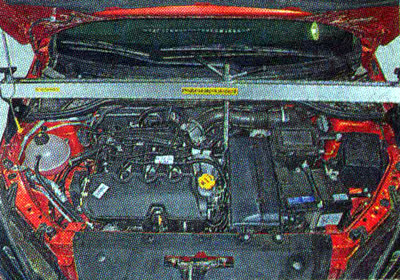
Recommendation. Carrying out this operation is quite labor-intensive and requires certain skills and equipment, so if you are not confident in your own abilities, it is better to entrust the work to a specialized service station. The gearbox weighs approximately 30 kg, so work should be carried out with an assistant or using an adjustable stop or lifting device with an appropriate lifting capacity.
Removal
I. Place the vehicle on an inspection ditch or overpass and prepare it for work (see "Preparing the car for maintenance and repair").
2. Remove the battery (see "Battery - Removal and Installation").
3. Remove the air filter housing (see "Air filter - removal and installation").
4. Remove the battery shelf.
5. Using a quick-release clamp, clamp the brake fluid supply hose to the clutch master cylinder. Disconnect the clutch release hydraulic tube from the clutch slave cylinder (see "Clutch release hydraulic drive - bleeding") and drain the liquid from it into a container.
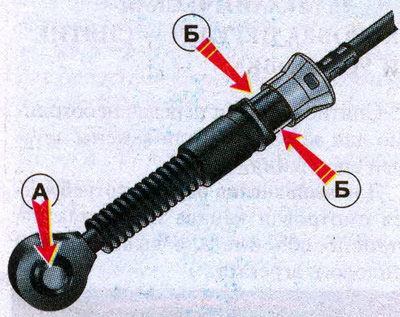
6. By pressing the lock A, disconnect the rod end from the gear shift mechanism. We remove the cable sheath retainer B from the mounting bracket. Similarly, we disconnect the second gear shift cable.
7. Loosen the front wheel hub nuts (see "Front Wheel Drives - Removal and Installation").
8. We lift the front part of the car and remove the front wheels (see "Wheel replacement").
9. Drain the oil from the gearbox (see "Manual transmission - transmission oil change").
10. Remove the front mudguard from the left side of the car (see "Front mudguard - removal and installation").
11. We hang the power unit on a special device and unload the left support.
12. Remove the starter (see "Starter - removal and installation"), we install the intake manifold support bracket in place and tighten the nuts that secure it.
13. In the car interior, unscrew the tension bolt and disconnect the steering column cardan shaft from the steering gear shaft.
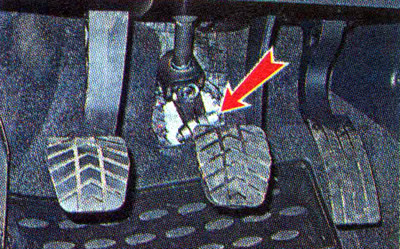
14. Using an 18 mm wrench, unscrew the right steering gear mounting bolt.
15. Remove the front suspension anti-roll bar struts (see "Anti-roll bar strut - replacement").
16. Remove the rear support of the power unit (see "Replacing the rear support").
17. Disconnect the ball joint pins of the levers from the steering knuckles and remove the longitudinal beams of the front subframe (see "Front Suspension Arm - Replacement").
18. Place a height-adjustable stop under the subframe. Using an 18 mm socket or open-end wrench, unscrew the four bolts securing the front subframe.
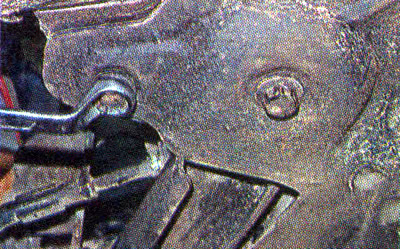
19. Remove the front subframe together with the steering mechanism and anti-roll bar.
20. Remove the front wheel drives (see "Front Wheel Drives - Removal and Installation").
21. To prevent dirt from getting into the gearbox, cover the opening of the left drive with a clean rag.
22. Using a 13 mm wrench, unscrew the bolt securing the ground wire tip and disconnect the wire from the gearbox.
23. Remove the wiring harness from the holder on the gearbox bracket.
24. Disconnect the oxygen concentration sensor wiring harness connector and detach the connector from the bracket.
25. Remove the wire from the holder on the gearbox.
26. Disconnect the wiring harness connector from the reversing light switch (see "Reverse Light Switch - Replacement") and disconnect the wiring harness holder from the gearbox.
27. Move the wiring harness to the side.
28. Unscrew the bolts securing the gearbox to the cylinder block.
Note: We perform further work with an assistant or install an adjustable stop under the gearbox.
29. Remove the left support of the power unit (see "Powertrain Mounts - Replacement").
30. Lower the power unit down a little, move the gearbox away from the engine under the left side member and carefully lower the gearbox to the floor.
Warning! When removing the gearbox, do not rest its input shaft on the clutch diaphragm spring, this may cause damage to the clutch.
31. Install the gearbox in reverse order.
32. Tighten the mounting bolts and nuts to the prescribed torques (see table 10.2.2.).