
Car repair AvtoVAZ Car repair Renault Car repair Hyundai Car repair Ford Car repair Volkswagen Car repair Audi Car repair Chevrolet
English Русский
Български
Беларускі
Український
Српски
Hrvatski
Română
Polski
Slovenský
Magyar
articles sitemap contacts bookmark
LadaMan.ru


Kalina Granta Priora Vesta Largus XRAY
Kalina Sedan (2004-2013, VAZ-1118) Kalina Hatchback (2004-2013, VAZ-1119)

Replacing valve stem seals (Kalina 1118)

  • Main
  • Kalina
  • Kalina Sedan
  • Power unit
  • Engine repair
  • Replacing valve stem seals
0
The valve stem seals can be replaced without removing the cylinder head from the block.

To replace the valve stem seals you will need: all the tools needed to remove the timing belt and its pulley (see "Replacing the cylinder head gasket"), socket head "13". Additionally, you will need a tin rod with a diameter of about 8 mm (for example, solder), tweezers, screwdriver, mandrel for pressing in valve stem seals, valve stem seal and valve spring removers.

1. Disconnect the wire from the negative terminal of the battery.

2. Remove the toothed pulley from the camshaft (see "Replacing the cylinder head gasket").

3. Remove the cylinder head cover (see "Replacing the cylinder head cover gasket").

4. Disconnect the wiring harness connector from the phase sensor by pressing its lock.
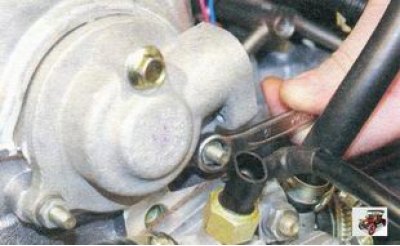
4. Disconnect the wiring harness connector from the phase sensor by pressing its lock.


5. Remove the bolt and two nuts securing the rear cylinder head cover.
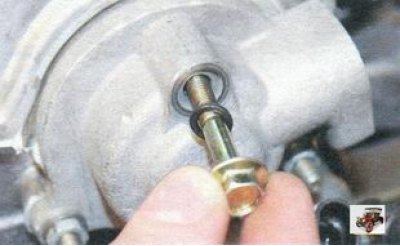
5. Remove the bolt and two nuts securing the rear cylinder head cover.


Note: Please note that there is a rubber sealing ring installed under the bolt head. Replace a ring that is too compressed, hardened or torn.


Note: Please note that there is a rubber sealing ring installed under the bolt head. Replace a ring…


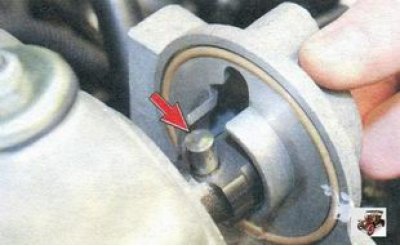
6. Remove the cylinder head cover by sliding it back and turning it so that the timing pin of the phase sensor, pressed into the camshaft, coincides with the groove in the cover.
6. Remove the cylinder head cover by sliding it back and turning it so that the timing pin of the…


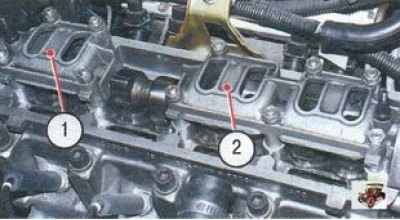
7. Evenly unscrew the four nuts securing the front 1 and six nuts securing the rear 2 camshaft bearing housings and remove the washers. Then remove both housings.

8. If the key does not fit tightly in the camshaft groove, remove it so as not to lose it.
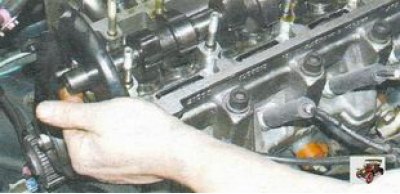
8. If the key does not fit tightly in the camshaft groove, remove it so as not to lose it.


9. Remove the camshaft from the cylinder head.


10. Remove the oil seal from the camshaft.
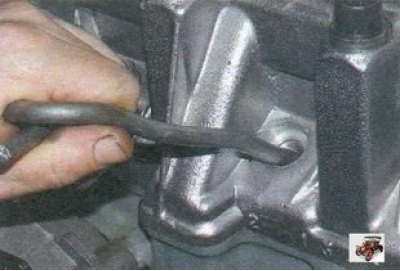
10. Remove the oil seal from the camshaft.


11. Turn the crankshaft so that the piston corresponding to the replaced oil seals is at top dead center. After removing the spark plug of the 1st cylinder, insert a tin rod through the spark plug hole between the piston and the exhaust valve (to prevent the valve from falling down).

12. Remove the exhaust valve tappet of the 1st cylinder together with the adjusting washer (see "Replacing valve lifters").
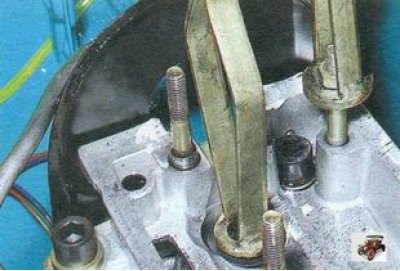
12. Remove the exhaust valve tappet of the 1st cylinder together with the adjusting washer (see…


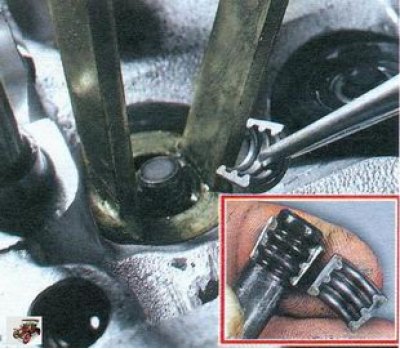
13. Install the valve spring compressor onto the exhaust valve springs of cylinder 1 as shown in the photo. Use a nut without a serrated flange. Compress the valve springs with a compressor.

14. Remove two crackers with tweezers. Then remove the valve spring compressor.
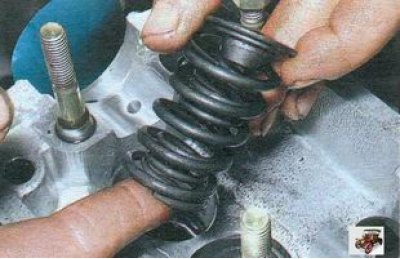


14. Remove two crackers with tweezers. Then remove the valve spring compressor.


15. Remove the upper spring plate, inner and outer valve springs.

16. Press the valve stem seal off the valve guide.
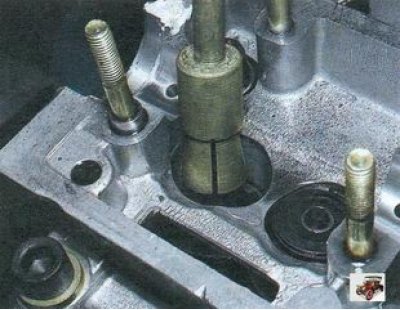
16. Press the valve stem seal off the valve guide.


17. To do this, install the collet of the valve stem seal remover onto the cap...
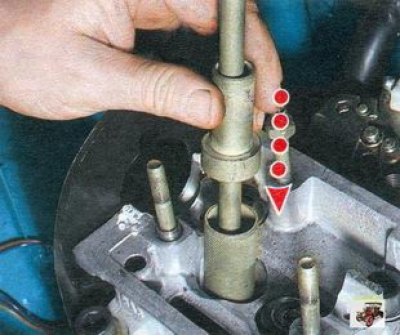
17. To do this, install the collet of the valve stem seal remover onto the cap...


18. ...and hit the striker sharply on the sleeve of the device. Then hit the striker of the device handle just as sharply...
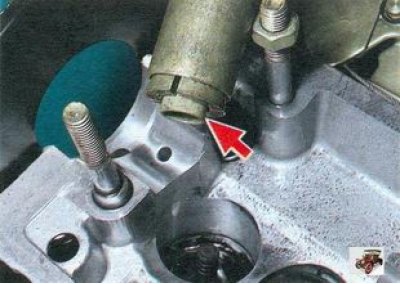


18. ...and hit the striker sharply on the sleeve of the device. Then hit the striker of the device…


19. ...thereby pressing the oil scraper cap off the bushing. Remove the oil seal from the collet of the tool.
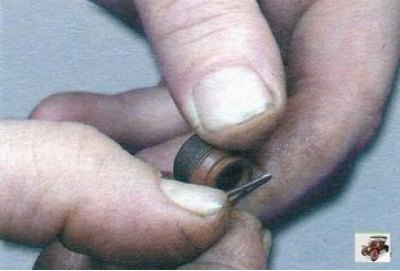
19. ...thereby pressing the oil scraper cap off the bushing. Remove the oil seal from the collet of…


20. Before installing new valve stem seals, it is recommended to remove the springs from them, otherwise the valve stem seals can be damaged when they pass through the grooves for the crackers on the valves.
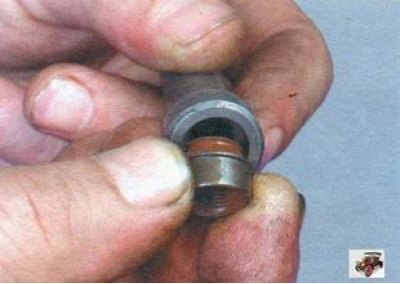
20. Before installing new valve stem seals, it is recommended to remove the springs from them,…


21. Dip the valve stem seal into engine oil and insert it into the mandrel.
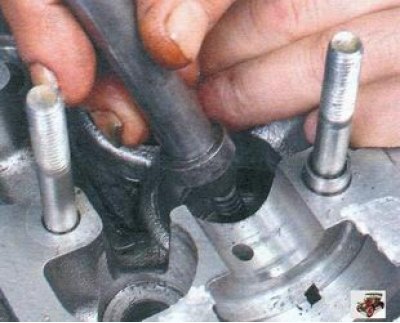


21. Dip the valve stem seal into engine oil and insert it into the mandrel.


22. Carefully press the oil seal into the lower plate until it stops.

23. Install the spring on the oil seal, if it was removed.
23. Install the spring on the oil seal, if it was removed.


24. Install the springs and valve plate in the reverse order of removal. Install the crackers using a puller so that they fit into the grooves of the valve stem. Remove the tin rod from the spark plug hole.

25. Install the valve tappet together with the adjusting washer.

26. Similarly, replace the oil seals of the exhaust valve of the 1st cylinder and both valves of the 4th cylinder.

27. Keeping the timing belt taut, turn the crankshaft half a turn and replace the valve stem seals of the 2nd and 3rd cylinders.

28. After replacing all the oil seals, turn the crankshaft another half turn.
28. After replacing all the oil seals, turn the crankshaft another half turn.


29. Lubricate the camshaft bearings in the cylinder head and the tappet adjusting washers with engine oil.

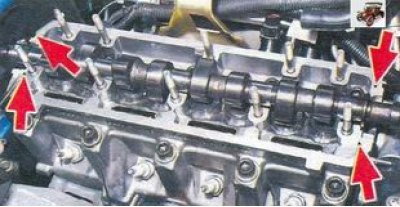
30. Install the camshaft in the cylinder head supports so that the cams of the 1st cylinder are directed away from the valve lifters.
30. Install the camshaft in the cylinder head supports so that the cams of the 1st cylinder are…


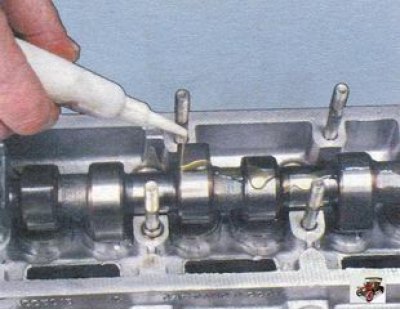
31. Lubricate the camshaft journals and cams with engine oil.
31. Lubricate the camshaft journals and cams with engine oil.


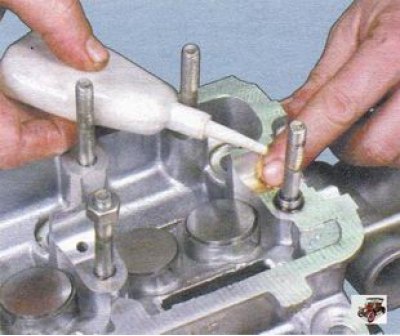
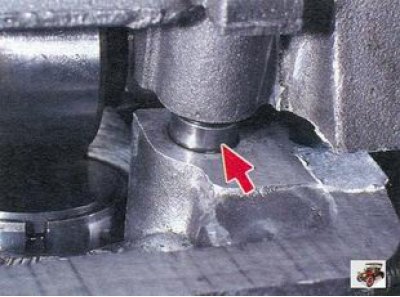
32. Apply sealant to the cylinder head in the area of the outer camshaft supports.
32. Apply sealant to the cylinder head in the area of the outer camshaft supports.


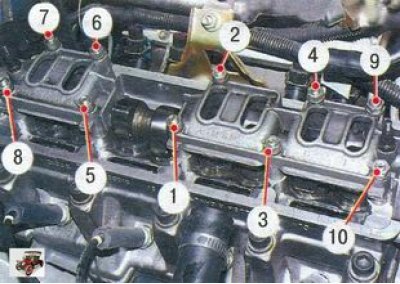
33. Install the camshaft bearing housings, place the washers on the studs and tighten the mounting nuts in two stages in the order shown:

- tighten the nuts until the bearing housings touch the cylinder head surface, making sure that...
- tighten the nuts until the bearing housings touch the cylinder head surface, making sure that...


...the guide bushings entered the holes in the bearing housings.

Finally tighten the nuts in the sequence shown.

34. Install the camshaft oil seal (see "Replacing the camshaft oil seal").

35. Check the valve clearances and adjust the valve clearances if necessary (see "Adjusting valve clearances").

36. Install all removed parts on the vehicle, connect the hoses and wires in the reverse order of removal.


This article is available at russian, bulgarian, belarusian, ukrainian, serbian, croatian, romanian, polish, slovak, hungarian
This article has been reviewed: Daniil Markelov
Share with friends:
◀ Previous
Lada Kalina Sedan: Engine repair
Next ▶

Replacing the camshaft seal
Replacing the cylinder head gasket
Replacing the cylinder head cover gasket
Removal, inspection and installation of the flywheel
Adjusting valve clearances
Replacing the oil pan gasket
Replacing crankshaft seals
Camshaft replacement
Replacing valve lifters
Disassembly, repair and assembly of the cylinder head
More articles with information from manuals for Lada:

• Valve stem seals — replacement Lada Granta 1 (2011-2023, VAZ-2190)
• Replacing valve stem seals Lada Priora 1 (2007-2018, VAZ-2170)
• Valve stem seals — replacement Lada Vesta 1 (2015-2023, VAZ-2180)
• Checking the level and replacing the engine oil and filter Lada Largus 1 (2012-2023)
• Bleeding the hydraulic brake system, replacing the fluid Lada X-Ray 1 (2015-2022)
Link to this article in various formats
Reviews and comments of visitors
No comments yet


Add up two numbers: 38 + 44


Kalina Sedan (2004-2013) 
  • General information
  • Vehicle device
  • Operation and maintenance
  • Faults en route
  • Power unit
  • Engine repair
  • Cooling and lubrication system
  • Exhaust system
  • Supply system
  • Ignition and control
  • Transmission
  • Clutch and drive shafts
  • Car gearbox
  • Chassis (running gear)
  • Front suspension
  • Rear suspension
  • Steering
  • Brake system
  • Body and interior
  • Exterior (external elements)
  • Interior (internal elements)
  • Doors, locks and windows
  • Electrical equipment
  • Equipment and devices
  • Power devices
  • Lighting and signaling
  • Heating and ventilation
Kalina Hatchback (2004-2013) 
  • General information
  • Vehicle Details
  • Maintenance
  • Troubleshooting
  • Power unit
  • Engine repair
  • Cooling system
  • Supply system
  • Control system
  • Exhaust system
  • Transmission
  • Clutch
  • Car gearbox
  • Drive shafts
  • Chassis (running gear)
  • Wheels and tires
  • Front suspension
  • Rear suspension
  • Steering
  • Brake system
  • Body and interior
  • Exterior (external elements)
  • Interior (internal elements)
  • Doors, locks and windows
  • Electrical equipment
  • Equipment and devices
  • Power devices
  • Lighting and signaling
  • Electrical circuits
LadaMan.ru © 2018–2026 | Mobile version | About Lada | Sitemap: EN BG BY UA RS HR RO PL SK HU | Contacts with admin | | Add to bookmarks
Kalina Hatchback (2004-2013) | Kalina Sedan (2004-2013) | Granta 1 (2011-2023) | Priora 1 (2007-2018) | Vesta 1 (2015-2023) | Largus 1 (2012-2023) | X-Ray 1 (2015-2022) |
This site uses cookies to ensure everything runs smoothly.