
Before removing the engine, it is necessary to prepare a reliable stand on which the engine must stand stably.
Note. Before disconnecting hoses and electrical wires, we recommend marking them so as not to be confused during assembly.
You will need: keys «on 10», «at 13», «at 15», «at 17», screwdrivers, pliers, wire cutters or a knife, hoist or other lifting device, slings (strong rope).
1. Remove the decorative engine cover (see «Removal and installation of a decorative casing of the engine»).
2. Reduce the pressure in the power system if work is performed immediately after a trip (see «Reduced fuel pressure in the power system»).
3. Disconnect the wire from the terminal «minus» battery.
4. For convenience, remove the battery (see «Removing and installing the battery»).
5. Remove the engine mudguard (see «Removal and installation of a mudguard of the engine»).
6. Drain coolant (see «Coolant replacement»).
7. Remove the air filter (see «Removal and installation of the air filter»).
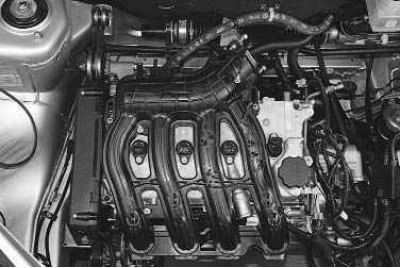
8. Disconnect from the block head, throttle assembly and intake manifold all hoses, pipelines and wires that were disconnected before removing the cylinder head to replace its gasket, as well as the throttle cable with its bracket (see «Replacing the cylinder head gasket»).
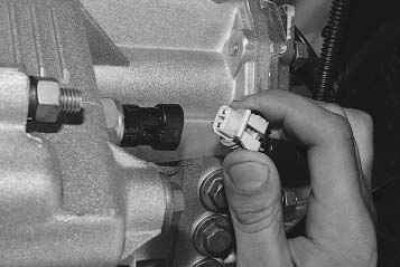
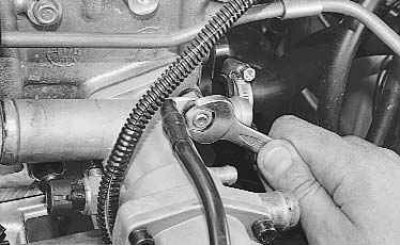
9. Disconnect the wiring harness pads from the speed sensor, crankshaft position sensor and knock sensor (see «Engine management sensors»).
10. Disconnect the wires from the starter (see «Removal and installation of a starter») and generator (see «Removal and installation of the generator»).
11. Disconnect the harness connector from the reversing light switch on the transmission.
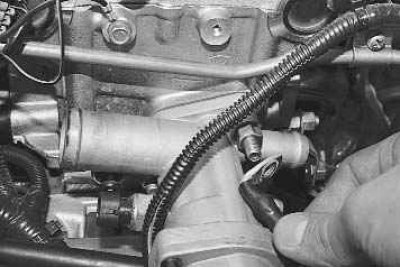
12. Disconnect the blocks of the wiring harnesses of the oxygen concentration sensors and remove the holders of their wires from the holes of the heat-insulating shield of the steering mechanism (see «Replacing the collector»).
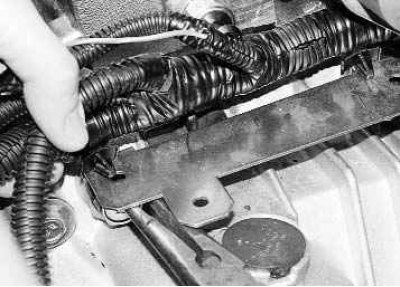
13. Disconnect the engine harness holders from the bracket on the engine and move the harness to the side.
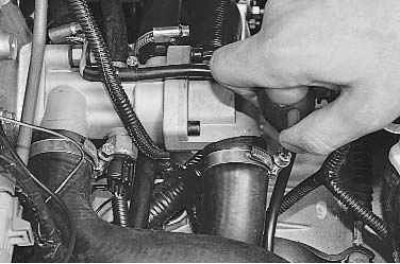
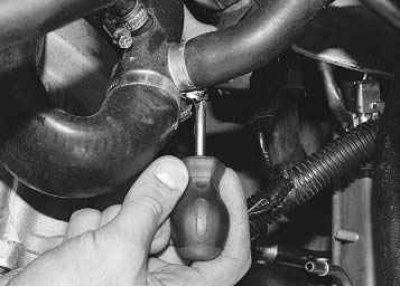
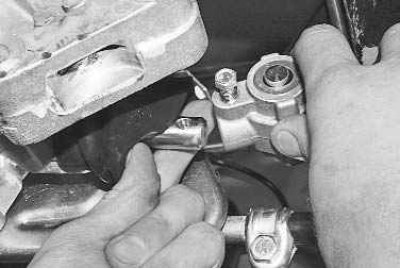
14. Loosen the clamps..
15.... and disconnect all hoses from the thermostat.
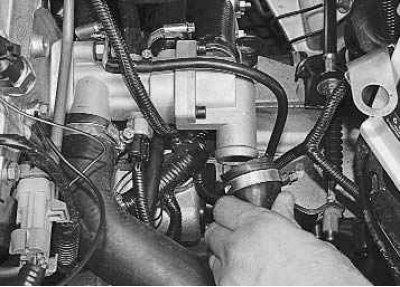
16. Loosen the clamp..
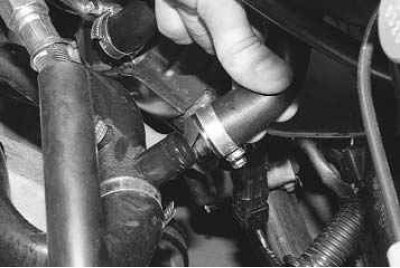
17.... and disconnect the heater hose from the water pump inlet pipe.
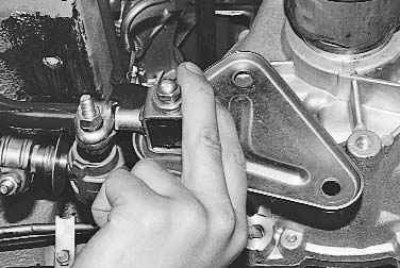
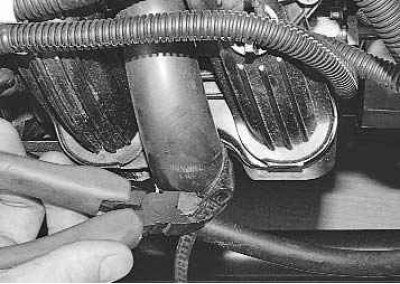
18. Unscrew with a key «at 13» tip mounting nut «mass» wires..
19.... and remove the wire.

20. Disconnect the fuel hose from the tube attached to the engine shield.
21. Disconnect the jet link from the gearbox (see «Removal and installation of a transmission»).
22. Disconnect the shift rod from the gearbox (see «Removal and installation of a transmission»).
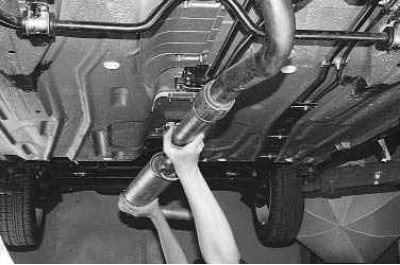
23. Remove the additional muffler, as its downpipe prevents the engine from lowering down (see «Replacing the additional muffler»).
24. Disconnect the lower end of the clutch cable from the gearbox (see «Replacing the clutch release cable»).
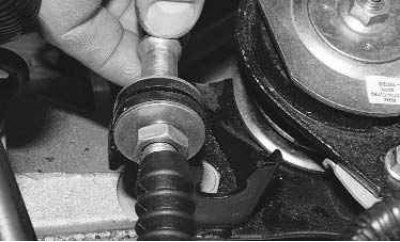
25. Break the clamp that tightens the throttle cable and the crankcase ventilation hose, and remove the cable from the engine.
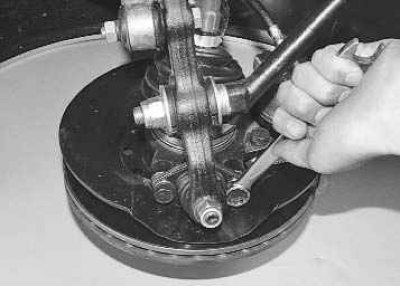
26. Disconnect the front suspension arms from the steering knuckles, for which the key «at 17» Turn out on two bolts of fastening of spherical support to kulaks from both parties of the car.
27. Leaning the mounting blade on the gearbox housing, squeeze out the internal hinges of the left..
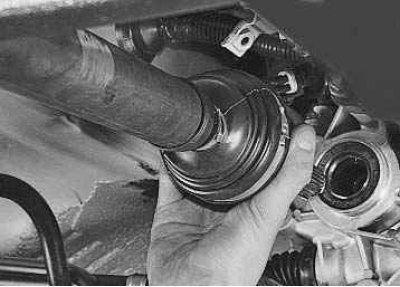
28.... and right front wheel drive. Move the drives away from the gearbox by moving the respective front suspension struts outward.
Note. The movement of the shock absorber struts is prevented by steering rods. In order to eliminate their influence, when disconnecting the right-hand drive gearbox, turn the steering wheel all the way to the left, and when disconnecting the left-hand drive, turn it to the right.
Attention! Disconnect the right drive only after removing the front cover of the clutch housing (see «Replacing the oil pan gasket»), otherwise the mounting blade can bend the cover and the flywheel will touch it.
Attention! Do not disconnect both drives at the same time, since in this case the gears of the axle shafts may shift in the differential and it will be impossible to install the drives without disassembling the gearbox. If both actuators need to be disconnected, after disconnecting one of them, replace it with a service plug or the old inner hinge housing and tie the plug or housing to the gearbox with wire so that they do not fall out when the gearbox is removed. Then disconnect the second drive.
29. Make sure that all wires, hoses and controls are disconnected from the power unit.
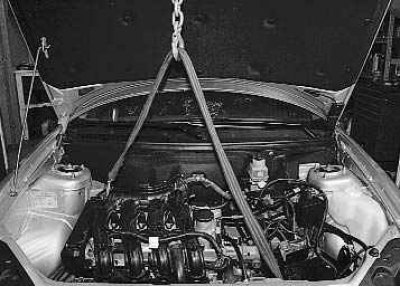
30. Attach the hoist straps to the engine and tighten them slightly to relieve the power unit foot pads.
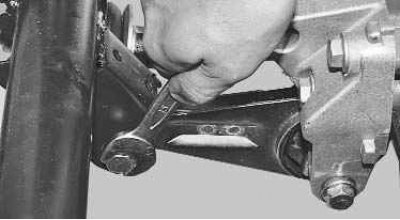
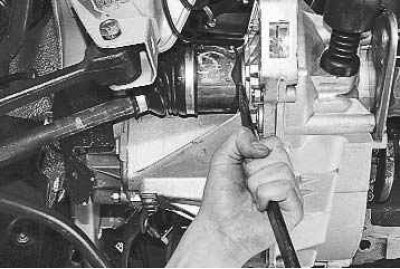
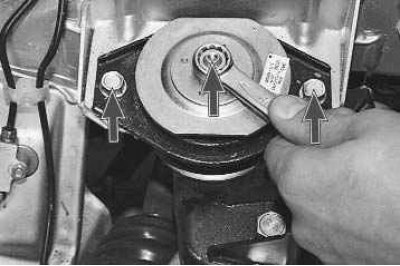
31. Key out «at 15» a bolt of fastening of a bar of the right support of the power unit to a crossbar.
32. Key out «at 15» a bolt of fastening of a bar of the left support of the power unit to a body.
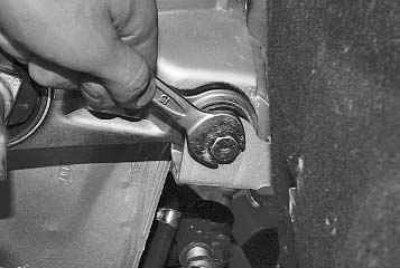
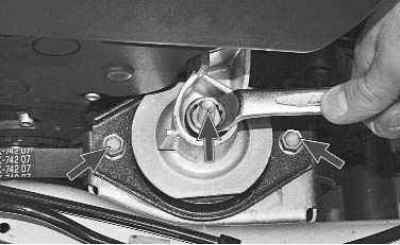
33. Unscrew with a key «at 15» nut of fastening of an arm of a back support of the power unit to a pillow of a support and turn out a key «at 13» two bolts of fastening of a pillow to a body. Remove the support pad (see «Replacing power unit supports»).
34. Unscrew with a key «at 17» nut fastening the bracket of the front support of the power unit to the support cushion and unscrew with a wrench «at 13» two bolts of fastening of a pillow to a body. Remove the support pad (see «Replacing power unit supports»).
35. Install a pre-prepared stand under the engine, lower the power unit onto it, lift the car and remove the engine from under it.
Note. This section describes how to remove the engine downwards in accordance with the manufacturer's recommendations (as part of the power unit, together with the gearbox). This requires lifting mechanisms to raise the front of the car higher. In garage conditions, it is easier to remove the engine up, after removing the gearbox. In this case, it is not necessary to remove the additional muffler.
36. Install the engine in the reverse order of removal. After installation, add oil to the crankcase and liquid to the cooling system.
37. Adjust throttle actuators (see «Throttle Cable Replacement») and gearbox control (see «Gearbox control drive adjustment»).
38. Start the engine and check for fuel, oil and coolant leaks. Check oil pressure. Listen to the engine: it should run smoothly, without extraneous noise and knocks.