
Car repair AvtoVAZ Car repair Renault Car repair Hyundai Car repair Ford Car repair Volkswagen Car repair Audi Car repair Chevrolet
English Русский
Български
Беларускі
Український
Српски
Hrvatski
Română
Polski
Slovenský
Magyar
articles sitemap contacts bookmark
LadaMan.ru


Kalina Granta Priora Vesta Largus XRAY
Priora 1 (2007-2018, VAZ-2170)

Lapping valves (Priora 2170)

  • Main
  • Priora
  • Priora 1
  • Power unit
  • Engine repair
  • Lapping valves
0
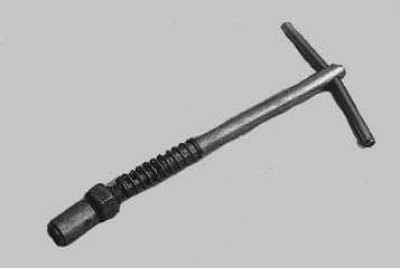
For lapping valves, it is most convenient to use a special mechanical device (reversible drill).

In addition, ready-made manual valve holders are available for sale.

In addition, ready-made manual valve holders are available for sale.

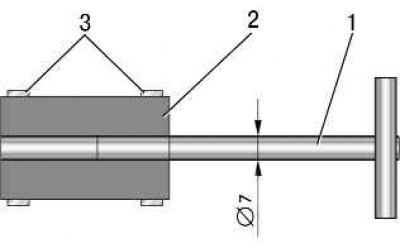
Figure 5.13. Valve grinding tool: 1 – metal rod; 2 – rubber hose; 3 – screw clamps

Figure 5.13. Valve grinding tool: 1 – metal rod; 2 – rubber hose; 3 – screw clamps


If they are not available, you can use a device made according to the drawing (figure 5.13).

In addition, you will need: lapping paste, kerosene, a weak spring with an outer diameter that passes through the valve seat hole.

1. Clean the valve from carbon deposits.
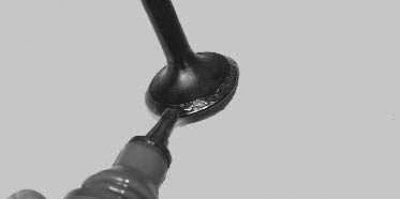
2. Apply a continuous thin layer of lapping paste to the valve chamfer.

2. Apply a continuous thin layer of lapping paste to the valve chamfer.


3. Place the pre-selected spring on the valve stem and insert the valve into the guide bushing from…


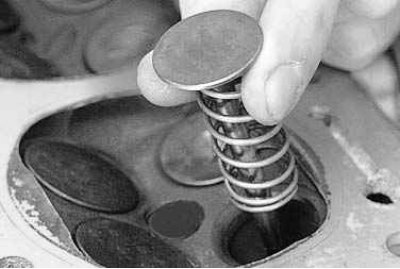
3. Place the pre-selected spring on the valve stem and insert the valve into the guide bushing from the combustion chamber side, lubricating the valve stem with a layer of graphite grease.

Note: Graphite grease prevents the abrasive from the lapping paste from getting into the guide bushing holes and makes it easier to rotate the valve during lapping.


4. Place the valve lapping tool on the valve stem (or with some tension a rubber tube to connect the valve to the reversible drill).

5. Turn on the drill at minimum speed (in reverse mode) or by rotating the device (in case of manual lapping) alternately in both directions by half a turn, grind the valve, periodically pressing it to the seat, then weakening the pressing force.
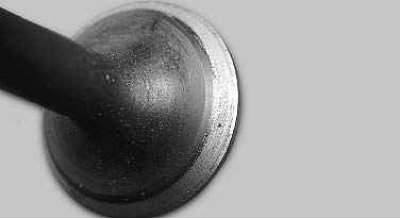
6. An external sign of satisfactory lapping is a uniform matte-gray color of the valve working…


6. An external sign of satisfactory lapping is a uniform matte-gray color of the valve working chamfer…
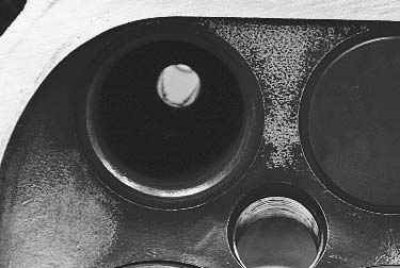


7. …and valve seats in the cylinder head.

7. …and valve seats in the cylinder head.

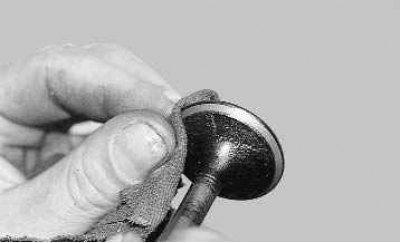
8. After lapping, thoroughly wipe the valve and seat with a clean cloth and rinse to remove any…


8. After lapping, thoroughly wipe the valve and seat with a clean cloth and rinse to remove any remaining lapping paste. Check the tightness of the valve by installing it with springs and crackers in the head. Then place the head with the combustion chambers facing up, plug the spark plug hole and pour kerosene into the combustion chamber. If kerosene does not leak into the cylinder head channel within 3 minutes, the valve is sealed.


This article is available at russian, bulgarian, belarusian, ukrainian, serbian, croatian, romanian, polish, slovak, hungarian
This article has been reviewed: Vladislav Voloshin
Share with friends:
◀ Previous
Lada Priora 1: Engine repair
Next ▶

Disassembly, repair and assembly of the cylinder head
Possible malfunctions of hydraulic tappets
Checking and replacing hydraulic tappets
Removal, inspection and installation of camshafts
Removal, inspection and installation of the flywheel
Removal and installation the engine
Disassembling the engine
Engine parts defect detection
Engine assembly
More articles with information from manuals for Lada:

• Lapping valves Lada Kalina Sedan (2004-2013, VAZ-1118)
• Valves — lapping Lada Vesta 1 (2015-2023, VAZ-2180)
• Engine assembly (8 valves) Lada Largus 1 (2012-2023)
Link to this article in various formats
Reviews and comments of visitors
No comments yet


Add up two numbers: 31 + 18


Priora 1 (2007-2018) 
  • General information
  • Vehicle device
  • User manual
  • Faults en route
  • Maintenance
  • Power unit
  • Engine repair
  • Cooling and lubrication system
  • Supply system
  • Exhaust system
  • Transmission
  • Clutch
  • Car gearbox
  • Drive shafts
  • Chassis (running gear)
  • Car suspension
  • Steering
  • Brake system
  • Body and interior
  • Exterior (external elements)
  • Interior (internal elements)
  • Doors, locks and windows
  • Electrical equipment
  • Equipment and devices
  • Power devices
  • Lighting and signaling
  • Cooling and heating
  • Electrical circuits
LadaMan.ru © 2018–2026 | Mobile version | About Lada | Sitemap: EN BG BY UA RS HR RO PL SK HU | Contacts with admin | | Add to bookmarks
Kalina Hatchback (2004-2013) | Kalina Sedan (2004-2013) | Granta 1 (2011-2023) | Priora 1 (2007-2018) | Vesta 1 (2015-2023) | Largus 1 (2012-2023) | X-Ray 1 (2015-2022) |
This site uses cookies to ensure everything runs smoothly.