
Car repair AvtoVAZ Car repair Renault Car repair Hyundai Car repair Ford Car repair Volkswagen Car repair Audi Car repair Chevrolet
English Русский
Български
Беларускі
Український
Српски
Hrvatski
Română
Polski
Slovenský
Magyar
articles sitemap contacts bookmark
LadaMan.ru


Kalina Granta Priora Vesta Largus XRAY
Priora 1 (2007-2018, VAZ-2170)

Replacing the catalytic converter gasket (Priora 2170)

  • Main
  • Priora
  • Priora 1
  • Power unit
  • Engine repair
  • Replacing the catalytic converter gasket
0
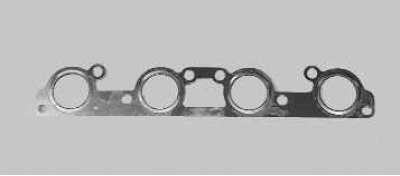
Between the flanges of the cylinder head and the exhaust manifold, a sealing gasket is installed, made of two thin molded metal strips connected to each other by spot welding. If the gasket is not tight, exhaust gases will break through to the outside, accompanied by a characteristic sharp sound. If the fault cannot be corrected by tightening the exhaust manifold mount, replace the gasket.

You will need: 10 and 13 mm wrenches, a 13 mm socket head, pliers, a ruler, and a feeler gauge.


You will need: 10 and 13 mm wrenches, a 13 mm socket head, pliers, a ruler, and a feeler gauge.

1. Disconnect the wire from the negative terminal of the battery.

2. Remove the decorative engine cover (see "Removing and installing the decorative engine cover").

3. Disconnect the exhaust pipe of the additional muffler from the exhaust manifold by unscrewing the nuts securing the exhaust pipe flange to the exhaust manifold flange, disconnect the suspension cushions from the muffler brackets and remove the exhaust pipe flange from the exhaust manifold flange studs. Remove the additional muffler (see "Replacing the additional muffler").
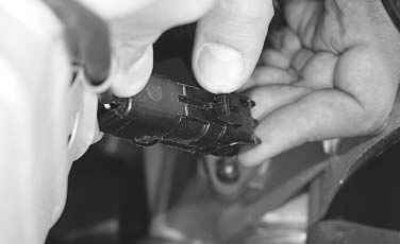
4. Press the clamps…
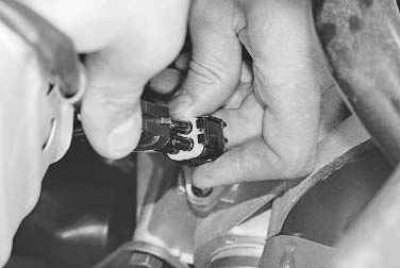

4. Press the clamps…


5. …and disconnect the control and diagnostic oxygen concentration sensor wiring harness connectors…


5. …and disconnect the control and diagnostic oxygen concentration sensor wiring harness connectors from the engine harness.
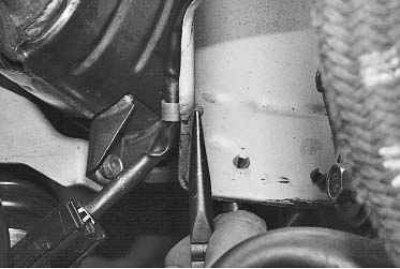
6. Press the holders' antennae…
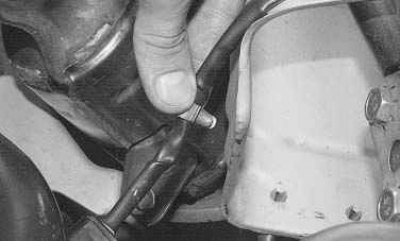

6. Press the holders' antennae…

7. …and disconnect the holders of the control and diagnostic oxygen concentration sensor wire…


7. …and disconnect the holders of the control and diagnostic oxygen concentration sensor wire harnesses from the steering gear heat-insulating shield.
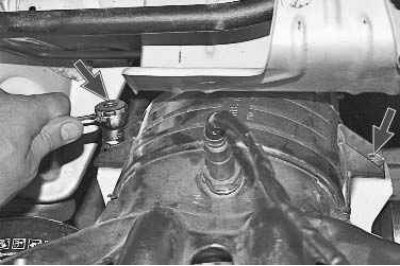


8. Using a 13 mm socket head, unscrew the bolts securing the exhaust manifold to the bracket.

8. Using a 13 mm socket head, unscrew the bolts securing the exhaust manifold to the bracket.

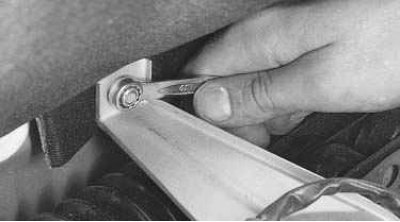
9. Using a 10 mm spanner, unscrew the three nuts securing the steering gear heat-insulating shield…


9. Using a 10 mm spanner, unscrew the three nuts securing the steering gear heat-insulating shield to the engine shield (two nuts are located under the steering gear)…
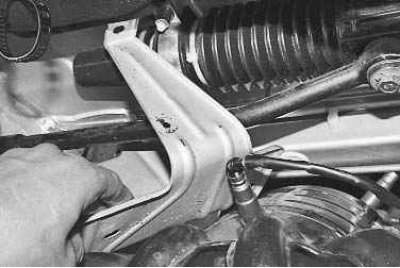
10. …and remove the shield.
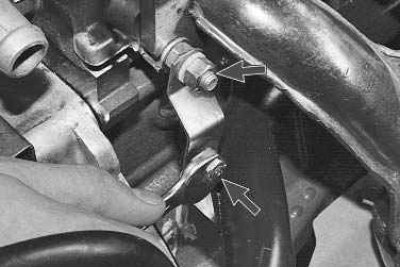

10. …and remove the shield.

11. Using a 13 mm wrench, unscrew the two nuts securing the water pump inlet pipe bracket…
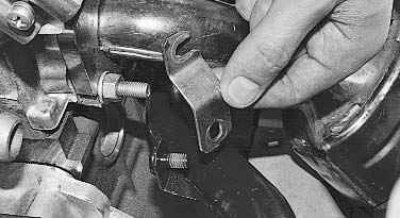

11. Using a 13 mm wrench, unscrew the two nuts securing the water pump inlet pipe bracket…


12. …and remove the bracket.
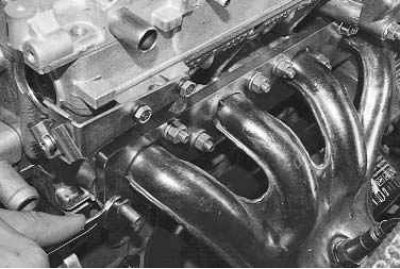

12. …and remove the bracket.

13. Using a 13 mm wrench, unscrew the eight nuts securing the exhaust manifold to the cylinder head…
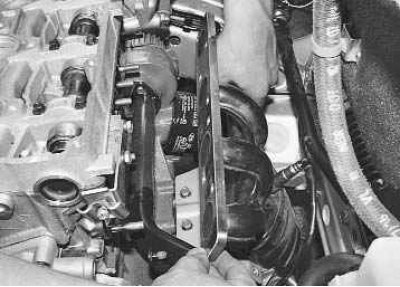

13. Using a 13 mm wrench, unscrew the eight nuts securing the exhaust manifold to the cylinder head…

14. …and remove the exhaust manifold…
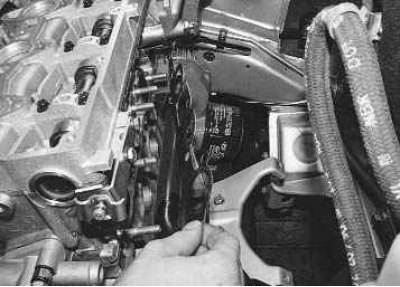

14. …and remove the exhaust manifold…

15. …and its gasket.


15. …and its gasket.


16. Install the new gasket and all removed parts in the reverse order of removal.
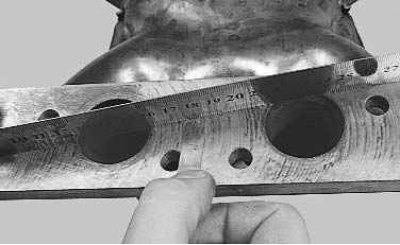
17. Check the flatness of the exhaust manifold flange surface. To do this, place the ruler edgewise…


17. Check the flatness of the exhaust manifold flange surface. To do this, place the ruler edgewise on the surface of the flange and measure the gap between the plane of the flange and the ruler with a feeler gauge. Grind the flange surface or replace the collector if the gap exceeds 0.1 mm.

Note: To prevent the gasket from sticking and to improve its tightness, we recommend that you lubricate the gasket on both sides with a thin layer of graphite grease before installation.


Note: Lubricate the exhaust manifold mounting studs with graphite grease.


This article is available at russian, bulgarian, belarusian, ukrainian, serbian, croatian, romanian, polish, slovak, hungarian
This article has been reviewed: Vladislav Voloshin
Share with friends:
◀ Previous
Lada Priora 1: Engine repair
Next ▶

Replacing the intake manifold sealing rings
Replacing the oil pan gasket
Replacing the rear crankshaft oil seal
Replacing the front crankshaft oil seal
Replacing camshaft seals
Removal, inspection and installation of the flywheel
Removal, inspection and installation of camshafts
Checking and replacing hydraulic tappets
Possible malfunctions of hydraulic tappets
Disassembly, repair and assembly of the cylinder head
More articles with information from manuals for Lada:

• Replacing the catalytic converter Lada Kalina Sedan (2004-2013, VAZ-1118)
• Catalytic collector — removal, gasket replacement and installation Lada Granta 1 (2011-2023, VAZ-2190)
• Catalytic collector — removal, gasket replacement and installation Lada Vesta 1 (2015-2023, VAZ-2180)
• Catalytic converter (neutralizer) Lada Largus 1 (2012-2023)
• Bleeding the hydraulic brake system, replacing the fluid Lada X-Ray 1 (2015-2022)
Link to this article in various formats
Reviews and comments of visitors
No comments yet


Add up two numbers: 26 + 34


Priora 1 (2007-2018) 
  • General information
  • Vehicle device
  • User manual
  • Faults en route
  • Maintenance
  • Power unit
  • Engine repair
  • Cooling and lubrication system
  • Supply system
  • Exhaust system
  • Transmission
  • Clutch
  • Car gearbox
  • Drive shafts
  • Chassis (running gear)
  • Car suspension
  • Steering
  • Brake system
  • Body and interior
  • Exterior (external elements)
  • Interior (internal elements)
  • Doors, locks and windows
  • Electrical equipment
  • Equipment and devices
  • Power devices
  • Lighting and signaling
  • Cooling and heating
  • Electrical circuits
LadaMan.ru © 2018–2026 | Mobile version | About Lada | Sitemap: EN BG BY UA RS HR RO PL SK HU | Contacts with admin | | Add to bookmarks
Kalina Hatchback (2004-2013) | Kalina Sedan (2004-2013) | Granta 1 (2011-2023) | Priora 1 (2007-2018) | Vesta 1 (2015-2023) | Largus 1 (2012-2023) | X-Ray 1 (2015-2022) |
This site uses cookies to ensure everything runs smoothly.