



Note: If the cooling system is filled with a coolant such as antifreeze, it should be replaced every 40 thousand km or 2 years of operation.
Note: You will need: a 13 mm wrench, a Phillips-head screwdriver, coolant, and a clean cloth.
Caution! Use coolants recommended by the manufacturer (see appendix 2).
Caution! Replace the coolant only when the engine is cold.
Warning: Coolant is toxic, so be careful when handling it.
Attention! When starting the engine, the expansion tank cap must be closed. Screw the cap on tightly. When the engine is running, the cooling system is under pressure, so coolant may leak from under a loosely tightened plug.
1. Place the vehicle on an inspection pit or lift.
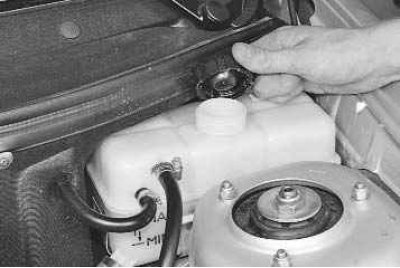
2. Unscrew the expansion tank cap. Remove the engine splash guard (see "Removing and installing the engine mudguard").
Note: It is not necessary to remove the engine crankcase guard, but in this case you will have to take measures against coolant leaks on the area under the car, since it will splash heavily when it gets from the drain holes onto the guard.
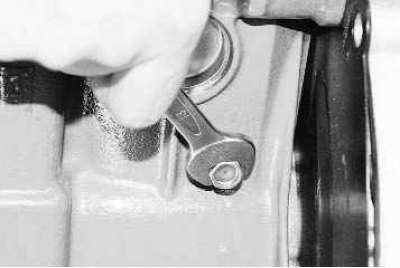
3. Place a container under the engine and remove the drain plug on the cylinder block. After draining the coolant, wipe any traces of it off the cylinder block.
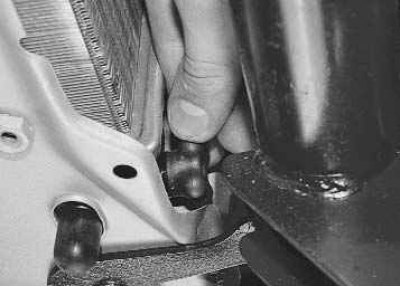
4. Place a container under the radiator, unscrew the drain plug on the radiator…
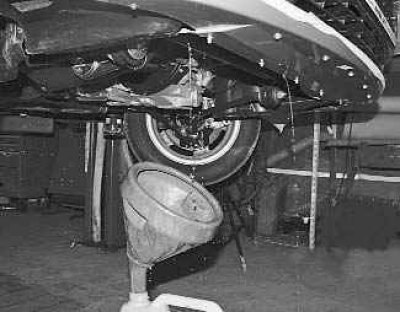
5. …and wait until the coolant has completely drained from the system.
Warning! Antifreeze is deadly poisonous to all living things. Therefore, in order not to pollute the environment, drain it from the cylinder block and radiator through a funnel (for example, made from a plastic bottle).
Note: The radiator drain plug is sealed with a rubber ring, do not lose it. Replace any torn or hardened ring.
6. Screw the plugs into the cylinder block and radiator.
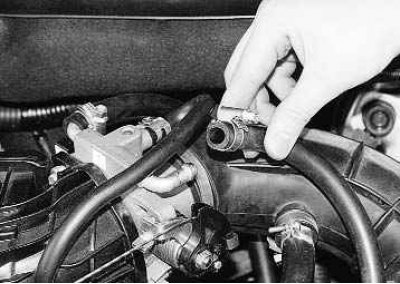
7. Loosen the clamp and disconnect the coolant drain hose from the throttle body heater fitting. This is necessary to ensure that air is released from the engine cooling system as it fills. If this is not done, due to the formation of air locks, the coolant will not fill the system completely.
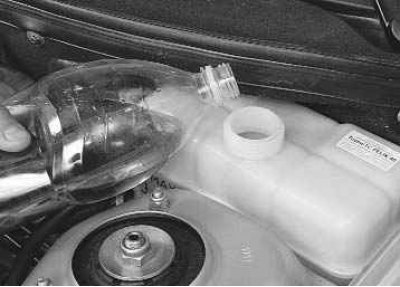
8. Fill the engine cooling system by pouring coolant into the expansion tank until it starts to flow out of the hose disconnected from the throttle body. At this point, put the hose back in place and tighten the clamp that secures it.
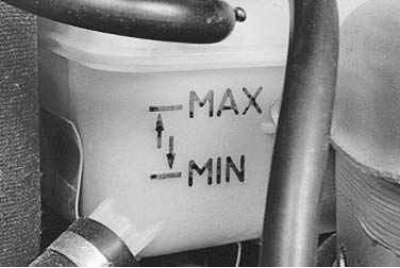
9. Continue pouring fluid until its level reaches the "MAX" mark on the wall of the expansion tank (after starting the engine, the coolant will displace the remaining air and the level in the tank will drop slightly). Tighten the expansion tank cap.
Attention! Tighten the expansion tank cap tightly. When the engine is running, the expansion tank is under pressure, so coolant may leak from under a loosely tightened cap.
10. Install the engine splash guard.
11. Start the engine and let it warm up to operating temperature (before turning on the fan). After this, stop the engine, check the coolant level (see "Checking the level and adding coolant").
Attention! Do not fill the expansion tank with fluid above the "MAX" mark, as its level in the tank increases significantly when the engine warms up.
Caution! When the engine is running, monitor the coolant temperature using the gauge. If the arrow has moved to the red zone and the fan has not turned on, turn on the heater and check what air is coming through it. If heated air flows through the heater, the fan is most likely faulty; if it is cold, it means that an air lock has formed in the engine cooling system. After this, turn off the engine. To remove the air lock, let the engine cool down and unscrew the expansion tank cap (be careful: if the engine has not cooled down completely, the coolant may splash out of the reservoir). Start the engine, let it run for 3-5 minutes and close the tank cap
Note: To ensure the system is filled without air locks, periodically squeeze the radiator hoses with your hand.
Note: After a few days of operating the vehicle after replacing the coolant, check its level. Add coolant if necessary.
Note: If after a very short time the fresh fluid changes color to brown, it means you have poured in a fake, to which the manufacturers "forgot" to add corrosion inhibitors. In addition, one of the signs of a fake is a sudden, complete discoloration of the liquid. Good quality coolant dye is very durable and will only darken over time. The liquid, tinted with linen blue, is decolorized. This type of "antifreeze" needs to be replaced quickly.