
Car repair AvtoVAZ Car repair Renault Car repair Hyundai Car repair Ford Car repair Volkswagen Car repair Audi Car repair Chevrolet
English Русский
Български
Беларускі
Український
Српски
Hrvatski
Română
Polski
Slovenský
Magyar
articles sitemap contacts bookmark
LadaMan.ru


Kalina Granta Priora Vesta Largus XRAY
Priora 1 (2007-2018, VAZ-2170)

Cleaning the crankcase ventilation system (Priora 2170)

  • Main
  • Priora
  • Priora 1
  • General information
  • Maintenance
  • Cleaning the crankcase ventilation system
0
Over time, resinous deposits from crankcase gases accumulate in the engine's crankcase ventilation system, making it difficult for these gases to be removed into the engine cylinders for combustion. Because of this, the gas pressure inside the engine increases and oil leaks appear through the seals. To avoid this, clean and flush the system periodically.

According to the manufacturer's recommendation, the engine crankcase ventilation system must be cleaned every 60 thousand km.

Note: Clean the crankcase ventilation system before each oil change.


You will need: an 8 mm spanner, a Phillips-head screwdriver, and narrow-nosed pliers.

1. Remove the decorative engine cover (see "Removing and installing the decorative engine cover").

2. Remove the air filter (see "Removing and installing the air filter").
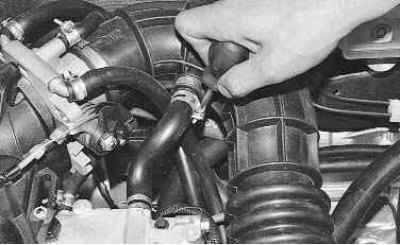
3. Loosen the clamp..
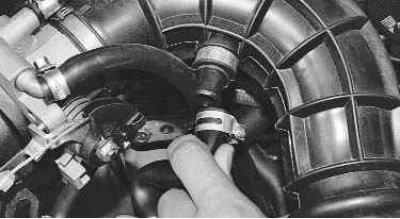

3. Loosen the clamp..

4. …and disconnect the large branch hose of the crankcase ventilation system from the air supply…


4. …and disconnect the large branch hose of the crankcase ventilation system from the air supply hose.
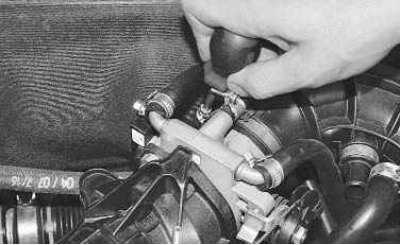


5. Loosen the clamp..
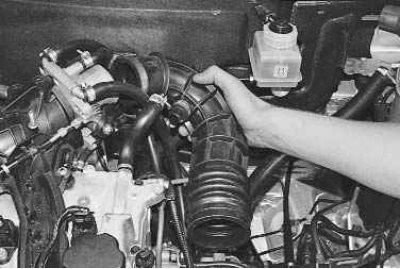

5. Loosen the clamp..

6. …and disconnect the air supply hose from the throttle assembly.
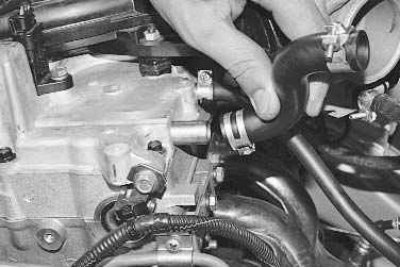

6. …and disconnect the air supply hose from the throttle assembly.

7. After loosening the clamp, disconnect the large branch hose of the crankcase ventilation system…


7. After loosening the clamp, disconnect the large branch hose of the crankcase ventilation system from the cylinder head cover and remove it.
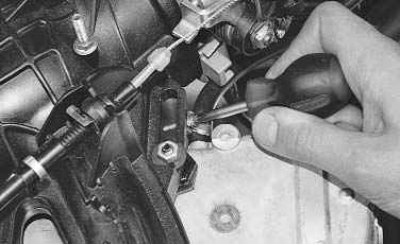
8. Similarly, remove the small branch hose of the crankcase ventilation system by disconnecting it…


8. Similarly, remove the small branch hose of the crankcase ventilation system by disconnecting it from the throttle assembly fittings and the cylinder head cover.
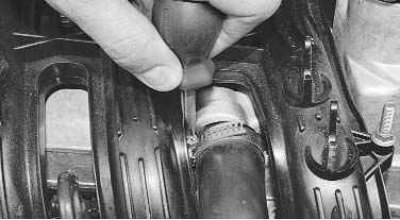


9. Loosen the clamp..
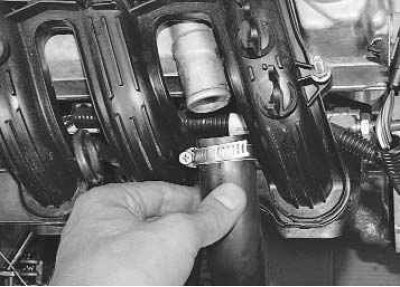

9. Loosen the clamp..

10. …and remove the ventilation system supply hose by disconnecting it from the cylinder head cover…


10. …and remove the ventilation system supply hose by disconnecting it from the cylinder head cover pipe…
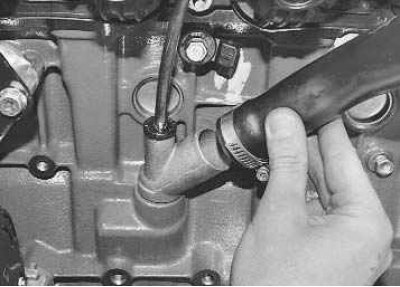
11. …and similarly from the cylinder block nipple.


11. …and similarly from the cylinder block nipple.

12. Wash the hoses with gasoline or kerosene, blow with compressed air and dry. Clean the holes of the fittings and pipes for connecting the hoses.


13. Remove the cylinder head cover (see "Replacing the cylinder head cover gasket").
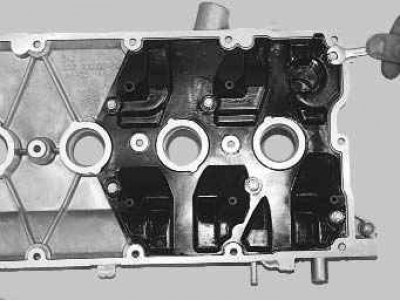
14. Remove the six bolts securing the separator from the inside of the cylinder head cover…

14. Remove the six bolts securing the separator from the inside of the cylinder head cover…

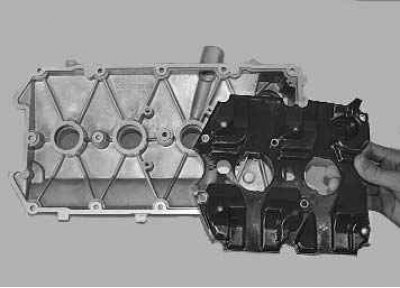
15. ...and remove the separator.

15. ...and remove the separator.

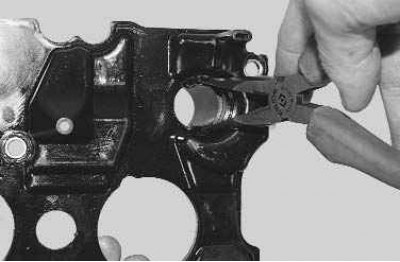
16. Use pliers to squeeze the separator oil deflector clamps…
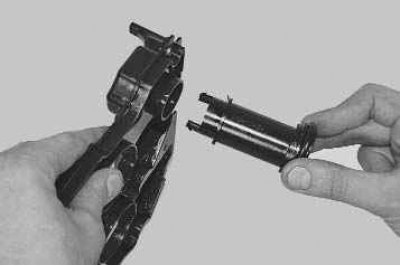

16. Use pliers to squeeze the separator oil deflector clamps…

17. …and remove the oil deflector from the oil separator.


17. …and remove the oil deflector from the oil separator.


18. Carefully pry up the rubber sealing ring with a screwdriver...
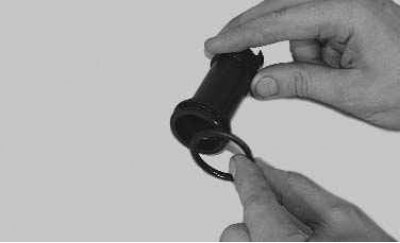

18. Carefully pry up the rubber sealing ring with a screwdriver...

19. ...and take it off. If the ring is too compressed or has lost its elasticity, replace it with a…


19. ...and take it off. If the ring is too compressed or has lost its elasticity, replace it with a new one.
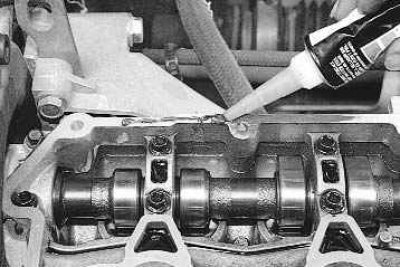
Note: Clean the cylinder head cover before installing it (from old sealant) and degrease the mating…


Note: Clean the cylinder head cover before installing it (from old sealant) and degrease the mating surfaces of the cylinder head and cylinder head cover. Apply a thin layer of sealant to the mating surface of the cylinder head.


20. Install the hoses and parts in the reverse order of removal.


This article is available at russian, bulgarian, belarusian, ukrainian, serbian, croatian, romanian, polish, slovak, hungarian
This article has been reviewed: Vladislav Voloshin
Share with friends:
◀ Previous
Lada Priora 1: Maintenance
Next ▶

Changing engine oil and oil filter
Replacing the timing belt
Replacing the alternator drive belt
Checking and adjusting headlights
Checking and adjusting the front wheel alignment angles
Replacing the coolant
Gearbox oil change
Replacing the working fluid in the brake system
Replacing the air filter element
Replacing the fuel filter
More articles with information from manuals for Lada:

• Cleaning the crankcase ventilation system Lada Kalina Sedan (2004-2013, VAZ-1118)
• Control of the ventilation and heating system of the passenger… Lada Granta 1 (2011-2023, VAZ-2190)
• Cleaning and washing of the body Lada Vesta 1 (2015-2023, VAZ-2180)
• Heating, ventilation and air conditioning system Lada Largus 1 (2012-2023)
• Replacing the replacement element of the outdoor air filter of the… Lada X-Ray 1 (2015-2022)
Link to this article in various formats
Reviews and comments of visitors
No comments yet


Add up two numbers: 35 + 44


Priora 1 (2007-2018) 
  • General information
  • Vehicle device
  • User manual
  • Faults en route
  • Maintenance
  • Power unit
  • Engine repair
  • Cooling and lubrication system
  • Supply system
  • Exhaust system
  • Transmission
  • Clutch
  • Car gearbox
  • Drive shafts
  • Chassis (running gear)
  • Car suspension
  • Steering
  • Brake system
  • Body and interior
  • Exterior (external elements)
  • Interior (internal elements)
  • Doors, locks and windows
  • Electrical equipment
  • Equipment and devices
  • Power devices
  • Lighting and signaling
  • Cooling and heating
  • Electrical circuits
LadaMan.ru © 2018–2026 | Mobile version | About Lada | Sitemap: EN BG BY UA RS HR RO PL SK HU | Contacts with admin | | Add to bookmarks
Kalina Hatchback (2004-2013) | Kalina Sedan (2004-2013) | Granta 1 (2011-2023) | Priora 1 (2007-2018) | Vesta 1 (2015-2023) | Largus 1 (2012-2023) | X-Ray 1 (2015-2022) |
This site uses cookies to ensure everything runs smoothly.