
Car repair AvtoVAZ Car repair Renault Car repair Hyundai Car repair Ford Car repair Volkswagen Car repair Audi Car repair Chevrolet
English Русский
Български
Беларускі
Український
Српски
Hrvatski
Română
Polski
Slovenský
Magyar
articles sitemap contacts bookmark
LadaMan.ru


Kalina Granta Priora Vesta Largus XRAY
Priora 1 (2007-2018, VAZ-2170)

Changing engine oil and oil filter (Priora 2170)

  • Main
  • Priora
  • Priora 1
  • General information
  • Maintenance
  • Changing engine oil and oil filter
0
According to the manufacturer's recommendation, engine oil and oil filter should be replaced after 15 thousand km of mileage or 1 year of operation (whichever comes first). The volume of oil poured into the engine is 3.5 liters.

Note: Under severe operating conditions in a large city or very dusty areas, change the oil and filter every 10 thousand km.


You will need: engine oil, oil filter, clean rag, container for draining oil with a capacity of about 5 liters, 17 mm wrench, special wrench for unscrewing the oil filter.

Note: Drain the oil after driving while the engine is still hot. If the engine is cold, start it and warm it up to operating temperature.


Note: Fill with the same grade of oil as the oil that was in the engine. If you decide to change the brand of oil, flush the lubrication system with flushing oil or oil of the brand that will be used. To do this, after draining the old oil, fill in new oil up to the lower mark on the oil level indicator (dipstick). Start the engine and let it idle for 10 minutes. Drain the oil and only then replace the oil filter. Now you can fill in new oil to the required level (upper mark on the dipstick).


Caution: Do not pour used oil onto the ground.


1. Place the vehicle on an inspection pit or lift.
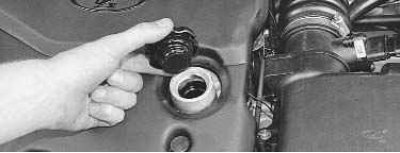
2. Open the hood and unscrew the oil filler cap. Remove the engine splash guard (see «Removing and…


2. Open the hood and unscrew the oil filler cap. Remove the engine splash guard (see "Removing and installing the engine mudguard").
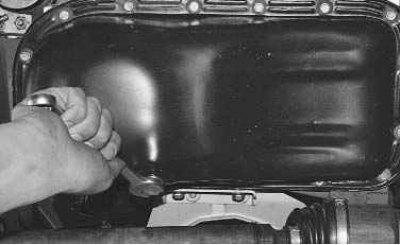


3. Clean the oil drain plug on the engine oil pan with a wire brush and then with a rag. Loosen the…


3. Clean the oil drain plug on the engine oil pan with a wire brush and then with a rag. Loosen the oil drain plug.
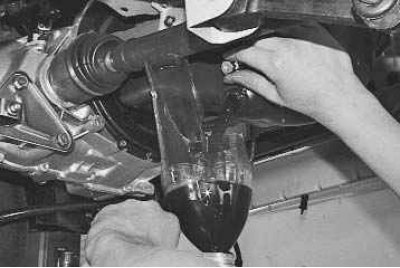
4. Finally, unscrew the oil drain plug, having first placed a container underneath to catch the…


4. Finally, unscrew the oil drain plug, having first placed a container underneath to catch the drained oil, and drain the oil. For convenience, you can use a funnel or the neck cut from a plastic bottle.

Caution: Be careful: the drained engine oil is hot.


5. Screw the cap back on.
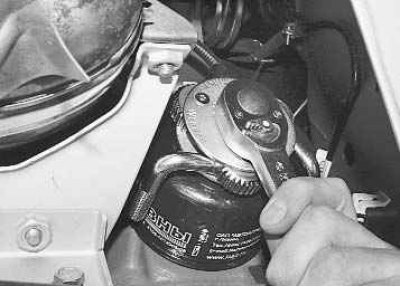
6. Using a special key, loosen the oil filter and remove it.
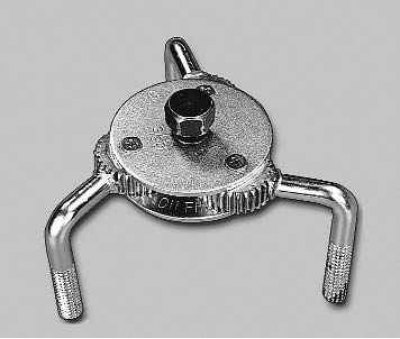

6. Using a special key, loosen the oil filter and remove it.


Note: Use a special key to unscrew the oil filter. If you don't have such a key or a similar…


Note: Use a special key to unscrew the oil filter. If you don't have such a key or a similar puller, punch the filter housing with a screwdriver and, using it as a lever, unscrew the filter. Punch the filter as close to the bottom as possible to avoid damaging the fitting. You can also use a strip of coarse sandpaper folded in half, wrapping it around the filter and pushing it out of place with your hands.
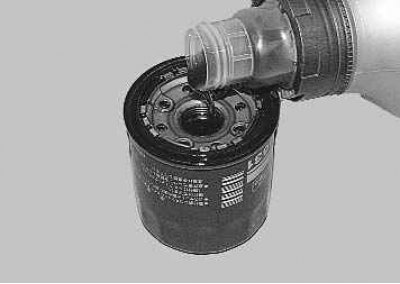

7. Fill the new filter approximately 2/3 full with clean engine oil…


7. Fill the new filter approximately 2/3 full with clean engine oil…

Note: It is necessary to fill the filter with oil so that when the engine is first started after changing the oil, the oil channels fill up faster and the valve drive parts operate in conditions of oil starvation for as little time as possible.
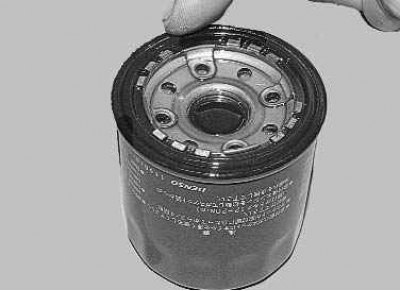


8. …and lubricate the O-ring with clean engine oil if it is not treated with grease or talc by the…


8. …and lubricate the O-ring with clean engine oil if it is not treated with grease or talc by the manufacturer.

9. Screw the filter into place by hand 3/4 of a turn from the moment the ring touches the cylinder block flange.
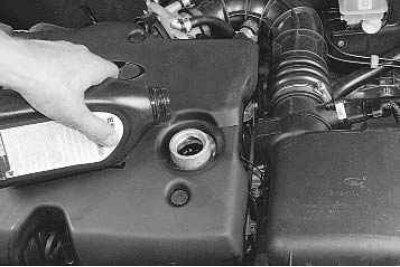
10. Unscrew the oil filler cap and fill with clean oil (see «Checking the level and adding oil to…


10. Unscrew the oil filler cap and fill with clean oil (see "Checking the level and adding oil to the engine lubrication system"). Replace the oil filler cap.

11. Start the engine and let it idle for a few minutes (the low oil pressure warning light should go out 2–3 seconds after the engine starts).
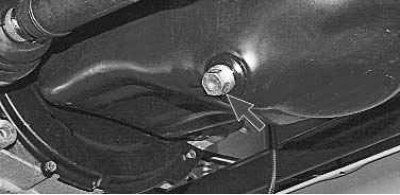
12. While the engine is running, check to see if oil is leaking from under the drain plug…
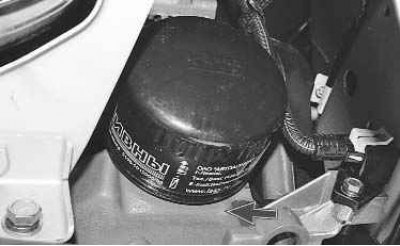

12. While the engine is running, check to see if oil is leaking from under the drain plug…


13. …and oil filter. Stop the engine, check the oil level, and top it up if necessary (see…


13. …and oil filter. Stop the engine, check the oil level, and top it up if necessary (see "Checking the level and adding oil to the engine lubrication system"), tighten the drain plug and filter.

14. Install the engine splash guard.


This article is available at russian, bulgarian, belarusian, ukrainian, serbian, croatian, romanian, polish, slovak, hungarian
This article has been reviewed: Vladislav Voloshin
Share with friends:
◀ Previous
Lada Priora 1: Maintenance
Next ▶

Replacing the timing belt
Replacing the alternator drive belt
Checking and adjusting headlights
Checking and adjusting the front wheel alignment angles
Checking the free play (play) of the steering wheel
Cleaning the crankcase ventilation system
Replacing the coolant
Gearbox oil change
Replacing the working fluid in the brake system
Replacing the air filter element
More articles with information from manuals for Lada:

• Engine Oil and Oil Filter — Replacement Lada Kalina Hatchback (2004-2013, VAZ-1119)
• Engine Oil and Oil Filter — Replacement Lada Granta 1 (2011-2023, VAZ-2190)
• Engine Oil and Oil Filter — replacement Lada Vesta 1 (2015-2023, VAZ-2180)
• Checking the level and replacing the engine oil and filter Lada Largus 1 (2012-2023)
• Troubleshooting Engine Troubleshooting Lada X-Ray 1 (2015-2022)
Link to this article in various formats
Reviews and comments of visitors
No comments yet


Add up two numbers: 20 + 30


Priora 1 (2007-2018) 
  • General information
  • Vehicle device
  • User manual
  • Faults en route
  • Maintenance
  • Power unit
  • Engine repair
  • Cooling and lubrication system
  • Supply system
  • Exhaust system
  • Transmission
  • Clutch
  • Car gearbox
  • Drive shafts
  • Chassis (running gear)
  • Car suspension
  • Steering
  • Brake system
  • Body and interior
  • Exterior (external elements)
  • Interior (internal elements)
  • Doors, locks and windows
  • Electrical equipment
  • Equipment and devices
  • Power devices
  • Lighting and signaling
  • Cooling and heating
  • Electrical circuits
LadaMan.ru © 2018–2026 | Mobile version | About Lada | Sitemap: EN BG BY UA RS HR RO PL SK HU | Contacts with admin | | Add to bookmarks
Kalina Hatchback (2004-2013) | Kalina Sedan (2004-2013) | Granta 1 (2011-2023) | Priora 1 (2007-2018) | Vesta 1 (2015-2023) | Largus 1 (2012-2023) | X-Ray 1 (2015-2022) |
This site uses cookies to ensure everything runs smoothly.