
Comment. Removal of the gear shift actuator may be required when replacing defective parts (e.g. to replace a torn drive rod boot, a damaged drive rod). The sequence and number of operations indicated below can be changed depending on the purpose of the work.
To perform the work, you will need an assistant, as well as a viewing ditch or overpass.
Removal and disassembly
1. We prepare the car for work (see «Preparing the car for maintenance and repair»),
2. We clean the threads of the coupling bolt of the clamp with a metal brush. We process the junction of the rod with the hinge and the bolt with a penetrating lubricant.
3. With a 13 mm wrench, we loosen the tightening of the nut of the clamp coupling bolt.
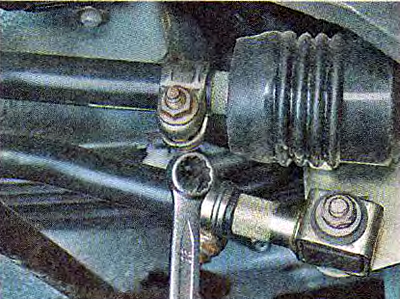
4. Unclench the clamp with a screwdriver and move it along the rod. We unclench the thrust with a screwdriver.
5. After wiping the junction of the rod with the hinge with a rag, we mark the relative position of the drive rod and the hinge.
6. Disconnect the rod from the hinge.
7. Disconnect the jet thrust from the base of the ball joint of the gear lever (see «Jet thrust - removal and installation»»).
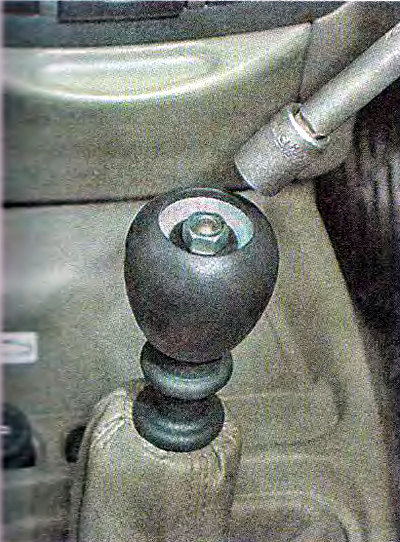
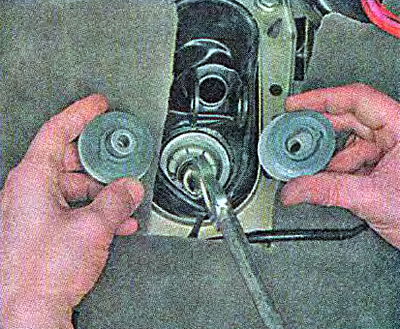
8. In the passenger compartment, use a thin slotted screwdriver to remove the plug from the gear lever handle.
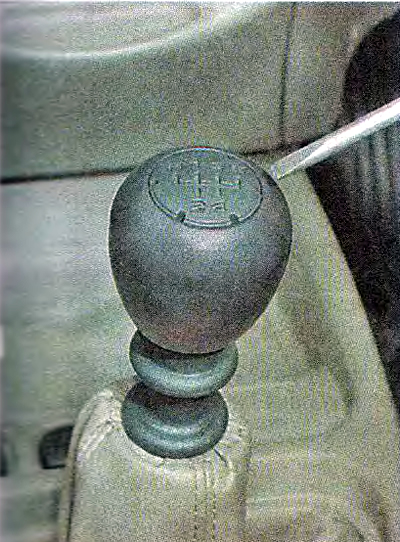
Using a 13 mm socket wrench, we delay the nut securing the handle bolt and remove the handle from the gear lever.
10. Prying with a screwdriver, remove the cover from the lining of the floor tunnel and turn the cover inside out.
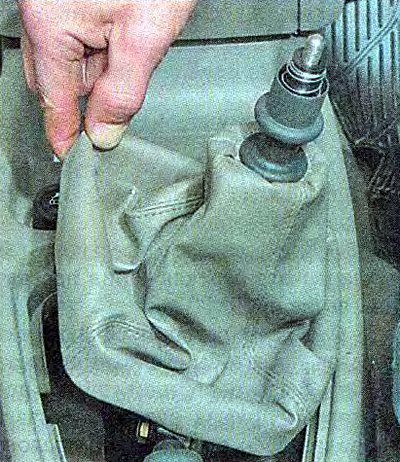
11. Disconnect the wiring harness from the reverse lock solenoid switch. Loosen or cut the plastic clamp.
12. Remove the switch from the gear lever.
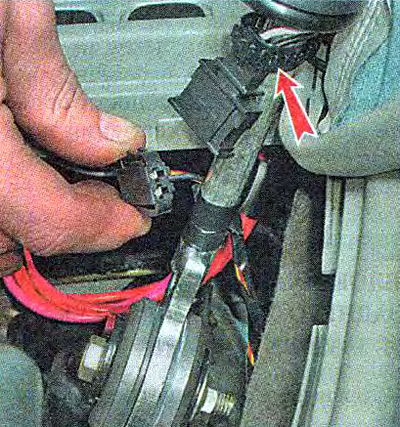
13. Remove the lining of the floor tunnel (see «Floor tunnel lining - removal and installation»).
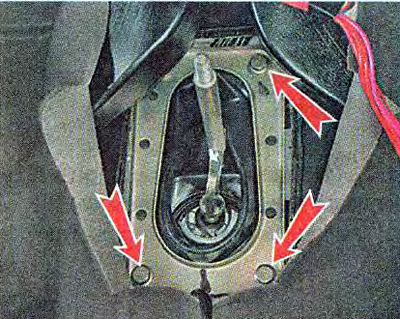
If necessary, you can unscrew the four bolts securing the gear lever support to the body (see below) and remove the drive assembly.
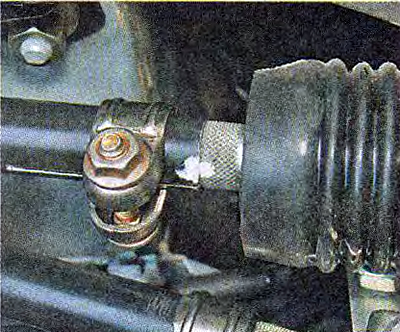
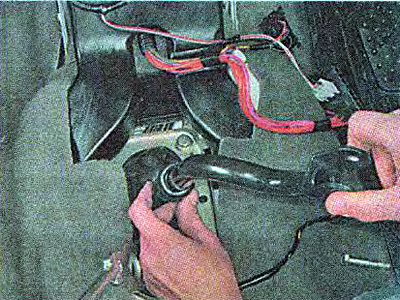
14. Using a 13 mm wrench, unscrew the nut of the bolt securing the thrust to the lever, holding the bolt from turning with a second wrench of the same size.
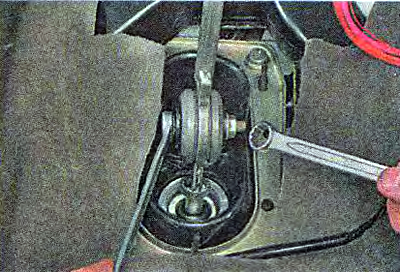
15. Remove the bolt from the lever. We remove the lever from the traction fork. We remove the metal and plastic washers, take out the metal spacer.
16. To remove the drive rod, lubricate it with soapy water and remove it from the opening of the cover.
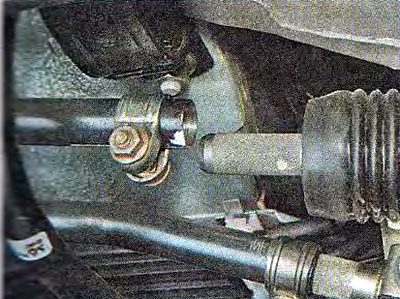
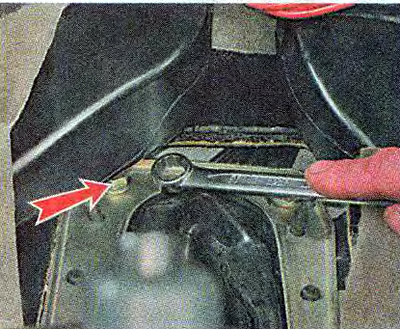
17. Using a 13 mm socket head, unscrew the three bolts securing the bracket to the body.
We unscrew the fourth bolt of the bracket with a spanner wrench of the same size (access to it from above closes the air duct).
18. Remove the bracket and the cover of the drive rod. We replace the torn cover.
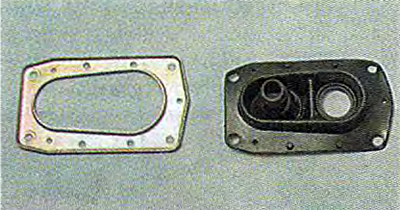
19. We remove the gear lever support from the hole in the floor tunnel.
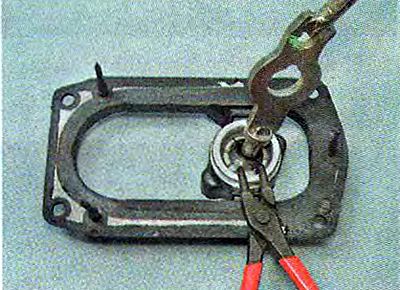
20. With a puller, we compress the retaining ring of the ball joint of the lever and remove it from the base of the support.
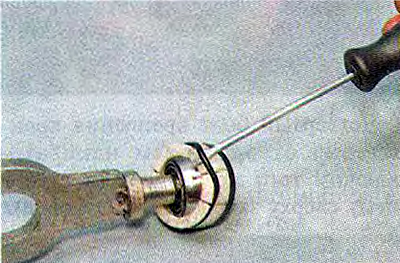
21. We take out the lever from the base of the support.

22. Prying with a screwdriver, remove the upper sealing ring.
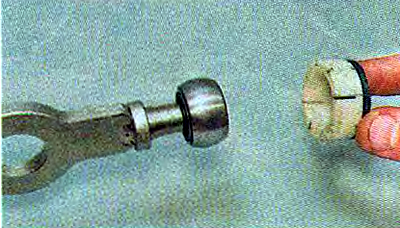
23. Remove the support from the lever.
Assembly and installation
We assemble and install the drive in the reverse order. Before tightening the clamp of the drive rod of the gear shift mechanism, we adjust the drive (see below).
Adjustment
1. Weaken the tightening of the clamp of the drive rod of the gear shift mechanism (see paragraphs 2-4 above).
2. Raise the lower part of the gear lever boot (see point 10 above).
3. We shift the gear lever so that its lower part of the lever is perpendicular to the floor surface, and the lever handle is located from the right seat cushion at a distance approximately equal to ⅓ of the distance between the front seats and hold it in this position. At the same time, the assistant, having displaced the clamp by 2-3 mm from the end of the thrust, tightens the clamp nut.
4. We install the cover in place and, trying to turn on the gears, we make sure that the gear shift mechanism drive is working.