
Execution sequence
1. We prepare the car for work and install it on a viewing ditch or overpass (see «Preparing the car for maintenance and repair»).
2. Remove the right front wheel and right front fender liner (see «Wheel replacement» And «Front fender liner - removal and installation»).
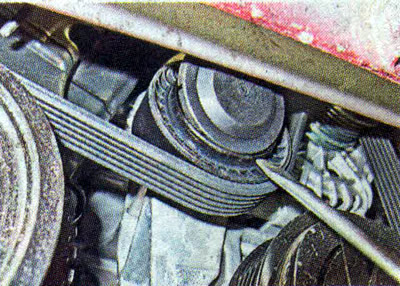
3. With a slotted screwdriver, pry off the protective cover of the tension roller.
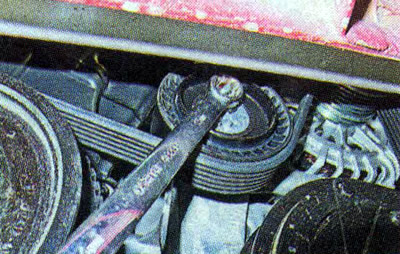
4. Using a 13 mm spanner, loosen the tightening nut of the tension roller.
5. Install the TORX T-55 bit into the hub of the tension roller...
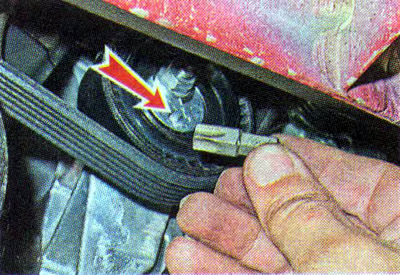
... and, with the help of another key, turning the roller hub in the direction of the arrow, we loosen the belt tension.

6. Taking the tension roller away from the belt, remove the belt from the roller, and then from the other pulleys.
Recommendation. After removing the belt, check the condition of the tension roller bearing. If during rotation of the roller, the bearing makes a lot of noise or seizes, or has a noticeable play, the roller must be replaced. To replace the tension roller with a 13 mm wrench, unscrew the fastening nut. We install a new tension roller on the stud, tighten the fastening bolt nut with a torque of 21 Nm.
7. We put the belt on the pulleys in reverse order as shown in the photo «Engine accessory drive belt» (see above) In chapter «Accessory drive belt - check».
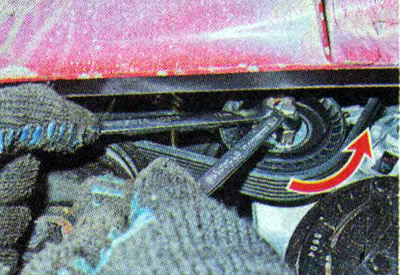
8. Using the TORX T-55 key, turning the hub of the tension roller counterclockwise, we tighten the belt. Holding it in this position, tighten the fastening nut with a 13 mm wrench.
9. Check the tension of the drive belt (see note in section «Accessory drive belt - check»), if necessary, adjust the tension.
10. Install the protective cover of the tension roller and other removed parts in reverse order.