



Note: The work can be done without this device if you can unscrew the camshaft pulley mounting bolts.
Sequence of execution
1. Remove the upper front timing belt cover (see "Timing Belt - Checking Condition").
2. Using a 17 mm socket wrench, turn the crankshaft until the marks on the camshaft pulleys align with the marks on the rear timing belt cover (see "Timing Belt - Replacement").
3. Holding the camshaft pulleys one by one with a special tool, loosen the pulley mounting bolts with a 17 mm wrench.
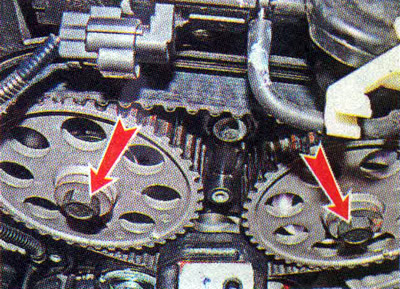
Recommendation. If there is no tool to hold the camshaft pulleys, they can be locked using wooden wedges.
4. Loosen the timing belt tension (see "Timing Belt - Replacement").
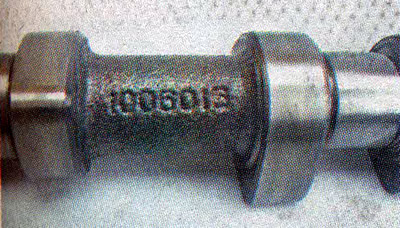
Intake valve shaft marked 1006015.
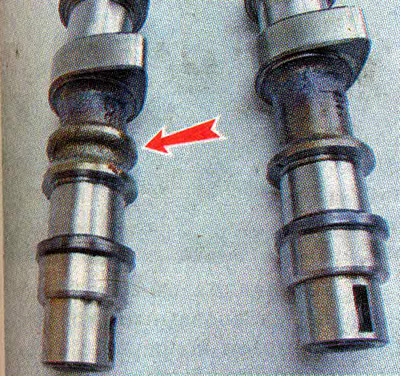
In addition, the intake valve shaft has an additional belt.
Attention! When repairing the engine, do not use a sealant with a high silicone content (silicon compounds), vapors of which can enter the cylinders through the crankcase ventilation system and then into the exhaust tract. Use a sealant that is specifically labeled as safe for use with the oxygen sensor.
Caution! Do not apply too much sealant to the mating surfaces of the bearing housing. When tightening the mounting bolts, the sealant squeezed into the internal cavities of the engine can clog the oil channels.
3. Apply a thin layer of Loctite-574 sealant to the lower surface of the bearing housing around the spark plug well holes, and also...
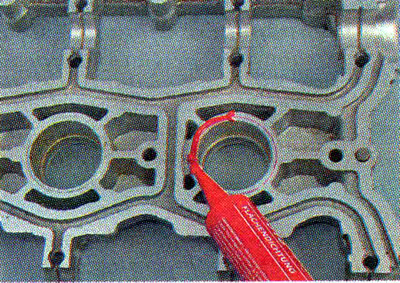
...and onto the plane of the cylinder head according to the following diagram:
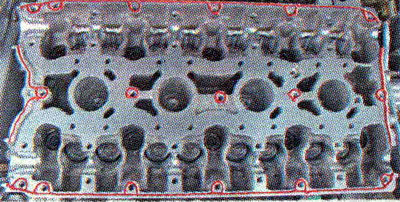
4. Install the camshafts into the cylinder head with the keyways facing up.
5. Install the bearing housing on the cylinder head and evenly tighten its mounting bolts until the bearing housing touches the cylinder head. Finally, tighten the bearing housing mounting bolts in pairs, with a torque of 8.0–10.0 Nm (0.8–1.0 kgfm) in the sequence shown in the photo (see below).
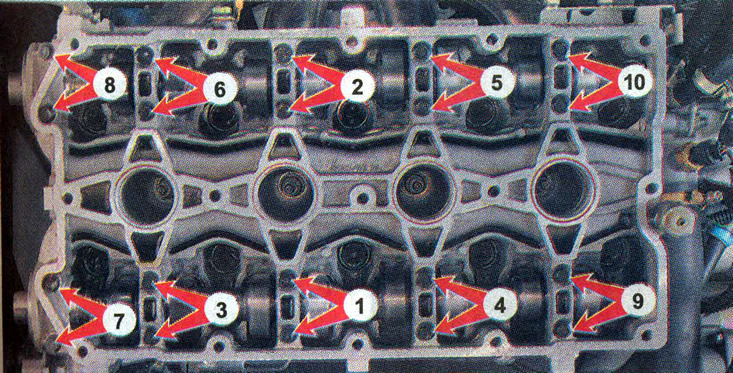
Sequence of tightening the bearing housing bolts
6. Use a rag to remove excess sealant squeezed out of the gap between the cylinder head and the bearing housing cover.
7. Press in the camshaft seals (see "Camshaft Seals - Replacement").
8. Press two plugs into the cylinder head.
9. Further assembly is carried out in the reverse order of disassembly.