



Note: The cylinder head can be removed as a complete unit with the camshafts and thermostat (to access the connecting rod and piston group, to replace the gasket, etc.). If the head is subject to repair, it is advisable to disassemble it as much as possible before removing it from the cylinder block.
To perform the work you will need an inspection pit or overpass, as well as a new cylinder head gasket.
Removal
1. Drain the coolant from the engine (see "Coolant - Replacement").
Recommendation. If repairs to the connecting rod and piston group are required, it is advisable to immediately drain the oil from the engine crankcase.
2. Remove the decorative engine cover (see "Engine trim panel - removal and installation").
3. Using a 10 mm wrench, unscrew the bolt securing the ground wire tip and disconnect it from the cylinder head. Disconnect the wiring harness from the emergency oil pressure sensor.
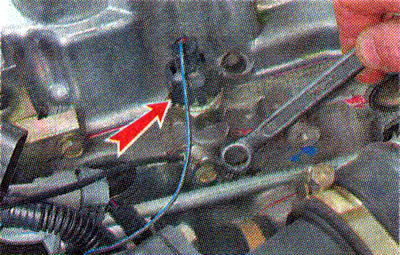
4. To avoid damage, disconnect the wire connector from the coolant temperature sensor (see "Coolant Temperature Gauge Sensor - Checking and Replacing").
5. Disconnect the thermostat housing from the cylinder head (see "Thermostat - replacement").
6. Remove the cylinder head cover (see "Cylinder Head Cover - Removal, Cleaning Oil Deflector and Installation").
7. Remove the camshafts.
8. Remove the hydraulic tappets from the mounting holes (see "Hydraulic tappets - removal and installation")
9. Remove the catalytic collector (see "Catalytic collector - removal, gasket replacement and installation").
Note: The camshaft position and temperature gauge sensors do not need to be removed, but the head must be removed from the cylinder block carefully to avoid accidentally damaging the sensors.
[Article based on information from the website: www.ladaman.ru]
10. Evenly, in several steps, using a TORX E10 key, unscrew the ten cylinder head mounting bolts.
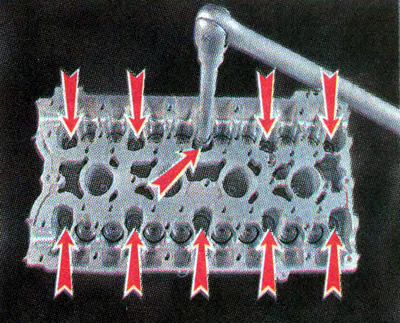
11. Remove the head from the cylinder block.
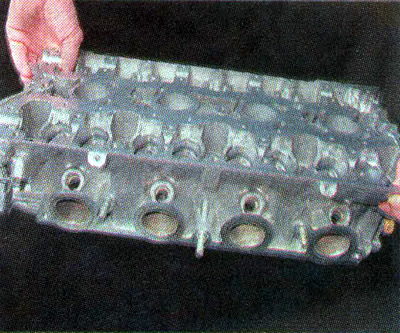
12. Remove the cylinder head gasket.
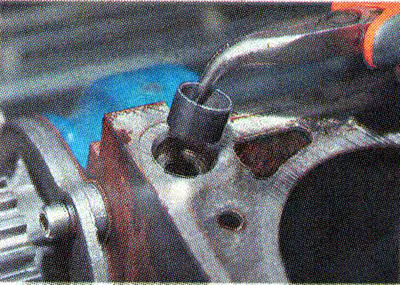
13. To avoid losing them, remove the two guide bushings from the mounting holes in the cylinder block.
14. Wash the cylinder head from dirt and deposits with kerosene or diesel fuel.
Installation
1. Remove from the threaded holes of the cylinder block (under the cylinder head mounting bolts) oil and coolant residues.
2. Wipe the mating surfaces of the cylinder head and block with a cloth and degrease them with a solvent.
When installing the cylinder head, always use a new gasket. Oil must not come into contact with the gasket surface.
3. Install the head guide bushings into the cylinder block mounting locations. We place the gasket on the cylinder block, while the guide bushings should enter the corresponding holes of the gasket.
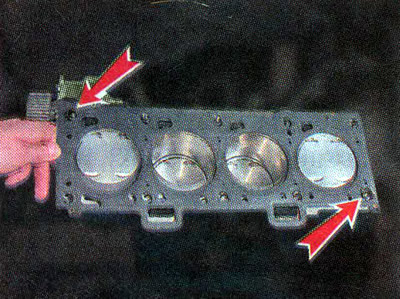
4. Install the head on the cylinder block. By slightly moving the head from side to side, we ensure that the guide bushings enter the corresponding recesses of the head.
Warning! Reuse of cylinder head bolts is only permitted if their length does not exceed 100 mm.
5. Using a caliper or a mechanic's ruler, measure the length of the bolts. Bolts longer than 100 mm are replaced.
6. Before installation, dip the threaded part of the bolts in engine oil, then let the oil drain, waiting about half an hour.
7. Install the bolts for fastening the head into the holes. Using a torque wrench, tighten the head mounting bolts in three steps: first with a torque of 20 N·m (2 kgf·m), then turn the bolts 90° further, and then turn the bolts 90° further again. In doing so, follow the sequence shown in the photo (see above).
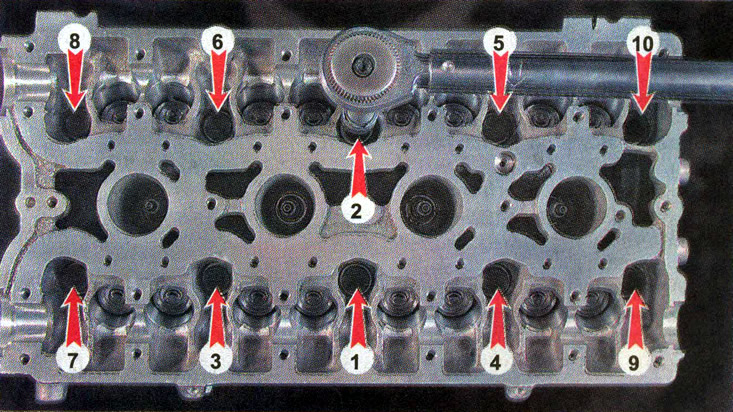
Cylinder Head Bolt Tightening Sequence
8. Further assembly of the engine is carried out in the reverse order of assembly.