
To perform the work, you will need a special 13 mm key for fittings for fastening pipelines and a rubber bulb (or syringe).
Removing
1. We prepare the car for work (see «Preparing the car for maintenance and repair»).
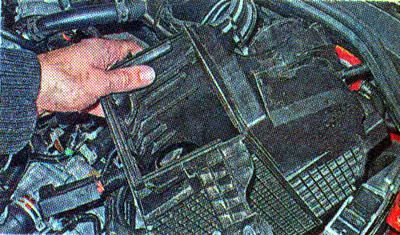
2. Remove the muffler of the air intake system and the air filter housing (see «Air filter - removal and installation»).
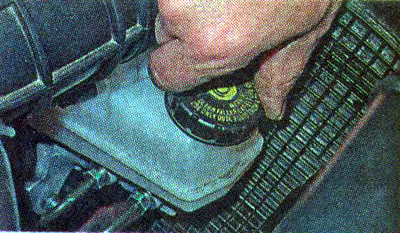
3. Turn off and remove the tank cover. We select the brake fluid from the reservoir with a syringe or a rubber bulb and replace the cap.
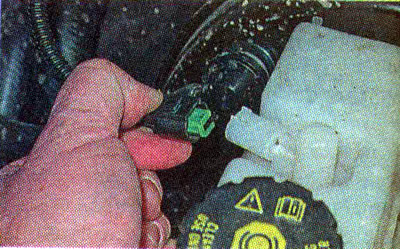
4. Press the latch and disconnect the wiring harness block from the sensor.
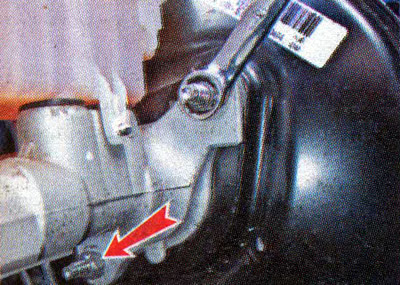
5. Using a special 13 mm wrench, unscrew the fittings of the two brake pipes...
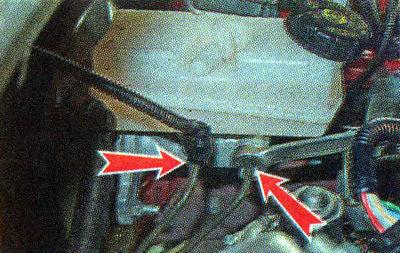
... and carefully remove the tubes from the cylinder, without much bending them.
Warning! Do not allow brake fluid to come into contact with the car body, as it may damage the paintwork. If brake fluid gets on the paintwork, wash it off with plenty of water as soon as possible.
6. Using a 13 mm socket wrench, unscrew the two nuts securing the master brake cylinder.
7. Remove the main brake cylinder assembly with the reservoir.
8. If necessary, remove the tank.
Installation
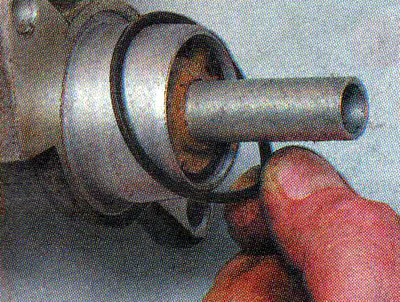
Comment. The connection between the master brake cylinder and the vacuum brake booster is sealed with a rubber ring. If damaged, the ring must be replaced.
1. Install the master brake cylinder in reverse order. Tighten the cylinder mounting nuts with a torque of 21 Nm, tube fittings - 14 Nm.
2. Connect the wiring harness block to the sensor.
3. Fill the tank with new brake fluid and pump the hydraulic drive of the brake system (see «Hydraulic brake drive - pumping»).