



1. Remove the generator from the vehicle (see "Removal and installation the generator").
2. Remove the voltage regulator (see "Checking and replacing the voltage regulator with capacitor and brush holder").

3. Use a screwdriver to pry up the diode bridge contacts and remove the generator stator winding leads from them.
[Source link - website www.ladaman.ru]
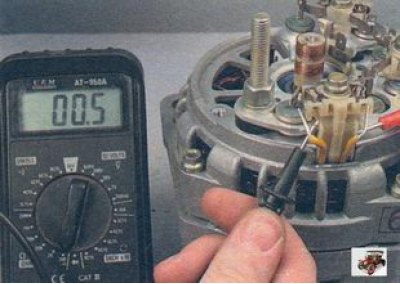
4. Check for a break in the generator stator windings. To do this, connect an ohmmeter (tester) to the terminals of one of the windings one by one. If it shows infinity, then there is a break in the windings and the generator stator needs to be replaced.
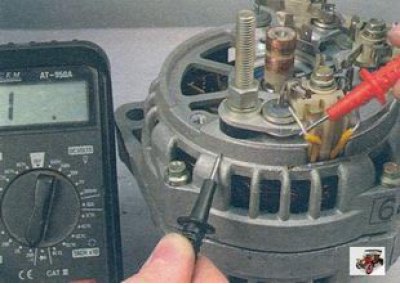
5. Check the short circuit of the generator stator windings to ground. To do this, connect one wire of the ohmmeter to the terminal of the stator winding, and the second to the generator housing. If the ohmmeter shows infinity, then there is no short circuit.
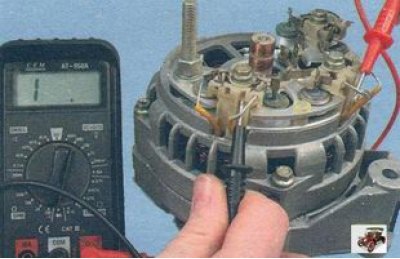
6. Check the short circuit between the generator stator windings. To do this, connect one wire of the ohmmeter to the terminal of one of the windings, and the second to the other winding. If the ohmmeter shows infinity, then there is no short circuit.
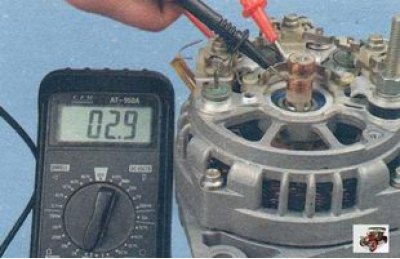
7. Check the resistance of the generator rotor winding with an ohmmeter (tester) by connecting it to the slip rings. If the ohmmeter shows infinity, then there is a break in the windings and the rotor needs to be replaced. 8. Check the voltage regulator and capacitor for proper operation (see "Checking and replacing the voltage regulator with capacitor and brush holder").
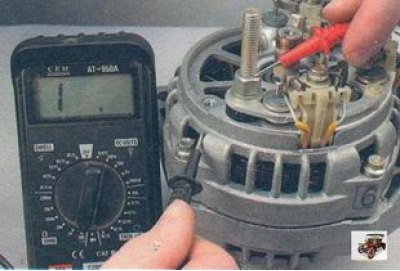
9. You can check the rectifier unit either with the generator removed or without removing the generator from the vehicle. Connect one lead of the ohmmeter to the "B+" terminal of the generator, and the other to the generator body. If the ohmmeter shows infinity, then there is no break and all diodes are working properly.
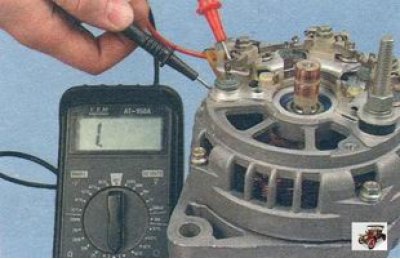
10. If there is a break, check the diodes individually. Connect one wire to the ground of the rectifier unit and the other to the diode terminal, then swap the wires. The diode must only allow current to flow in one direction; if the diode passes current in both directions, it is faulty.
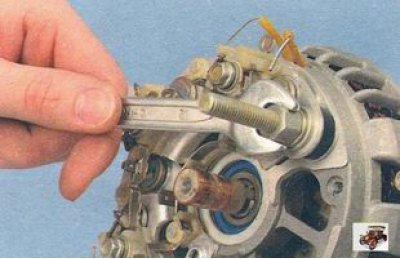
11. Unscrew the nut securing the "B+" terminal and remove it together with the washers.
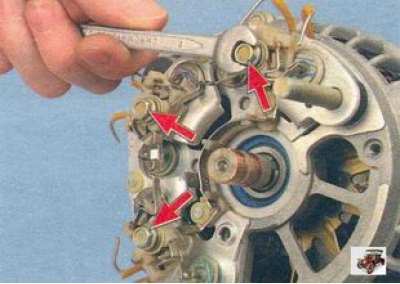
12. Unscrew the three bolts securing the rectifier unit to the generator body and remove the rectifier unit.
13. Mark the relative positions of the generator covers...
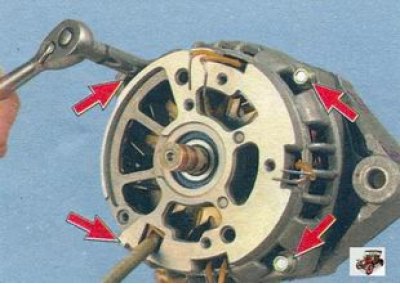
14. ...unscrew the four tie bolts, remove the washers...
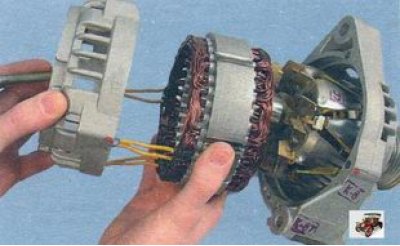
15. ...and, using a screwdriver, remove the generator cover from the contact ring side.
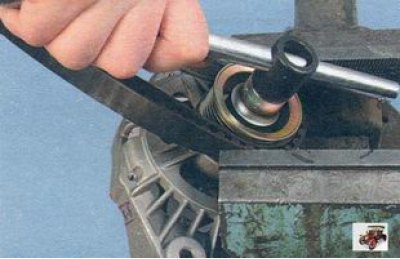
16. Clamp the generator pulley in a vice, having first placed some pads under it and holding the generator rotor from falling, and then unscrew the pulley mounting nut.
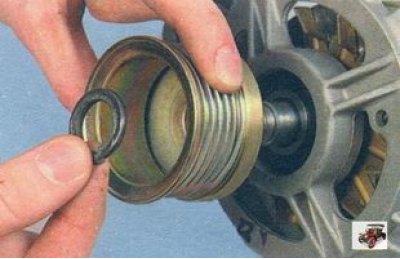
17. Remove the spring washer from the pulley and remove the pulley from the generator rotor shaft.
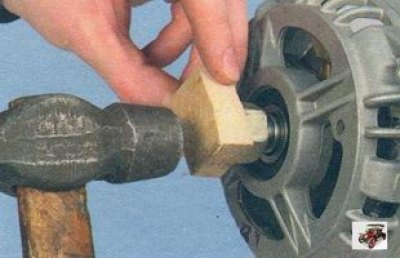
18. Screw the pulley mounting nut onto the rotor shaft and, using a wooden spacer, lightly tap the hammer to press the rotor shaft out of the generator cover bearing on the drive side.
19. Inspect the generator cover from the drive side, complete with bearing.
20. If, when rotating the generator cover bearing, there is play between the rings, rolling or jamming of the rolling elements, the protective rings are damaged or there are grease leaks, cracks are found in the cover, especially in the places where the generator is attached, it is necessary to replace the generator cover assembly with the bearing (the bearing in the cover is rolled).
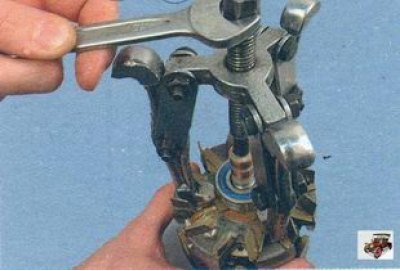
21. Check the ease of rotation of the bearing from the contact ring side. If, when rotating the bearing, there is play between the rings, rolling or jamming of the rolling elements, damaged protective rings or grease leaks, the bearing must be replaced. To do this, use a puller to press the bearing off the generator rotor shaft and press on a new bearing using a suitable mandrel, applying force to the inner ring of the bearing.
22. Inspect the generator cover from the contact ring side. If cracks are found, the generator cover must be replaced. Inspect the plastic bearing bushing; if damage or cracks are found, replace it.
23. Assemble and install the generator on the vehicle in the reverse order of removal.