



- inspection ditch or overpass;
- beard.
Removal
1. Prepare the car for work (see "Preparing the car for maintenance and repair").
2. Remove the front wheel (see "Wheel - replacement").
3. Remove the engine splash guard.
4. Unscrew the two bolts securing the ball joint to the steering knuckle (see "Ball joint of the rack - removal and installation").
Caution: When performing the following operation, be careful because the stabilizer is under tension.
5. Remove the bolt securing the stabilizer bar to the lever (see "Anti-roll bar - replacement of struts").
6. Using two 19 mm wrenches, unscrew the nut of the bolt securing the wishbone to the body bracket and remove the bolt.
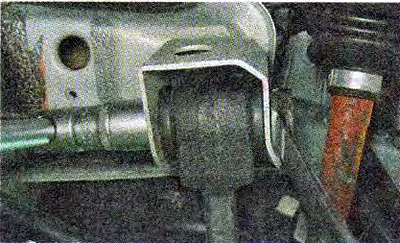
7. To minimize the misalignment of the steering axis caster angle when installing the lever, count and record the number of adjusting washers located at the rear end of the longitudinal brace.
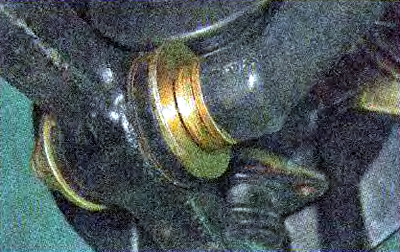
8. While holding the tensioner from turning with a 24 mm open-end wrench, use a socket wrench of the same size with a long handle to unscrew the nut at the rear end of the tensioner.
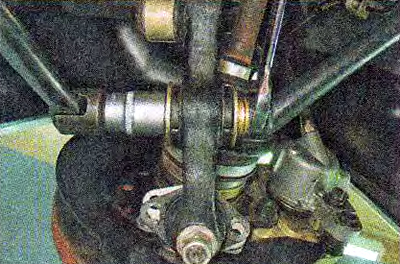
9. Remove the thrust washer from the rear end of the longitudinal tensioner.
10. Remove the lower arm assembly with the ball joint from the longitudinal strut.
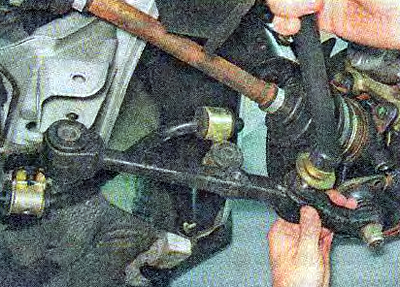
11. To avoid losing them, remove the thrust and adjusting washers from the tensioner.
12. If necessary, clamp the lever in a vice and press the ball joint pin out of it (see "Ball joint of the rack - removal and installation").
Installation
We install the lever in the reverse order.
Warning: When installing the adjusting washer, it is necessary that the chamfer on its inner edge faces the brace.
Recommendation. Finally tighten the rubber-to-metal hinge nuts only after the vehicle has been installed on the wheels.