
Car repair AvtoVAZ Car repair Renault Car repair Hyundai Car repair Ford Car repair Volkswagen Car repair Audi Car repair Chevrolet
English Русский
Български
Беларускі
Український
Српски
Hrvatski
Română
Polski
Slovenský
Magyar
articles sitemap contacts bookmark
LadaMan.ru


Kalina Granta Priora Vesta Largus XRAY
Granta 1 (2011-2023, VAZ-2190)

Transverse suspension arm — removal and installation (Granta 2190)

  • Main
  • Granta
  • Granta 1
  • Chassis (running gear)
  • Front suspension
  • Transverse suspension arm — removal and installation
0
Contents: Removal ⇣ Installation ⇣
To complete the work you will need:
  • inspection ditch or overpass;
  • beard.

Removal


1. Prepare the car for work ("Preparing the car for maintenance and repair").

2. Remove the front wheel ("Wheel - replacement").

3. Remove the engine splash guard.

4. Unscrew the two bolts securing the ball joint to the steering knuckle ("Ball joint of the rack - removal and installation").

Caution: When performing the following operation, be careful because the stabilizer is under tension.


5. Remove the bolt securing the stabilizer bar to the lever ("Anti-roll bar - replacement of struts").

6. Using two 19 mm wrenches, unscrew the nut of the bolt securing the wishbone to the body bracket and remove the bolt.
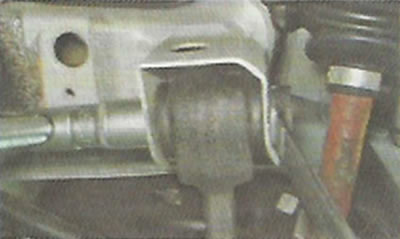
6. Using two 19 mm wrenches, unscrew the nut of the bolt securing the wishbone to the body bracket…


7. To minimize the misalignment of the steering axis caster angle when installing the lever, count and record the number of adjusting washers located at the rear end of the longitudinal brace.
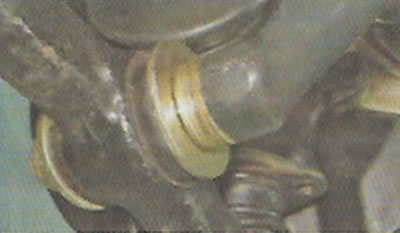
7. To minimize the misalignment of the steering axis caster angle when installing the lever, count…


Original publication on the website LADAMAN.RU


8. While holding the tensioner from turning with a 24 mm open-end wrench, use a socket wrench of the same size with a long handle to unscrew the nut at the rear end of the tensioner.
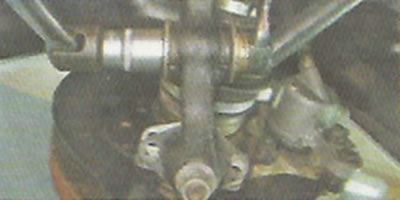
8. While holding the tensioner from turning with a 24 mm open-end wrench, use a socket wrench of…


9. Remove the thrust washer from the rear end of the longitudinal tensioner.

10. Remove the lower arm assembly with the ball joint from the longitudinal strut.
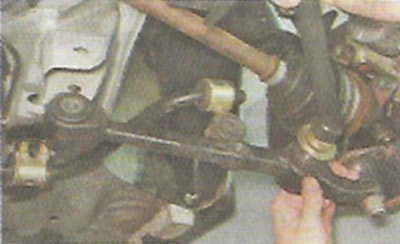
10. Remove the lower arm assembly with the ball joint from the longitudinal strut.


11. To avoid losing them, remove the thrust and adjusting washers from the tensioner.

12. If necessary, clamp the lever in a vice and press the ball joint pin out of it ("Ball joint of the rack - removal and installation").

Installation


We install the lever in the reverse order.

When installing the adjusting washer, it is necessary that the chamfer on its inner edge faces the tensioner.

Recommendation. Finally tighten the rubber-to-metal hinge nuts only after the vehicle has been installed on the wheels.


This article is available at russian, bulgarian, belarusian, ukrainian, serbian, croatian, romanian, polish, slovak, hungarian
This article has been reviewed: Polina Kudryashova
Share with friends:
◀ Previous
Lada Granta 1: Front suspension
Next ▶

Ball joint of the rack — removal and installation
Longitudinal suspension strut — removal and installation
Stretch mount bracket — removal and installation
Checking the technical condition of the front suspension
Description of the front suspension design
Wishbone suspension — replacement of rubber-metal hinges
Front suspension strut — removal and installation
Front suspension strut — disassembly and assembly
Anti-roll bar — replacement of struts
Anti-roll bar — removal, replacement of cushions and installation
More articles with information from manuals for Lada:

• Transverse suspension arm — removal and installation Lada Kalina Hatchback (2004-2013, VAZ-1119)
• Knocking in suspension and transmission Lada Priora 1 (2007-2018, VAZ-2170)
• Exhaust System Suspension — Replacement of Cushions Lada Vesta 1 (2015-2023, VAZ-2180)
• Front suspension — design description Lada Largus 1 (2012-2023)
• Troubleshooting Suspension and Steering Lada X-Ray 1 (2015-2022)
Link to this article in various formats
Reviews and comments of visitors
No comments yet


Add up two numbers: 31 + 11


Granta 1 (2011-2023) 
  • User manual
  • Governing bodies
  • Vehicle operation
  • Maintenance
  • Radio receiver
  • Radio receiver (option)
  • Power unit
  • Engine repair
  • Control system
  • Supply system
  • Cooling system
  • Exhaust system
  • Transmission
  • Clutch
  • Car gearbox
  • Drive shafts
  • Chassis (running gear)
  • Wheels, tires and hubs
  • Front suspension
  • Rear suspension
  • Steering
  • Brake system
  • Body and interior
  • Exterior (external elements)
  • Interior (internal elements)
  • Doors, locks and windows
  • Heating and ventilation
  • Electrical equipment
  • Equipment and devices
  • Power devices
  • Breakers and switches
  • Lighting and signaling
  • Electrical circuits
LadaMan.ru © 2018–2026 | Mobile version | About Lada | Sitemap: EN BG BY UA RS HR RO PL SK HU | Contacts with admin | | Add to bookmarks
Kalina Hatchback (2004-2013) | Kalina Sedan (2004-2013) | Granta 1 (2011-2023) | Priora 1 (2007-2018) | Vesta 1 (2015-2023) | Largus 1 (2012-2023) | X-Ray 1 (2015-2022) |
This site uses cookies to ensure everything runs smoothly.