
Car repair AvtoVAZ Car repair Renault Car repair Hyundai Car repair Ford Car repair Volkswagen Car repair Audi Car repair Chevrolet
English Русский
Български
Беларускі
Український
Српски
Hrvatski
Română
Polski
Slovenský
Magyar
articles sitemap contacts bookmark
LadaMan.ru


Kalina Granta Priora Vesta Largus XRAY
Granta 1 (2011-2023, VAZ-2190)

Front suspension strut — disassembly and assembly (Granta 2190)

  • Main
  • Granta
  • Granta 1
  • Chassis (running gear)
  • Front suspension
  • Front suspension strut — disassembly and assembly
0
Contents: Disassembly ⇣ Assembly ⇣
To complete the job, you will need suspension spring clamps and a suspension strut disassembly tool.

Disassembly


1. Remove the rack from the car ("Front suspension strut - removal and installation").

2. Remove the support plate from the rack and clamp the rack in a vice.
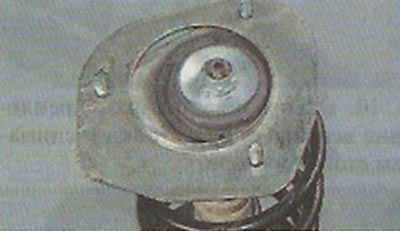
2. Remove the support plate from the rack and clamp the rack in a vice.


Warning! Be careful! The compressed spring has great force and when the tie breaks, it can straighten out and cause injury.


3. Install the tension springs on opposite sides and tighten the spring evenly, without distortions, until the load is removed from the upper support.
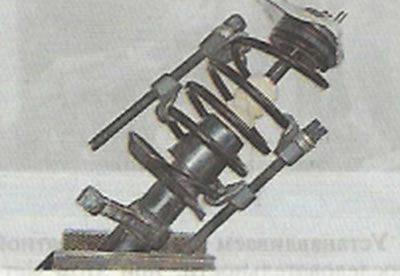
3. Install the tension springs on opposite sides and tighten the spring evenly, without…


4. Using a 6 mm Allen key to hold the shock absorber rod from turning, use a 22 mm key to unscrew its nut.
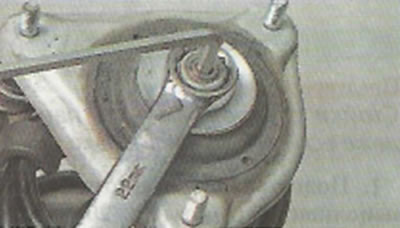
4. Using a 6 mm Allen key to hold the shock absorber rod from turning, use a 22 mm key to unscrew…


5. Remove the upper rebound stop limiting washer from the strut rod.
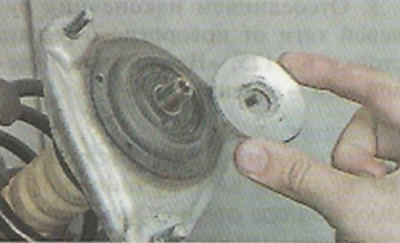


5. Remove the upper rebound stop limiting washer from the strut rod.


6. Remove the upper support from the rod.
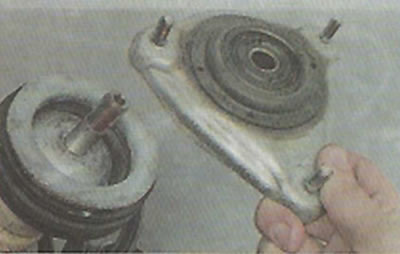
6. Remove the upper support from the rod.


7. Remove the bearing from the rack.
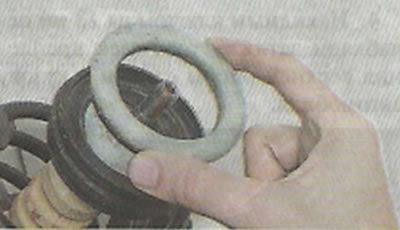
7. Remove the bearing from the rack.


8. Remove the upper spring cup from the rack.
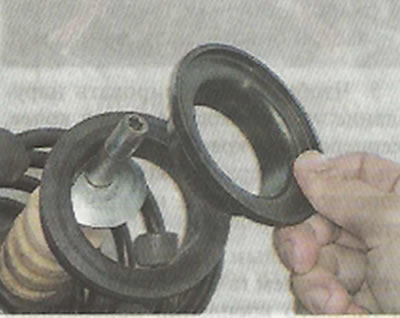
8. Remove the upper spring cup from the rack.


9. Remove the rubber gasket from the upper coil of the spring.
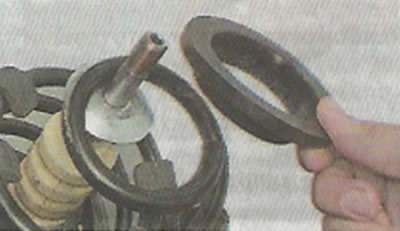


9. Remove the rubber gasket from the upper coil of the spring.


10. Remove the spring from the rack (without loosening the ties).
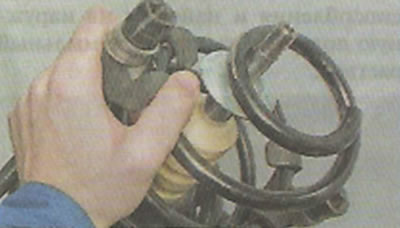
10. Remove the spring from the rack (without loosening the ties).


11. Remove the washer from the rod.
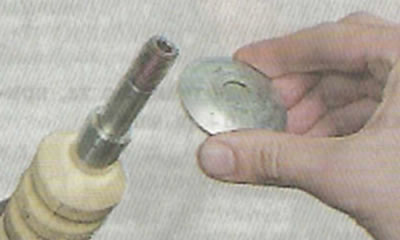
11. Remove the washer from the rod.


12. Remove the compression buffer together with the shock absorber rod protective cover.
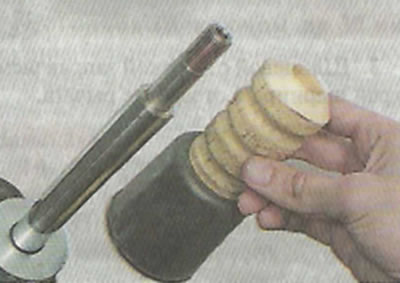
12. Remove the compression buffer together with the shock absorber rod protective cover.


13. To replace the spring, loosen the spring clamps.


Assembly


We assemble the front suspension strut in the reverse order.

Recommendation. Before assembling the rack, make sure the shock absorber is in good working order by manually extending and retracting the rod. If you feel dips, jerks, or hear extraneous sounds when moving the rod, replace the shock absorber. Check the integrity and serviceability of all elements installed on the rack. Replace a damaged or cracked shock absorber rod cover, damaged compression bump stop, cracked or weakened suspension spring. Front suspension springs are divided into classes according to their rigidity. The class of the spring is indicated by paint on the outside of one of its coils. The front suspension must be equipped with springs of the same class.


This article is available at russian, bulgarian, belarusian, ukrainian, serbian, croatian, romanian, polish, slovak, hungarian
This article has been reviewed: Polina Kudryashova
Share with friends:
◀ Previous
Lada Granta 1: Front suspension
Next ▶

Front suspension strut — removal and installation
Wishbone suspension — replacement of rubber-metal hinges
Transverse suspension arm — removal and installation
Ball joint of the rack — removal and installation
Longitudinal suspension strut — removal and installation
Anti-roll bar — replacement of struts
Anti-roll bar — removal, replacement of cushions and installation
Front Wheel Alignment Check
More articles with information from manuals for Lada:

• Front suspension strut — removal and installation Lada Kalina Hatchback (2004-2013, VAZ-1119)
• Replacing the front suspension strut Lada Priora 1 (2007-2018, VAZ-2170)
• Front suspension strut — removal and installation Lada Vesta 1 (2015-2023, VAZ-2180)
• Ball joint of the front suspension arm Lada Largus 1 (2012-2023)
• Front suspension telescopic strut — removal and installation Lada X-Ray 1 (2015-2022)
Link to this article in various formats
Reviews and comments of visitors
No comments yet


Add up two numbers: 35 + 17


Granta 1 (2011-2023) 
  • User manual
  • Governing bodies
  • Vehicle operation
  • Maintenance
  • Radio receiver
  • Radio receiver (option)
  • Power unit
  • Engine repair
  • Control system
  • Supply system
  • Cooling system
  • Exhaust system
  • Transmission
  • Clutch
  • Car gearbox
  • Drive shafts
  • Chassis (running gear)
  • Wheels, tires and hubs
  • Front suspension
  • Rear suspension
  • Steering
  • Brake system
  • Body and interior
  • Exterior (external elements)
  • Interior (internal elements)
  • Doors, locks and windows
  • Heating and ventilation
  • Electrical equipment
  • Equipment and devices
  • Power devices
  • Breakers and switches
  • Lighting and signaling
  • Electrical circuits
LadaMan.ru © 2018–2026 | Mobile version | About Lada | Sitemap: EN BG BY UA RS HR RO PL SK HU | Contacts with admin | | Add to bookmarks
Kalina Hatchback (2004-2013) | Kalina Sedan (2004-2013) | Granta 1 (2011-2023) | Priora 1 (2007-2018) | Vesta 1 (2015-2023) | Largus 1 (2012-2023) | X-Ray 1 (2015-2022) |
This site uses cookies to ensure everything runs smoothly.