
Car repair AvtoVAZ Car repair Renault Car repair Hyundai Car repair Ford Car repair Volkswagen Car repair Audi Car repair Chevrolet
English Русский
Български
Беларускі
Український
Српски
Hrvatski
Română
Polski
Slovenský
Magyar
articles sitemap contacts bookmark
LadaMan.ru


Kalina Granta Priora Vesta Largus XRAY
Kalina Sedan (2004-2013, VAZ-1118) Kalina Hatchback (2004-2013, VAZ-1119)

Disassembly and repair of a telescopic stand (Kalina 1118)

  • Main
  • Kalina
  • Kalina Sedan
  • Chassis (running gear)
  • Front suspension
  • Disassembly and repair of a telescopic stand
0
To disassemble and repair the telescopic strut on the car, you will need: clamps for suspension springs, a 17 key.

1. Remove the telescopic strut from the vehicle (see "Removal and installation a telescopic stand").
1. Remove the telescopic strut from the vehicle (see «Removal and installation a telescopic stand»).


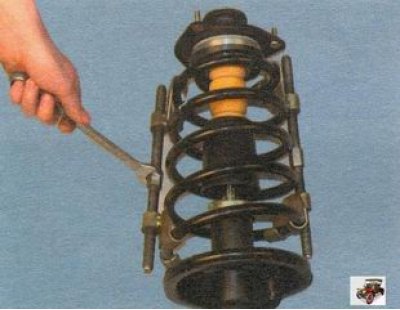
2. Clamp the telescopic stand in a vice, compress the spring with special clamps for compressing springs...
2. Clamp the telescopic stand in a vice, compress the spring with special clamps for compressing…


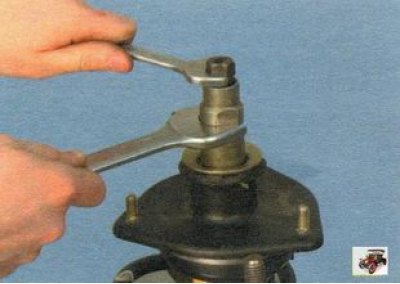
3. ...and unscrew the shock absorber rod nut using the tool, holding the shock absorber rod from turning.
3. ...and unscrew the shock absorber rod nut using the tool, holding the shock absorber rod from…


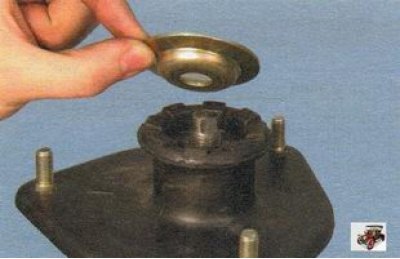
4. Remove the upper support travel limiting washer of the telescopic strut.


4. Remove the upper support travel limiting washer of the telescopic strut.


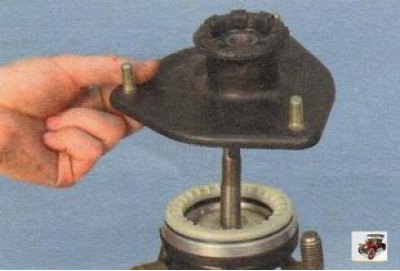
5. Remove the upper support of the telescopic stand.
5. Remove the upper support of the telescopic stand.


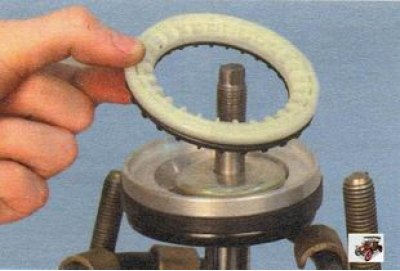
6. Remove the upper support bearing of the telescopic strut...
6. Remove the upper support bearing of the telescopic strut...


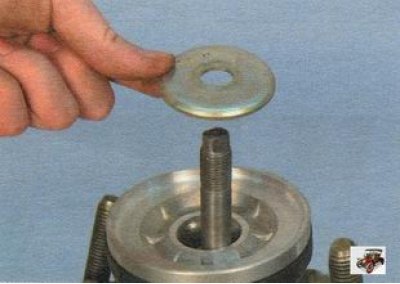
7. ... limiter of compression stroke of the upper support of the telescopic strut...

7. ... limiter of compression stroke of the upper support of the telescopic strut...
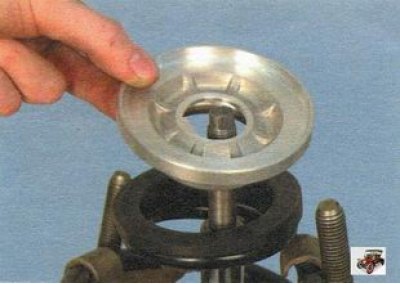

8. ...the upper cup of the spring...


8. ...the upper cup of the spring...


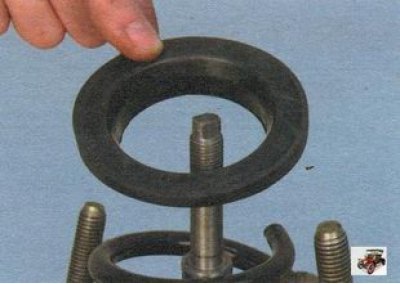
9. ...the upper insulating spring gasket...
9. ...the upper insulating spring gasket...


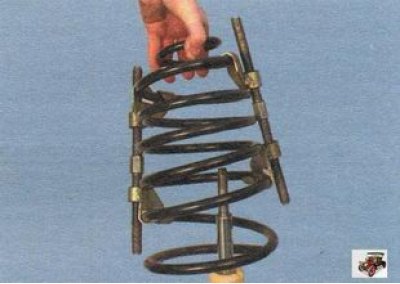
10. ...and remove the spring from the shock absorber strut.
10. ...and remove the spring from the shock absorber strut.


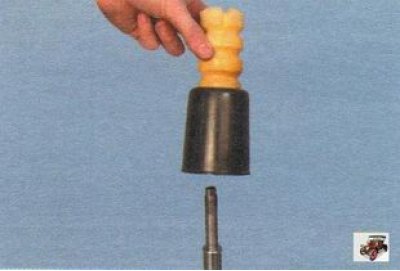
11. Remove the compression buffer and protective cover from the shock absorber rod.
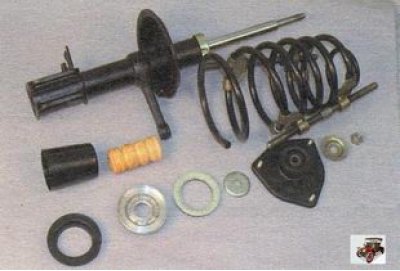
11. Remove the compression buffer and protective cover from the shock absorber rod.


12. Inspect the telescopic stand parts.


13. Replace the damaged compression buffer and damaged protective cover.

14. Replace the bearing if it has axial movement in the support housing or if it jams when turning.

15. Replace the upper support if you notice signs of aging of its rubber.

16. Replace the spring if cracks are found or the coils are deformed. To compress the spring, press it three times until the coils touch. Then apply a load of 3356 N (342 kgf) to the spring. Compress the spring along its axis, the support surfaces should correspond to the surfaces of the support cups on the telescopic stand. If the length of the spring with brown marking (class A) is less than 230 mm, replace it with a blue marking (class B).

17. Assemble the telescopic strut and install it on the vehicle in the reverse order of disassembly. Place the protective cover on the annular groove of the compression stroke buffer. Install the spring so that its ends rest against the protrusions of the lower and upper cups.

18. Final tighten the shock absorber rod nut with the vehicle parked on the surface.


This article is available at russian, bulgarian, belarusian, ukrainian, serbian, croatian, romanian, polish, slovak, hungarian
This article has been reviewed: Daniil Markelov
Share with friends:
◀ Previous
Lada Kalina Sedan: Front suspension
Next ▶

Removal and installation a telescopic stand
Checking the technical condition of the front suspension parts
Front suspension faults, their causes and solutions
Features of the front suspension design
Replacing the ball joint
Replacing the front suspension arm
Replacing the stretcher and the stretcher mounting bracket
Replacement of anti-roll bar components
Replacing the front hub bearing
More articles with information from manuals for Lada:

• Operating and repair materials Lada Granta 1 (2011-2023, VAZ-2190)
• Useful tips for engine repair Lada Priora 1 (2007-2018, VAZ-2170)
• Operating and repair materials Lada Vesta 1 (2015-2023, VAZ-2180)
• How to Repair Broken Threads Lada Largus 1 (2012-2023)
• Front suspension telescopic strut — removal and installation Lada X-Ray 1 (2015-2022)
Link to this article in various formats
Reviews and comments of visitors
No comments yet


Add up two numbers: 49 + 18


Kalina Sedan (2004-2013) 
  • General information
  • Vehicle device
  • Operation and maintenance
  • Faults en route
  • Power unit
  • Engine repair
  • Cooling and lubrication system
  • Exhaust system
  • Supply system
  • Ignition and control
  • Transmission
  • Clutch and drive shafts
  • Car gearbox
  • Chassis (running gear)
  • Front suspension
  • Rear suspension
  • Steering
  • Brake system
  • Body and interior
  • Exterior (external elements)
  • Interior (internal elements)
  • Doors, locks and windows
  • Electrical equipment
  • Equipment and devices
  • Power devices
  • Lighting and signaling
  • Heating and ventilation
Kalina Hatchback (2004-2013) 
  • General information
  • Vehicle Details
  • Maintenance
  • Troubleshooting
  • Power unit
  • Engine repair
  • Cooling system
  • Supply system
  • Control system
  • Exhaust system
  • Transmission
  • Clutch
  • Car gearbox
  • Drive shafts
  • Chassis (running gear)
  • Wheels and tires
  • Front suspension
  • Rear suspension
  • Steering
  • Brake system
  • Body and interior
  • Exterior (external elements)
  • Interior (internal elements)
  • Doors, locks and windows
  • Electrical equipment
  • Equipment and devices
  • Power devices
  • Lighting and signaling
  • Electrical circuits
LadaMan.ru © 2018–2026 | Mobile version | About Lada | Sitemap: EN BG BY UA RS HR RO PL SK HU | Contacts with admin | | Add to bookmarks
Kalina Hatchback (2004-2013) | Kalina Sedan (2004-2013) | Granta 1 (2011-2023) | Priora 1 (2007-2018) | Vesta 1 (2015-2023) | Largus 1 (2012-2023) | X-Ray 1 (2015-2022) |
This site uses cookies to ensure everything runs smoothly.