
Removing
1. We prepare the car for work (see «Preparing the car for maintenance and repair»).
2. Remove the front wheel from the side of the tip to be replaced (see «Wheel - replacement»).
3. With a metal brush, we clean the threaded connections of the tip from dirt and treat them with a penetrating lubricant.
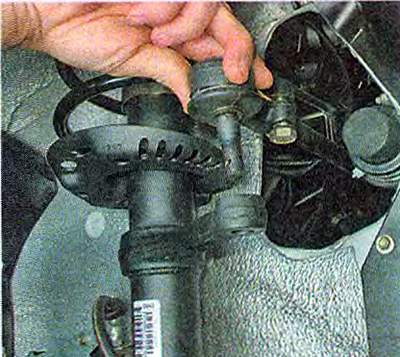
4. Using pliers, we straighten and remove the cotter pin from the hole of the ball pin of the thrust.
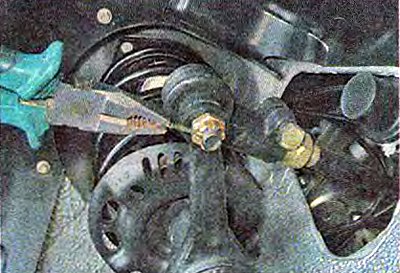
5. Using a 19 mm spanner, unscrew the castle nut of the finger.
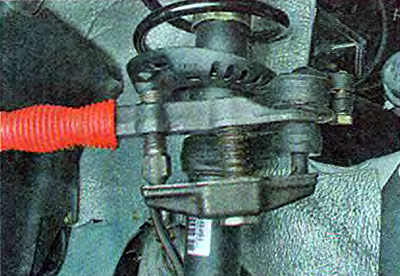
6. With a puller, we press the finger out of the hole in the steering knuckle of the front suspension strut.
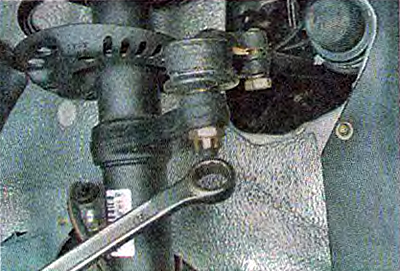
7. Using a 17 mm socket wrench, we loosen the tightening of the coupling bolt of the tip.
8. Use a slotted screwdriver to open the flange of the tip.
9. Rotating the outer tip and counting the number of revolutions, we screw the tip from the rod (if the adjusting sleeve starts to rotate with the tip, hold it with a 27 mm open-end wrench).
Comment. We count the number of revolutions made in order to approximately set the wheel alignment during assembly (e.g. to get to the control stand).
Installation
1. We cover the threaded part of the new tip with Litol-24 grease or similar.
2. We screw a new tip onto the adjusting sleeve, holding it with a 27 mm open-end wrench.
Comment. To approximately maintain the wheel alignment, we wrap the new tip into the coupling for the same number of revolutions that was made when unscrewing the old tip.
3. We insert a finger into the hole of the rotary arm of the rack and wrap the castellated nut.
4. Tighten the finger nut to a torque of 27.1-33.4 Nm (2.8-3.4 kgf·m) and turn it until the hole in the pin aligns with the nearest slot in the nut.
5. Cotter nut (insert the cotter pin into the finger and part the ends of the cotter pin in different directions).
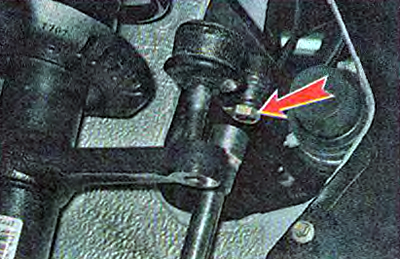
6. Tighten the coupling bolt of the flange of the tip 19.1-30.9 Nm (2.0-3.2 kgf·m).
Warning! After replacing the tip, it is necessary to adjust the toe-in of the wheels at the service station.