
Comment. On cars of the first releases, the instrument panel can be dismantled by first removing the instrument panel and other removable parts from it. On late production cars (equipped with a front passenger airbag) the instrument panel can only be removed assembled with the heater.
Removing
1. We prepare the car for work and disconnect the terminal from the negative terminal of the battery (see «Preparing the car for technical inspection and repair»).
2. Drain the coolant from the engine (see «Coolant - replacement»).
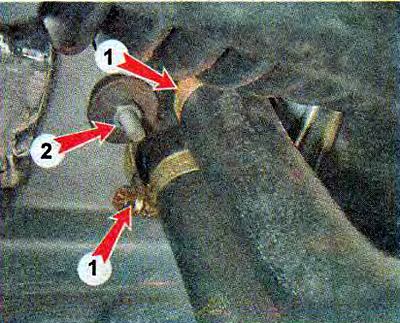
3. Having loosened the clamps 1, disconnect the hoses of the cooling system from the pipes of the heater radiator. Using a 10 mm socket wrench, unscrew the nut 2 that fastens the heater radiator to the partition of the engine compartment.
4. Remove the filter element of the cabin ventilation filter (see «Cabin ventilation and heating filter - replacement»).
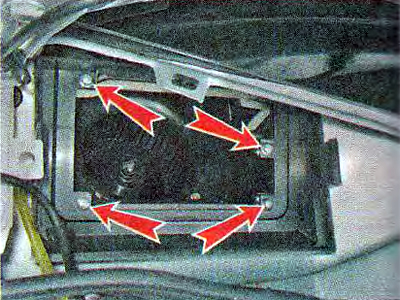
5. Using a Phillips screwdriver, unscrew the four screws securing the filter housing.
6. Remove the filter housing from the air intake box.
7. Remove the lining of the floor tunnel (see «Floor tunnel lining - removal and installation» and steering column pads (see «Decorative overlays of a steering column - removal and installation»).
8. If the car has an audio head unit (radio tape recorder) remove it in accordance with the installation instructions.
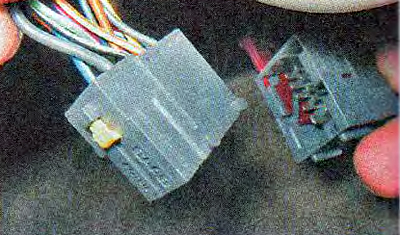
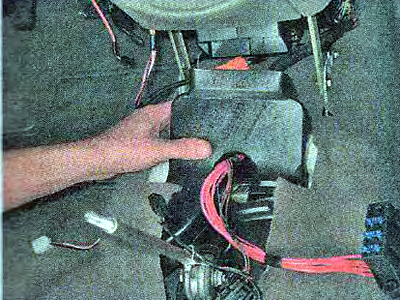
9. Remove the wiring harness from under the shelf for small items and disconnect the pads.
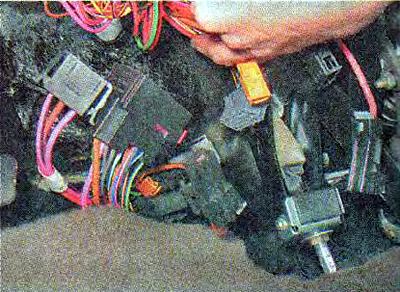
10. Similarly, we disconnect the pads of the instrument panel harnesses located under the fuse and relay mounting block (car wiring diagrams).
Comment. The wire blocks differ in the shape and number of pins, so it is impossible to confuse them. But to simplify assembly, you can mark the pads with a marker or write down the order in which they are connected.
11. Using a 10 mm socket wrench, unscrew the nut securing the air duct.
12. Raising the air duct, disengage it from the pin and disconnect it from the heater.
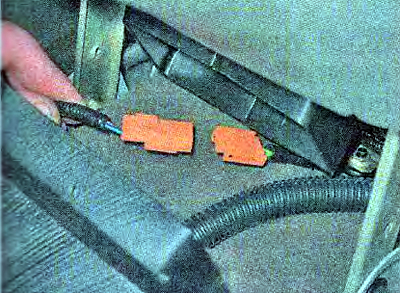
13. We disconnect the wire blocks laid under the air duct.
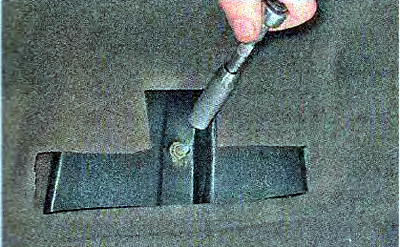
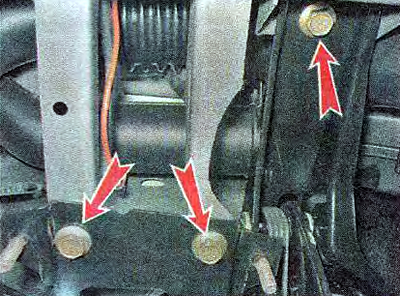
14. Using a 13 mm wrench, unscrew the two bolts securing the instrument panel console brackets to the floor tunnel (second bolt on the right side of the tunnel).
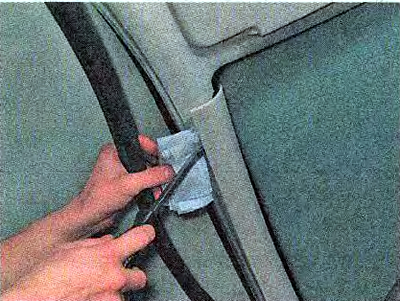
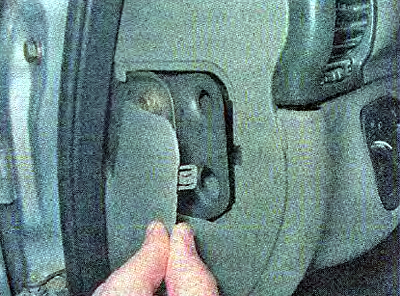
15. Having disconnected the seals and prying with a screwdriver, remove the lining from the A-pillars.
16. Near the pillars of the body, with a cross-tip screw, we unscrew the two self-tapping screws for fastening the instrument panel lining.
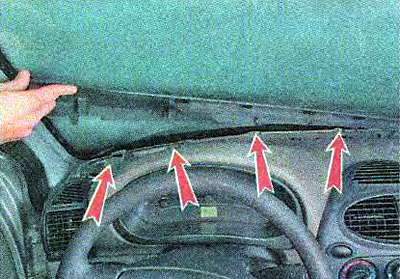
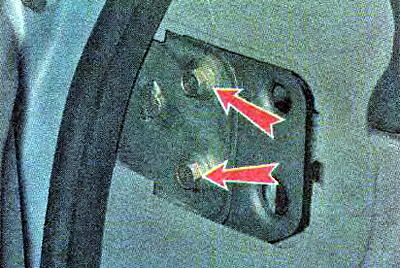
17. Overcoming the resistance of the holders, remove the top trim of the instrument panel. Using a 10 mm socket wrench, unscrew seven nuts (located under the removed lining) fastening the instrument panel to the body.
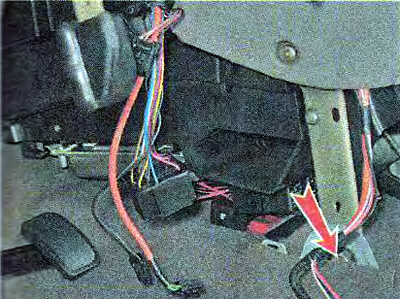
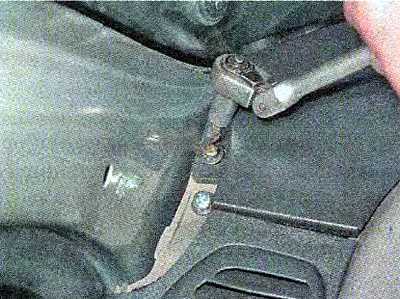
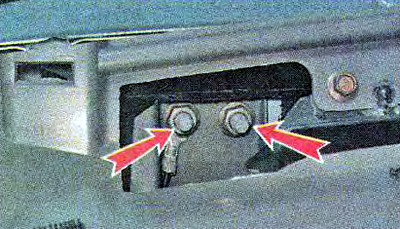
18. Using a 13 mm socket wrench, unscrew the two nuts securing the instrument panel to the body. Remove the wire end from one of the studs «masses».
19. Disconnect the steering column from the instrument panel beam and lower it onto the seat or remove the steering column (see «Steering column - removal and installation»).
20. Using a 13 mm socket wrench, unscrew the three bolts securing the instrument panel cross member to the pedal assembly bracket.
21. Prying with a slotted screwdriver, remove the right and left side trims of the instrument panel.
22. Using a 13 mm socket wrench, unscrew the bolts securing the cross member of the instrument panel (two on each side).
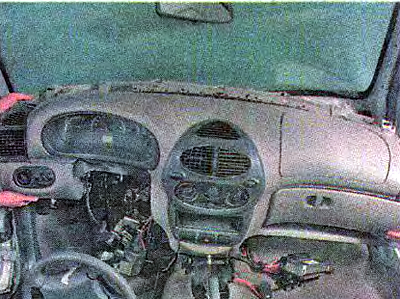
23. Remove the instrument panel assembly with the heater.
Installation
We install the assembled instrument panel assembly with the heater in reverse order.