
The pads must be replaced in the following cases:
- the thickness of the friction linings is less than the permissible value;
- the surface of the pads is oiled;
- the friction lining is loosely connected to the base;
- linings have deep grooves and chips.
You will need: keys «at 13», «at 17», flat blade screwdriver, chisel, hammer.
1. Disconnect the wire from the terminal «minus» battery.
2. Brake the vehicle with the parking brake and place chocks under the rear wheels.
3. Remove a forward wheel, clear the brake mechanism of dirt and take out a rubber sealant together with a hose from an arm.
4. If the brake fluid level in the master cylinder reservoir is at the mark «MAX» or approaches it, pump some of the fluid out of the tank. Otherwise, it will overflow when installing new pads.
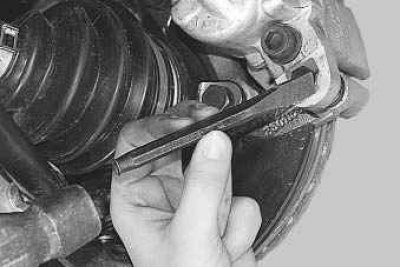
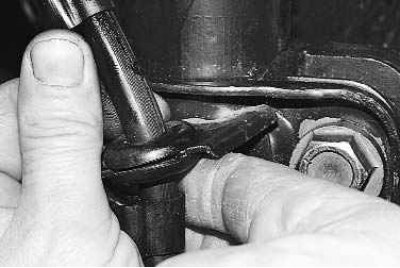
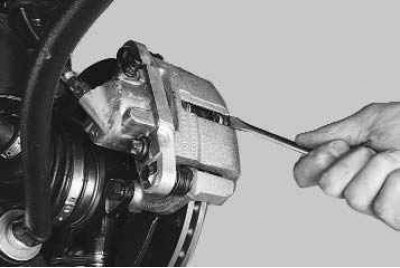
5. Use a screwdriver to pry off the angle of the lower bolt lock washer with a chisel.
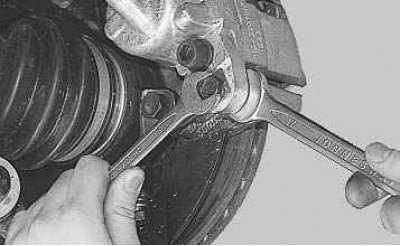
6. Key «at 13» unscrew the lower bolt of fastening of the case of a bracket, holding a wrench «at 17» guide pin for the hexagon.
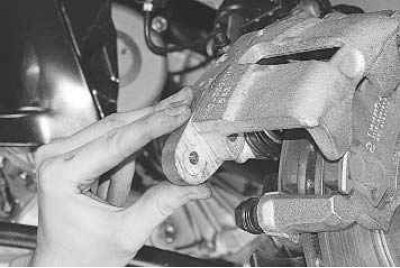
7. Turn the caliper body up around the axis of the upper guide pin and remove the brake pads.
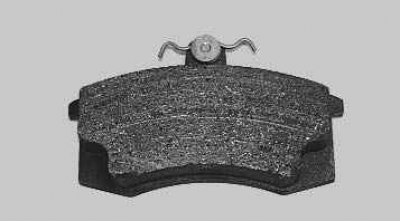
Note. The surface of the friction linings should not be oily, it should not have deep scratches and chips. The pad must be firmly connected to the base of the block.
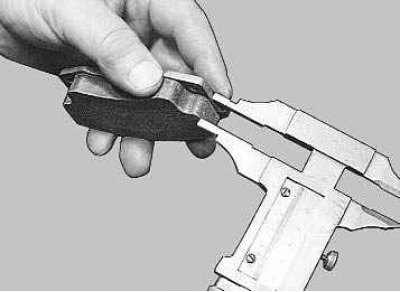
8. Check the thickness and condition of the friction linings of the brake pads.
9. Clean the brake parts from dirt and rust, especially the seats of the brake pads. Do this carefully so as not to damage the protective cover of the cylinder.
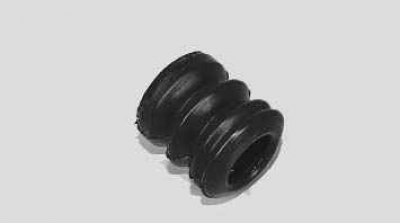
Note. Whenever you replace the brake pads, be sure to check the condition of the protective rubber boots of the guide pin and the movement of the caliper relative to the brake pad guide. If movement is difficult, lubricate the caliper guide pins with grease. To do this, remove the guide pin..
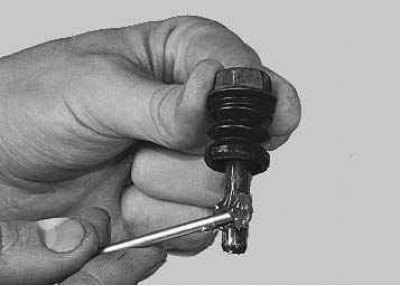
Note.... lubricate it with UNIOL-1 grease and put the grease into the inner cavity of the boot. Install the pin in the shoe guide in the reverse order of removal. If there are signs of rubber aging, replace the guide pin guards.
10. When installing new pads, press the piston into the cylinder. To do this, install the worn brake pads in place and lower the caliper housing. Using a screwdriver or spatula to press the outer pad and leaning on the caliper, gently press the piston into the cylinder.
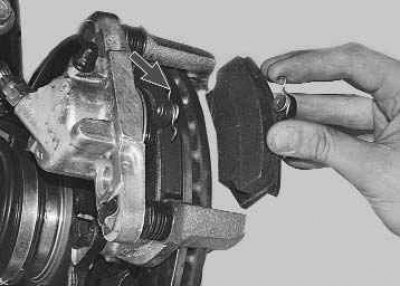
11. Install new brake pads. Compression springs must be installed parallel to the top edge of the pads (brake caliper removed for clarity).
12. Turn the bracket body down and screw in the lower mounting bolt, holding the guide pin by the hexagon with a wrench.
13. Bend the tab of the lock washer. Install the wheel and lower the vehicle to the ground, then press the brake pedal several times to set the piston to the working position. Check the brake fluid level in the reservoir and top up if necessary.
Note. After replacing worn out brake pads with new ones, do not rush to immediately go to busy highways. It is possible that at the very first intensive braking you will be unpleasantly surprised by the low efficiency of the brakes, although the pads were branded. Brake discs also wear out, and new pads only touch them at the edges, with little to no braking. Choose a quiet street or passage without cars and slow down gently several times so that the pads get used and begin to fit the entire surface. At the same time, evaluate the effectiveness of the brakes. Try not to brake sharply for at least the first hundred kilometers. With strong heating of unprocessed pads, the top layer of their pads burns, and the brakes will not be as effective as possible for a long time.