
Car repair AvtoVAZ Car repair Renault Car repair Hyundai Car repair Ford Car repair Volkswagen Car repair Audi Car repair Chevrolet
English Русский
Български
Беларускі
Український
Српски
Hrvatski
Română
Polski
Slovenský
Magyar
articles sitemap contacts bookmark
LadaMan.ru


Kalina Granta Priora Vesta Largus XRAY
Kalina Sedan (2004-2013, VAZ-1118) Kalina Hatchback (2004-2013, VAZ-1119)

Replacing the rear shock absorber and rear suspension spring (Kalina 1118)

  • Main
  • Kalina
  • Kalina Sedan
  • Chassis (running gear)
  • Rear suspension
  • Replacing the rear shock absorber and rear suspension spring
0
To replace the rear shock absorber and rear suspension spring on your car, you will need: a 6 mm wrench, a 17 mm open-end wrench, and two 19 mm wrenches.

1. Fold down the rear seat on the appropriate side (see "Folding the rear seat").
1. Fold down the rear seat on the appropriate side (see «Folding the rear seat»).


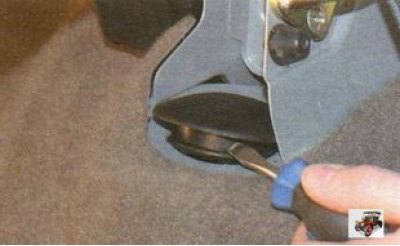
2. Use a screwdriver to pry up the rubber plug and remove it from its installation location.
2. Use a screwdriver to pry up the rubber plug and remove it from its installation location.


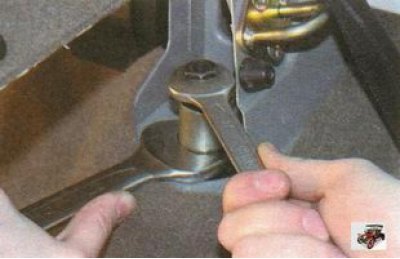
3. Unscrew the upper nut of the rear shock absorber.
3. Unscrew the upper nut of the rear shock absorber.


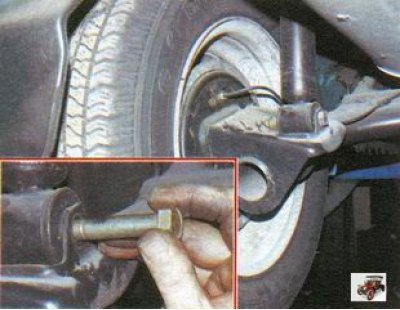
4. Raise the rear of the vehicle and remove the lower rear shock absorber mounting nut. Remove the bolt.


5. Remove the lower end of the shock absorber from the bracket and remove the rear shock absorber with the spring.
5. Remove the lower end of the shock absorber from the bracket and remove the rear shock absorber…


6. Remove the rear suspension spring insulation pad in the wheel well.
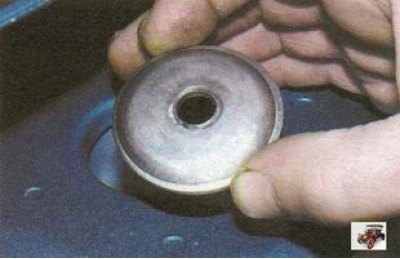
6. Remove the rear suspension spring insulation pad in the wheel well.


7. Remove the support washer from inside the passenger compartment.
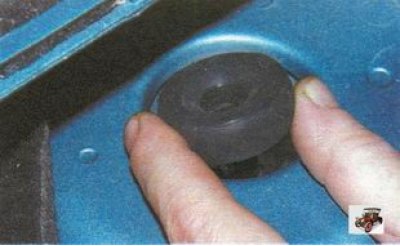
7. Remove the support washer from inside the passenger compartment.


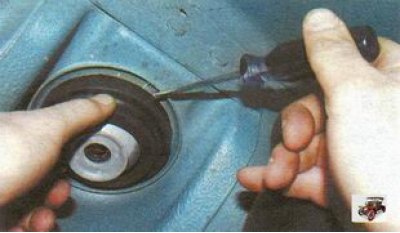
8. Remove the upper shock absorber cushion from the hole in the support.


9. Remove the spring from the shock absorber.
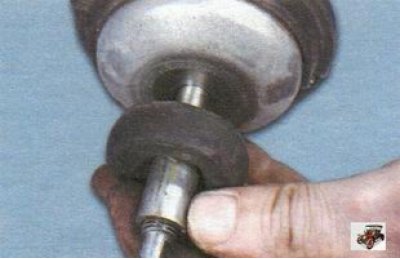
9. Remove the spring from the shock absorber.


10. Remove the bushing and lower cushion from the rear shock absorber rod.
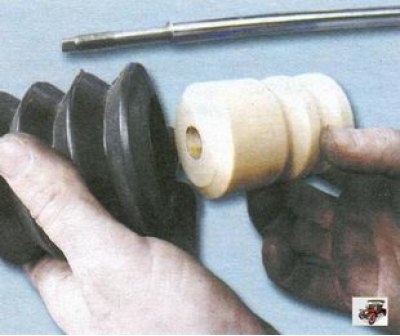
10. Remove the bushing and lower cushion from the rear shock absorber rod.


11. Remove the boot from the rear shock absorber and take the compression buffer out of the boot.

12. Replace the defective silent block of the lower mount of the rear shock absorber.

13. Replace torn or loose cushions.

14. Replace the torn shock absorber boot. When replacing the boot, remove the cover from it.

15. Replace the damaged or destroyed compression buffer.

16. Replace any torn or loose insulating gasket.

17. Replace the shock absorber spring if cracks are found or the coils are deformed.
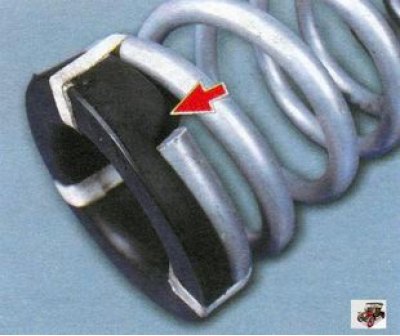
17. Replace the shock absorber spring if cracks are found or the coils are deformed.


18. First install the insulating gasket on the shock absorber spring so that the end of the spring rests against the protrusion of the gasket. Secure the gasket to the spring with electrical tape to prevent it from slipping off when installing the shock absorber spring.


19. Install the spring on the shock absorber so that its end rests against the protrusion of the lower cup.
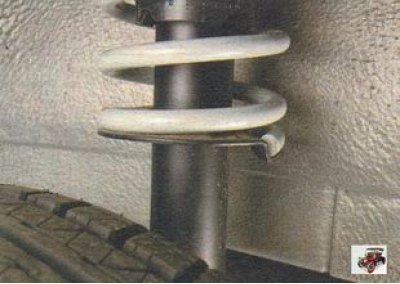
19. Install the spring on the shock absorber so that its end rests against the protrusion of the…


20. Install the rear shock absorber on the vehicle in the reverse order of removal. The lower end of the shock absorber spring should be facing the wheel on both the left and right shock absorbers.

21. Final tighten the nuts of the upper and lower shock absorber mounts with the vehicle on the ground. After lowering the car to the ground, rock it vigorously several times. Tighten the nut of the lower shock absorber mount to the beam with a torque of 68-84 N·m (6.8-8.4 kgf·m), the nut of the upper shock absorber mount with a torque of 51-63 N·m (5.1-6.3 kgf·m). After 100 km of running, tighten these threaded connections again with the required torques.


This article is available at russian, bulgarian, belarusian, ukrainian, serbian, croatian, romanian, polish, slovak, hungarian
This article has been reviewed: Daniil Markelov
Share with friends:
◀ Previous
Lada Kalina Sedan: Rear suspension
Next ▶

Rear suspension faults, their causes and solutions
Design features, rear suspension device
Replacing the rear hub bearing
Replacing the rear suspension beam
Checking and adjusting wheel alignment angles
More articles with information from manuals for Lada:

• Shock absorber and spring rear suspension — removal and installation Lada Granta 1 (2011-2023, VAZ-2190)
• Replacing the shock absorber and rear suspension spring Lada Priora 1 (2007-2018, VAZ-2170)
• Description of the rear suspension design Lada Vesta 1 (2015-2023, VAZ-2180)
• Rear shock absorber — removal and installation Lada Largus 1 (2012-2023)
• Rear shock absorber — removal and installation Lada X-Ray 1 (2015-2022)
Link to this article in various formats
Reviews and comments of visitors
No comments yet


Add up two numbers: 22 + 26


Kalina Sedan (2004-2013) 
  • General information
  • Vehicle device
  • Operation and maintenance
  • Faults en route
  • Power unit
  • Engine repair
  • Cooling and lubrication system
  • Exhaust system
  • Supply system
  • Ignition and control
  • Transmission
  • Clutch and drive shafts
  • Car gearbox
  • Chassis (running gear)
  • Front suspension
  • Rear suspension
  • Steering
  • Brake system
  • Body and interior
  • Exterior (external elements)
  • Interior (internal elements)
  • Doors, locks and windows
  • Electrical equipment
  • Equipment and devices
  • Power devices
  • Lighting and signaling
  • Heating and ventilation
Kalina Hatchback (2004-2013) 
  • General information
  • Vehicle Details
  • Maintenance
  • Troubleshooting
  • Power unit
  • Engine repair
  • Cooling system
  • Supply system
  • Control system
  • Exhaust system
  • Transmission
  • Clutch
  • Car gearbox
  • Drive shafts
  • Chassis (running gear)
  • Wheels and tires
  • Front suspension
  • Rear suspension
  • Steering
  • Brake system
  • Body and interior
  • Exterior (external elements)
  • Interior (internal elements)
  • Doors, locks and windows
  • Electrical equipment
  • Equipment and devices
  • Power devices
  • Lighting and signaling
  • Electrical circuits
LadaMan.ru © 2018–2026 | Mobile version | About Lada | Sitemap: EN BG BY UA RS HR RO PL SK HU | Contacts with admin | | Add to bookmarks
Kalina Hatchback (2004-2013) | Kalina Sedan (2004-2013) | Granta 1 (2011-2023) | Priora 1 (2007-2018) | Vesta 1 (2015-2023) | Largus 1 (2012-2023) | X-Ray 1 (2015-2022) |
This site uses cookies to ensure everything runs smoothly.