
Removing
1. We prepare the car for work («Preparing the car for maintenance and repair»).
2. Remove the upper front timing belt cover («Timing Belt - Checking Condition»).
Advice. If you remove the timing belt not for replacement, mark the direction of its rotation with a marker. When assembling, it should be installed in accordance with the label.
3. Remove the front right wheel («Wheel - replacement») and put the car on a secure stand.
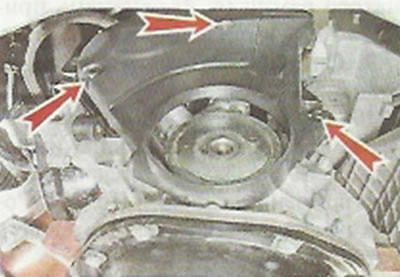
4. Remove the right side of the engine mudguard («Power unit mounts - replacement»).
5. Remove the alternator drive belt («Alternator drive belt - replacement»).
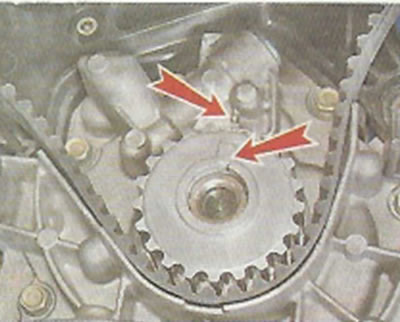
6. Using a 17 mm socket wrench, turn the crankshaft until the marks on the camshaft pulley align with the mark on the rear cover of the timing belt.
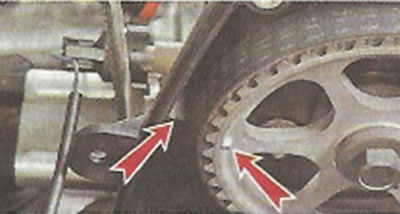
Comment. This position will correspond to the position of the crankshaft at TDC on the compression stroke of the first cylinder (see fig., p. 35). It is not allowed to rotate the crankshaft by the camshaft pulley bolt. When performing the following operation, the crankshaft can be held with a slotted screwdriver by the flywheel ring gear by removing the rubber plug installed in the upper part of the clutch housing. Also, the crankshaft pulley bolt can be unscrewed if the assistant engages a higher gear and presses the brake pedal. However, the crankshaft may rotate slightly. Therefore, you need to re-verify that all labels match.
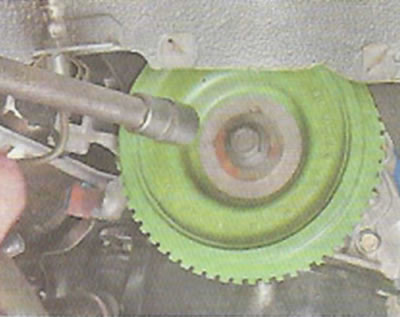
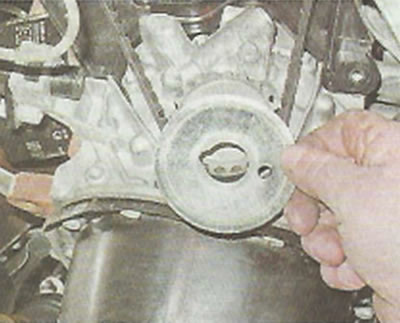
7. Using a 17 mm socket wrench with an extension, unscrew the bolt securing the crankshaft pulley and remove the pulley.
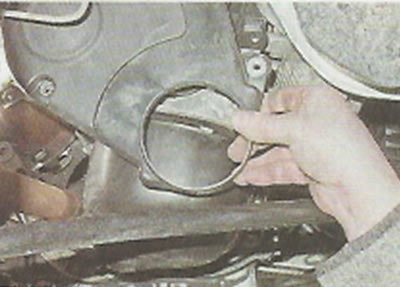
8. With a 5 mm hex wrench, unscrew the three bolts securing the lower front cover of the timing belt.
9. Remove the cover.
10. Remove the restrictive washer from the crankshaft.
11. Wrench 15 mm. by turning the bolt of the automatic tensioner half a turn counterclockwise, we loosen the tension of the timing belt.
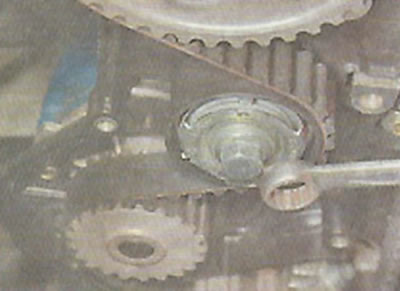
12. Remove the timing belt
Recommendation. After removing the belt, check the condition of the tension roller («Timing belt roller - removal and installation»).
Installation
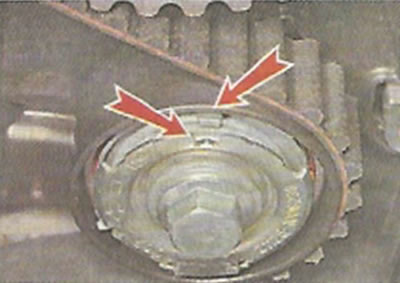
1. We put on a new belt, laying its branches in accordance with the pattern (With. 35), and making sure that the mark on the crankshaft sprocket is opposite the lug made on the oil pump housing.
2. We put the belt on the camshaft pulley so that the front branch is stretched. Without letting the belt loosen, we put it on the pump pulley and on the tensioner pulley.
3. With a puller for retaining rings, turn the tensioner in the direction of the arrows until the marks on it align...
... and with a 15 mm key we tighten the bolt of its fastening with a moment of 33.2-41.2 N·m (3.4-4.2 kgf·m).

4. If at the same time the camshaft has turned, then loosen the belt and reinstall it by turning the incorrectly installed camshaft (allowable mismatch of marks within one tooth of the camshaft pulley).
5. Turning the crankshaft two turns (behind the flywheel ring or by screwing the pulley mounting bolt into the shaft). we are convinced by the coincidence of the marks that the mutual position of the shafts is not violated. If necessary, aligning the marks, repeat the installation of the belt.
6. After combining all the marks, we install the parts removed from the car in place.