



To complete the work you will need an assistant, as well as:
- a special key for the bleed nipple or an 8 mm open-end wrench;
- clear vinyl tube of suitable diameter;
- brake fluid drain container;
- new brake fluid recommended by the manufacturer (see "Reference data").
- inspection ditch or overpass (desirable).
Sequence of execution
1. Prepare the car for work (see "Preparing the car for maintenance and repair").
2. Disconnect the wiring harness connector from the brake fluid low level sensor connector and remove the reservoir cap (see "Low Brake Fluid Sensor - Checking and Replacing").
Warning! To prevent air from entering the hydraulic drive of the brake system, when bleeding the drive, make sure that the brake fluid level in the reservoir does not fall below the MIN mark.
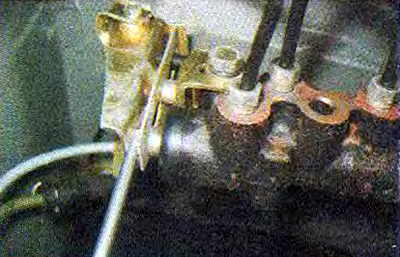
Warning! If the rear axle of the vehicle is suspended (the car is on a lift or supported by stands), the pressure regulator will block the path of brake fluid to the rear wheel cylinders. Therefore, to bleed the rear wheel cylinders, it is necessary to open the regulator valve.
3. To open the pressure regulator valve, insert the blade of a slotted screwdriver between the lever and the plate, pressing the regulator stem down.
4. Clean the nipple of the rear right wheel brake cylinder and the surface around it from dirt.
5. Remove the protective rubber cap from the bleed nipple.
6. Put a special or 8 mm open-end wrench on the bleed nipple, and then a transparent vinyl tube (the diameter of the tube should be such that it fits tightly on the fitting). We lower the other end of the tube into a transparent container partially filled with brake fluid.
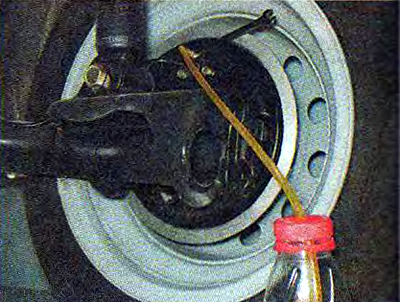
7. The assistant presses the brake pedal several times and after the last press holds the pedal in the lower position.
8. After loosening the nipple, unscrew it approximately half a turn until liquid begins to come out of the nipple.
(Original text is available on the website: «www.ladaman.ru»)
9. After the brake fluid stops coming out of the tube, tighten the fitting.
10. The assistant presses the pedal several times again and holds it in the pressed position.
11. Repeat the steps described in paragraph. 7 and 8 (see above).
12. Continue bleeding until the brake fluid with air bubbles stops escaping from the cylinder nipple, after which we finally tighten the nipple.
13. Remove the vinyl tube and open-end wrench from the fitting and put a protective rubber cap on the fitting.
14. Next, we bleed the brake cylinder of the front left wheel.
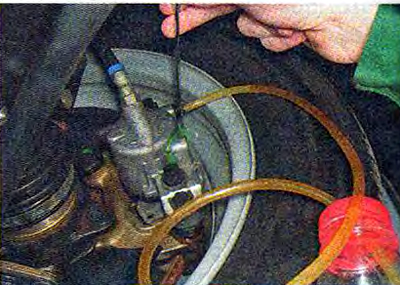
15. Similarly, we bleed the cylinders of the second circuit: the rear left and front right wheels in the specified order, monitoring the fluid level in the reservoir of the main brake cylinder.
16. By pressing the brake pedal, we check the operation of the hydraulic drive and the absence of fluid leakage from the bleed nipples. If the pedal is "soft" or it drops below its normal operating position, we re-check the tightness of the system and repeat bleeding the hydraulic drive.