



Sequence of execution
1. Prepare the car for work (see "Preparing the car for maintenance and repair").
Warning: The coolant level should be checked when the engine is cold. A slight increase or decrease in the coolant level when the engine heats up and cools down is not a malfunction. This is due to the thermal change in the volume of the liquid.
2. Check the coolant level in the expansion tank, which should be 25-30 mm above the MIN mark on the expansion tank body.
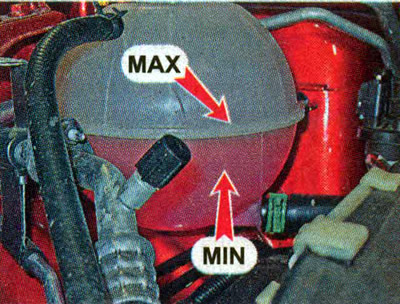
If the fluid level is at the MIN mark or below, add coolant to the reservoir (see below, "Coolant - replacement").
Recommendation. If you have to top up the coolant regularly, you should check the cooling system for leaks.
3. Check for fluid leaks from the radiator, engine block, temperature sensor installation location, connections of rubber hoses of the cooling system and their integrity.
Recommendation. You can try to eliminate coolant leaks from under the hoses by replacing the spring clamps with screw ones. However, do not overtighten the clamps, as they may cut the hoses.
4. Check the integrity of the expansion tank housing, engine radiator and heater.
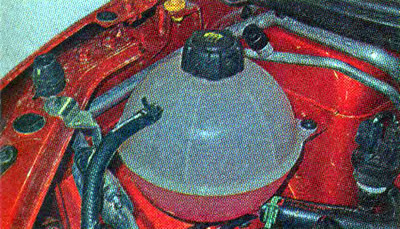
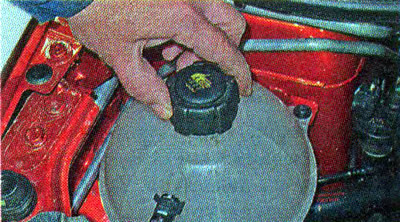
5. Open the cap of the expansion tank of the cooling system (see above).
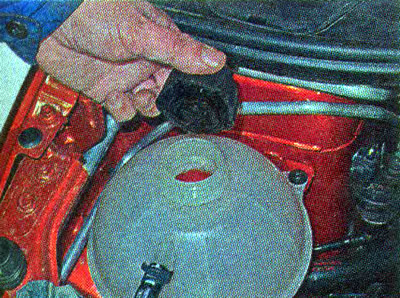
6. Fill the hydrometer with cooling liquid until the float rises.
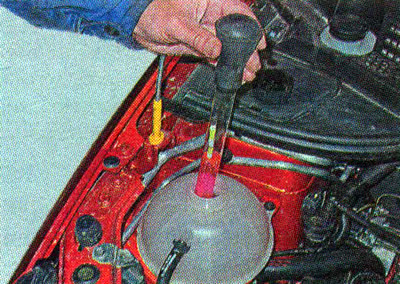
7. Using the float scale, we determine the density of the liquid.
Note: The hydrometer is a float with a scale graduated in units of density kg/m³. Depending on the density of the liquid, the float will sink to different depths. The scale is applied to the float in such a way that the liquid level is located opposite the value corresponding to its density. Antifreeze is sold either in a diluted form, ready for use, or as a concentrate, which must be diluted with distilled water before filling in accordance with the operating temperature of the vehicle. The concentration of antifreeze is determined by its density (see table). Sometimes the scale indicates the minimum allowable temperature range.
Table 9.4.3. Density and concentration of antifreeze
| Density of antifreeze at 20°C, kg/m³ | Concentration of ethylene glycol in antifreeze, % of volume | Minimum ambient temperature at which the engine can be operated,°C |
| 1 050 | 30 | -10 |
| 1 058 | 35 | -15 |
| 1 067 | 40 | -20 |
| 1 074 | 45 | -25 |
| 1 082 | 50 | -30 |
| 1 090 | 55 | -35 |
| 1 098 | 60 | -45 |
Note: Antifreeze must be diluted before pouring it into the cooling system, since this is the only way to ensure precise compliance with the specified ratios of antifreeze and distilled water. We check the density of the antifreeze after mixing.
8. Using the table, we determine the concentration of the antifreeze and the minimum temperature at which it can be used based on its density.
9. If the concentration of antifreeze does not correspond to the climate zone, replace the coolant (see below, "Coolant - replacement").
Note: Do not try to increase the ethylene glycol concentration excessively. When it increases above 60%, the freezing temperature of the antifreeze begins to increase again and at 100% ethylene glycol it will be -13°C.
10. Make sure that the expansion tank cap is tightly closed.
11. Make sure that the thermostat housing and the connection between the coolant pump and the cylinder block are tight.
12. Check for leaks from the pump drain hole (is located at the bottom of the pump), indicating wear of its seal.
13. To check the thermostat, start the cold engine. We control the temperature and circulation of the coolant in the small and large circles by touch, by changing the temperature of the hoses and pipes of the cooling system (in the photo the air filter is removed for clarity).
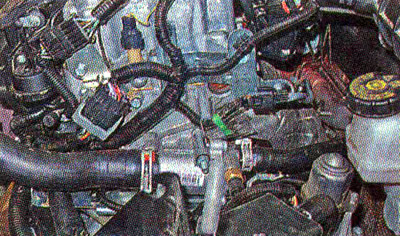
Note: If the engine cooling system is in good condition, then when the coolant temperature is less than 90°C, the thermostat valve should be closed and the coolant should circulate in a small circle. As a result, the lower radiator hose and the radiator itself will be noticeably colder than the thermostat housing, through which hot coolant circulates. When the coolant temperature reaches about 90°C, the thermostat valve will open and a gradually increasing flow of hot liquid will begin to flow into the radiator. In this case, first the radiator and then its lower hose will begin to heat up.
14. Leave the engine running until the engine radiator electric fan starts to operate. When the coolant temperature rises to a certain value, the electric fan should turn on, and after the temperature drops, it should automatically turn off.
Recommendation. If the electric fan does not turn on in time, the liquid has boiled, it is necessary to check the serviceability of the fan electric motor or the serviceability of the engine control system.
Recommendation. Checking the coolant temperature sensor is shown in the section "Coolant Temperature Sensor - Checking and Replacing".