The most common additional equipment is an audio system, consisting of a CD, DVD or radio player with a set of speakers. Also, the audio system can be supplemented with a power amplifier.
Warning! During the warranty period, self-installation of additional equipment on the car, or installation of equipment not provided by the manufacturer, may be a reason for refusing to receive free warranty repairs.
Sometimes standard vehicle electrical connectors are not suitable when installing non-standard equipment on it. In many cases, such as installing a CD player, audio amplifiers, and other non-factory-specified audio equipment, this problem can be easily solved. The fact is that audio equipment manufacturers also adhere to standard connecting blocks (at least maintaining a single standard for their mass production). It is enough to purchase an adapter with the appropriate connecting blocks. For common car models, such adapters are produced both by audio equipment manufacturers themselves and by third-party manufacturers. Complexity can arise only with the connection of rare Hi-end class equipment. But for such equipment, as a rule, it is necessary to lay its own wiring, separate from the vehicle's on-board circuit (such work should be entrusted to specialists).
When installing on a car most of the various electrical devices that are found on the market (burglar alarm, anti-radar, navigator, parking sensors, video recorder, etc.) it is not possible to use the standard connector. They just aren't on the car. Intervention in the standard electrical circuit of the car in most cases is limited to supplying voltage to a new device. Additional devices, even those consisting of several separate elements, are equipped with wires with appropriate connecting blocks and do not require a fundamental change in standard wiring. The greatest intervention in the electrical circuit of the car is performed during installation by the security system (the electrical circuits of the engine control system devices open, and more often, the corresponding wires are simply cut). By means of additional wires, switching or blocking devices are built into the gaps. In this case, it is required to carry out the most hidden connection of wires, which does not violate the appearance of the factory wiring harnesses. For these purposes, the most suitable connection using couplings (see «Wiring repair»). Such a connection is easy to hide again in the braid of the bundle. It is necessary to exclude the connection of wires by twisting in critical circuits (where contact failure can lead to engine shutdown, de-energization of devices and vehicle components affecting traffic safety).
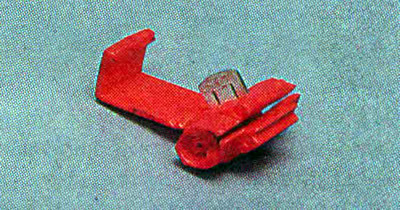
Where it is not required to hide the wiring, it is convenient to connect the wires using special connectors.
No tools are required to install them. Connectors are designed for standard wires used in vehicle wiring.
Execution sequence
1. We prepare the car for work and remove the wire terminal from the negative terminal of the battery (see «Preparing the car for maintenance and repair»).
2. We direct the wire of the car's electrical circuit, to which we will connect an additional device, into the slot of the connector, so that the free hole in the end of the connector (in the photo is indicated by an arrow) was directed towards the connected wire. We put the connector on the wire.
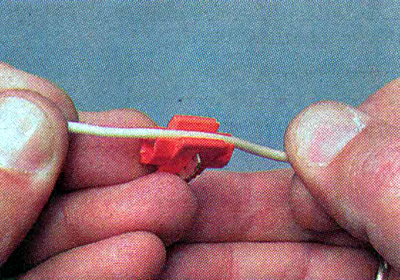
Comment. When choosing a circuit for connecting power to additional equipment, you should be guided by the power of these devices and the amperage of the fuse that protects this circuit. The instructions for the equipment being installed, as a rule, give recommendations on where to supply voltage to the device.
3. Insert the end of the wire to be connected into the free hole of the connector.
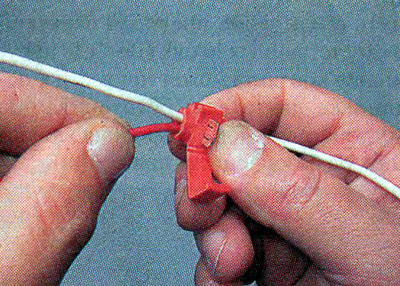
4. Turn the connector cover to the metal jumper and press until it snaps into place.
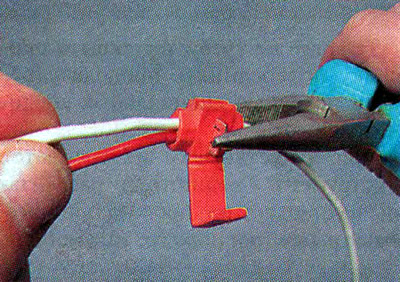
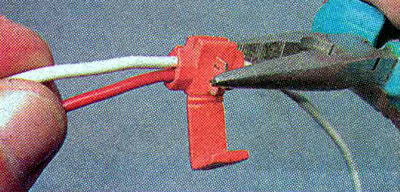
Comment. The jumper at the same time cuts the insulation from the wires and closes them, and the cover compresses the parts of the connector, securely fixing the wires in it. Additional insulation for such a connection is not required. If the force of the fingers is not enough to snap the connector cover into place, you can pre-drown the jumper with pliers or pliers.