Car repair AvtoVAZ Car repair Renault Car repair Hyundai Car repair Ford Car repair Volkswagen Car repair Audi Car repair Chevrolet
English Русский
Български
Беларускі
Український
Српски
Hrvatski
Română
Polski
Slovenský
Magyar
articles sitemap contacts bookmark
LadaMan.ru


Kalina Granta Priora Vesta Largus XRAY
Vesta 1 (2015-2023, VAZ-2180)

Rear Window Defroster — repair (Vesta 2180)

  • Main
  • Vesta
  • Vesta 1
  • Electrical equipment
  • Equipment and devices
  • Rear Window Defroster — repair
0
If the heating element is damaged, the rear window heats up unevenly. As a result, depending on weather conditions, uncleared, fogged or frosted areas remain on the rear window.

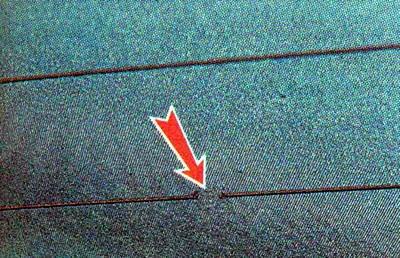
Damaged areas of the heating element threads can be identified visually...

Damaged areas of the heating element threads can be identified visually...


...or using a multimeter in ohmmeter mode.

To do this, it is necessary to sequentially check the resistance of all threads of the heating element.

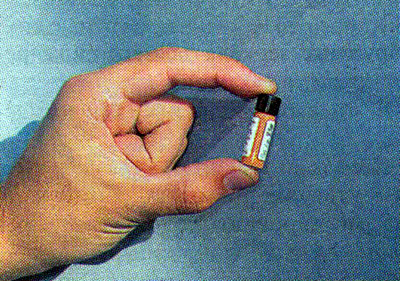
To perform the work you will need a special heating element repair kit with a special composition and a glass cleaner (see "Operating and repair materials").

Sequence of execution


1. Turn off the rear window defroster.

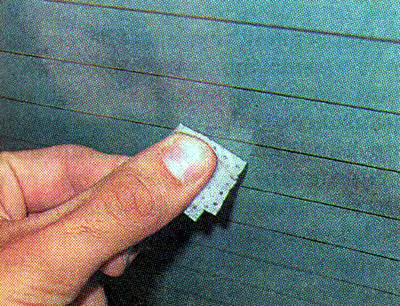
2. Clean the area around the damage with a regular glass cleaner (see "Tools, accessories and operating materials"), Using a clean soft cloth soaked in solvent, degrease the glass at the site of damage to the heater thread.

2. Clean the area around the damage with a regular glass cleaner (see «Tools, accessories and…


3. Carefully remove the protective layer from the adhesive base of the applicator.
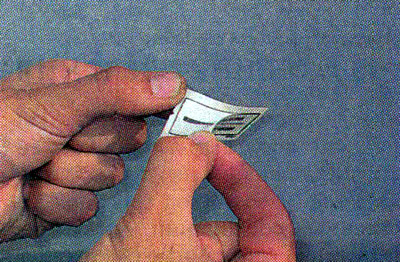


3. Carefully remove the protective layer from the adhesive base of the applicator.


4. Stick the applicator over the damaged area.
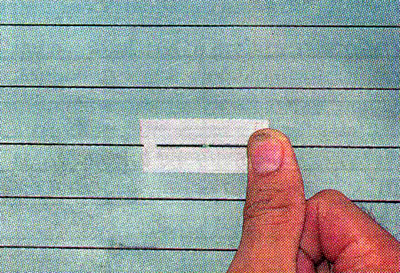
4. Stick the applicator over the damaged area.


Note: You can use masking tape instead of the applicator. To do this, cut two strips of masking tape 5-6 mm longer than the damaged area. Parallel to the damaged thread, we glue strips of cattle on top and bottom of it at a distance of 7 mm from each other so that the damaged area is located between them in the center.
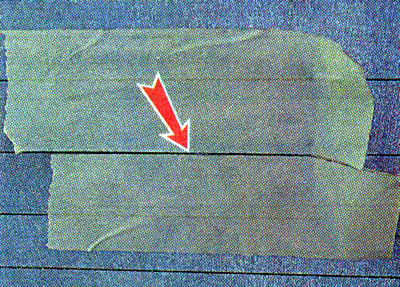

Note: You can use masking tape instead of the applicator. To do this, cut two strips of masking…


5. Shake the bottle with the repair compound thoroughly until a homogeneous mass is formed.


5. Shake the bottle with the repair compound thoroughly until a homogeneous mass is formed.


6. Using the brush included in the kit, apply the repair compound to the damaged area in three layers with a break of about a minute. We distribute the composition so that it goes onto the undamaged parts of the thread by 5 mm from the break, and the main thickness of the composition is located above the break and is not thinner than the applicator.
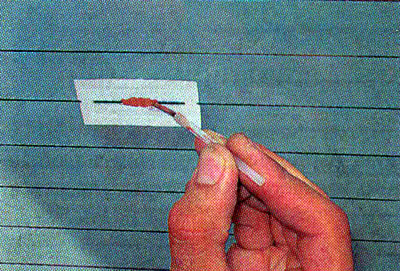
6. Using the brush included in the kit, apply the repair compound to the damaged area in three…


(For more details, see the page: «ladaman.ru»)

7. After waiting at least 20 minutes, peel off the applicator.
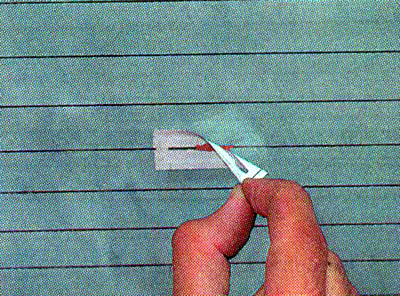
7. After waiting at least 20 minutes, peel off the applicator.


8. Visually verify that the repair compound completely covers the damaged section of the heater thread.
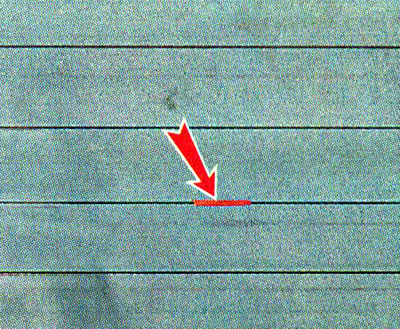


8. Visually verify that the repair compound completely covers the damaged section of the heater…


Warning! Do not turn on the heater earlier than 24 hours after repair.


9. After waiting 24 hours, turn on the rear window heater and make sure the repaired thread is working properly. If necessary, carefully scrape off any remaining repair compound from the glass and repeat the repair.


This article is available at russian, bulgarian, belarusian, ukrainian, serbian, croatian, romanian, polish, slovak, hungarian
This article has been reviewed: Kirill Dementyev
Share with friends:
◀ Previous
Lada Vesta 1: Equipment and devices
 

Audio system speakers — removal and installation
Era Glonass control unit — removal and installation
Connecting additional equipment
Windscreen washer reservoir — removal and installation
Windscreen washer pump — removal and installation
 
More articles with information from manuals for Lada:

• Rear Door Window Regulator — Removal and Installation Lada Kalina Hatchback (2004-2013, VAZ-1119)
• Rear Door Window Regulator — Removal and Installation Lada Granta 1 (2011-2023, VAZ-2190)
• Replacing the rear door window regulator Lada Priora 1 (2007-2018, VAZ-2170)
• Electrical diagram of the rear window heating Lada Largus 1 (2012-2023)
• Checking the oil level in the rear axle gearbox Lada X-Ray 1 (2015-2022)
Link to this article in various formats
Reviews and comments of visitors
No comments yet


Add up two numbers: 12 + 45


Vesta 1 (2015-2023) 
  • General information
  • Governing bodies
  • User manual
  • Maintenance
  • Troubleshooting
  • Power unit
  • Engine repair
  • Control system
  • Supply system
  • Cooling system
  • Exhaust system
  • Transmission
  • Clutch
  • Mechanical gearbox
  • Automatic gearbox
  • Drive shafts
  • Chassis (running gear)
  • Wheels, tires and hubs
  • Front suspension
  • Rear suspension
  • Steering
  • Brake system
  • Body and interior
  • Exterior (external elements)
  • Doors, locks and windows
  • Heating and ventilation
  • Electrical equipment
  • Equipment and devices
  • Power devices
  • Breakers and switches
  • Lighting and signaling
  • Electrical circuits
LadaMan.ru © 2018–2026 | Mobile version | About Lada | Sitemap: EN BG BY UA RS HR RO PL SK HU | Contacts with admin | | Add to bookmarks
Kalina Hatchback (2004-2013) | Kalina Sedan (2004-2013) | Granta 1 (2011-2023) | Priora 1 (2007-2018) | Vesta 1 (2015-2023) | Largus 1 (2012-2023) | X-Ray 1 (2015-2022) |
This site uses cookies to ensure everything runs smoothly.