
Car repair AvtoVAZ Car repair Renault Car repair Hyundai Car repair Ford Car repair Volkswagen Car repair Audi Car repair Chevrolet
English Русский
Български
Беларускі
Український
Српски
Hrvatski
Română
Polski
Slovenský
Magyar
articles sitemap contacts bookmark
LadaMan.ru


Kalina Granta Priora Vesta Largus XRAY
Priora 1 (2007-2018, VAZ-2170)

Checking the wheels (Priora 2170)

  • Main
  • Priora
  • Priora 1
  • General information
  • Maintenance
  • Checking the wheels
0
You will need: a pressure gauge, a pump, and a caliper.

Recommendations. Check your tire pressure periodically. High or low pressure leads to premature tire wear, deterioration of vehicle handling and stability.
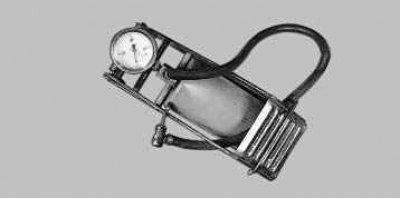

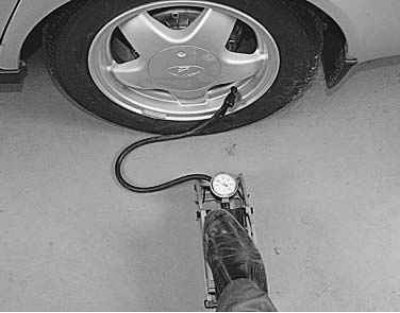
We recommend using a foot pump with a built-in pressure gauge.

We recommend using a foot pump with a built-in pressure gauge.

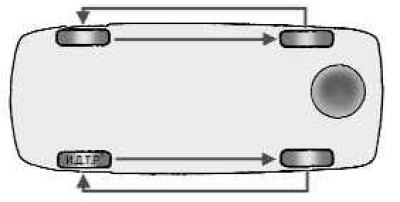
Figure 4.1. Wheel rotation diagram

Figure 4.1. Wheel rotation diagram


To ensure that the tires wear evenly, every 15,000 km (during routine maintenance) rearrange the wheels according to the diagram in the picture 4.1. After the first 15,000 km of mileage and then after every 30,000 km, balance the wheels and check the wheel alignment angles. To do this, contact a specialized workshop.

Attention! All wheel repair work should be carried out in specialized workshops. Check that all wheels are balanced after repair.


Warning! Operating tires with worn tread may result in an accident.
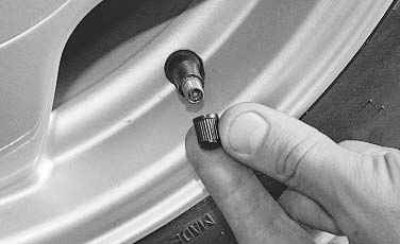

1. Unscrew the cap from the valve.

1. Unscrew the cap from the valve.

2. Check the air pressure in the tire. To do this, reset the pressure gauge readings to zero by…


2. Check the air pressure in the tire. To do this, reset the pressure gauge readings to zero by pressing the special button on the pressure gauge body..
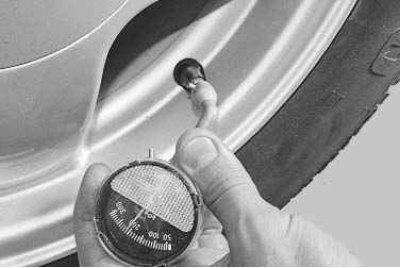
3. …connect the pressure gauge to the valve and press it with the tip of the pressure gauge.

3. …connect the pressure gauge to the valve and press it with the tip of the pressure gauge.


4. If the pressure is less than required, connect the hose tip to the valve and pump air,…


4. If the pressure is less than required, connect the hose tip to the valve and pump air, monitoring the pressure on the pressure gauge.
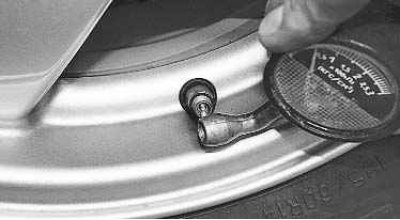
5. If the pressure is higher than required, press the special protrusion of the pressure gauge onto…


5. If the pressure is higher than required, press the special protrusion of the pressure gauge onto the valve tip and release air from the tire. Measure the pressure with a pressure gauge. Repeat these operations until the pressure returns to normal.
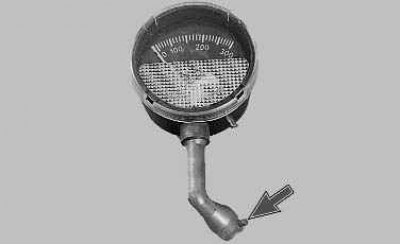
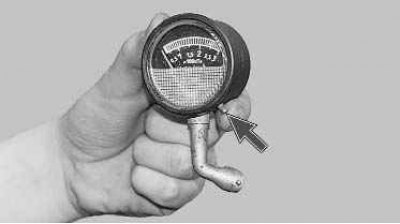
Note: This is what the special protrusion on the pressure gauge looks like for releasing air from…


Note: This is what the special protrusion on the pressure gauge looks like for releasing air from the tire.


6. If you notice that the air pressure in your tires is constantly dropping, try tightening the valve core more tightly using the cap and key.
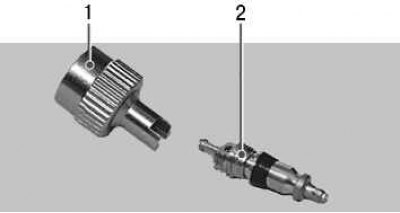
Note: This is what the protective cap 1 looks like with the key for tightening the valve 2.


Note: This is what the protective cap 1 looks like with the key for tightening the valve 2.


Caution! To avoid contamination of the valve cores, do not operate the vehicle without protective caps. If the caps have been lost, be sure to install new ones.
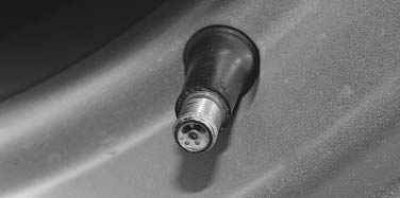

7. To check the valve for leaks, wet the valve opening. If air bubbles appear, replace the valve…


7. To check the valve for leaks, wet the valve opening. If air bubbles appear, replace the valve core.
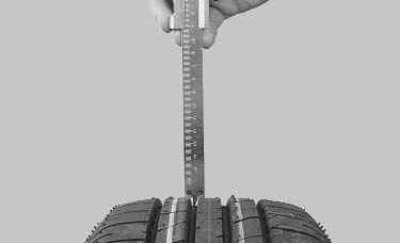
8. Measure the remaining tread depth with a caliper. If the tread depth is 1.6 mm or less, replace…


8. Measure the remaining tread depth with a caliper. If the tread depth is 1.6 mm or less, replace the tire.
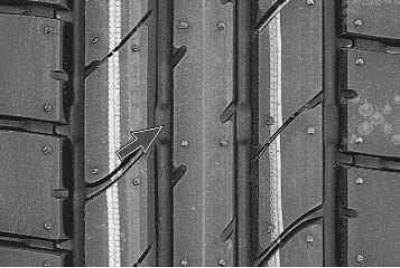


9. If you don't have a caliper at hand, you can check the tread depth visually using the tire wear…


9. If you don't have a caliper at hand, you can check the tread depth visually using the tire wear indicators, which are solid transverse stripes that appear on the tread when it is at its maximum wear.
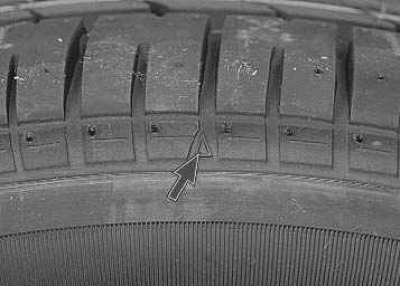
Note: The locations of the indicators are marked on the sidewall of the tire with triangles or the…


Note: The locations of the indicators are marked on the sidewall of the tire with triangles or the abbreviation "TWI" (depending on which designation system the tire manufacturer uses).
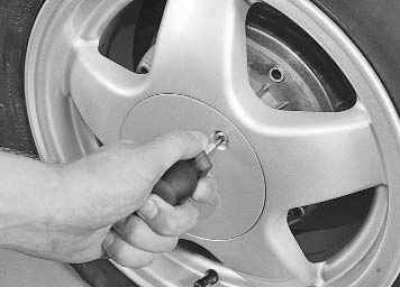

10. To check the wheel tightening, unscrew the screw that secures the decorative cap to the wheel…


10. To check the wheel tightening, unscrew the screw that secures the decorative cap to the wheel disk…
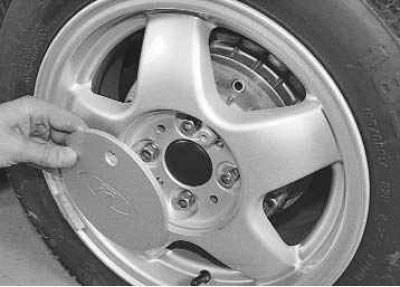


11. …and remove the cap.

11. …and remove the cap.

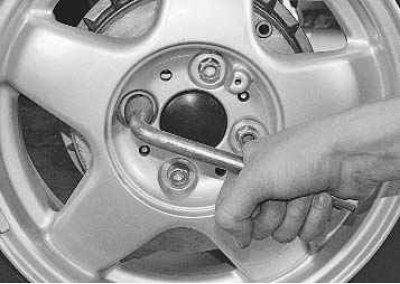
12. Check the tightness of the wheel nuts and, if necessary, tighten them to a torque of 88–108 N·m.


12. Check the tightness of the wheel nuts and, if necessary, tighten them to a torque of 88–108 N·m.


This article is available at russian, bulgarian, belarusian, ukrainian, serbian, croatian, romanian, polish, slovak, hungarian
This article has been reviewed: Vladislav Voloshin
Share with friends:
◀ Previous
Lada Priora 1: Maintenance
Next ▶

Checking external lighting fixtures
Safety regulations
General Provisions and Maintenance Regulations
Checking the alternator drive belt tension
Checking the timing belt tension
Checking the technical condition of the front suspension parts on the car
Checking the technical condition of the rear suspension parts on the car
Checking the degree of wear of brake pads, discs and drums
More articles with information from manuals for Lada:

• Checking the technical condition of wheels, tires and hubs Lada Kalina Hatchback (2004-2013, VAZ-1119)
• Checking the technical condition of wheels, tires and hubs Lada Granta 1 (2011-2023, VAZ-2190)
• Checking tire pressure Lada Vesta 1 (2015-2023, VAZ-2180)
• Wheels, tires and disks — characteristics, features, replacement Lada Largus 1 (2012-2023)
• Checking the oil level in the engine oil pan Lada X-Ray 1 (2015-2022)
Link to this article in various formats
Reviews and comments of visitors
No comments yet


Add up two numbers: 23 + 21


Priora 1 (2007-2018) 
  • General information
  • Vehicle device
  • User manual
  • Faults en route
  • Maintenance
  • Power unit
  • Engine repair
  • Cooling and lubrication system
  • Supply system
  • Exhaust system
  • Transmission
  • Clutch
  • Car gearbox
  • Drive shafts
  • Chassis (running gear)
  • Car suspension
  • Steering
  • Brake system
  • Body and interior
  • Exterior (external elements)
  • Interior (internal elements)
  • Doors, locks and windows
  • Electrical equipment
  • Equipment and devices
  • Power devices
  • Lighting and signaling
  • Cooling and heating
  • Electrical circuits
LadaMan.ru © 2018–2026 | Mobile version | About Lada | Sitemap: EN BG BY UA RS HR RO PL SK HU | Contacts with admin | | Add to bookmarks
Kalina Hatchback (2004-2013) | Kalina Sedan (2004-2013) | Granta 1 (2011-2023) | Priora 1 (2007-2018) | Vesta 1 (2015-2023) | Largus 1 (2012-2023) | X-Ray 1 (2015-2022) |
This site uses cookies to ensure everything runs smoothly.