



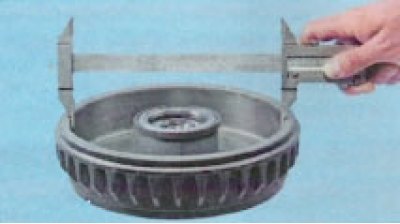
Maximum diameter of the working surface of the brake drum (maximum wear) - 229.5 mm. If this dimension is larger, the drum must be replaced.
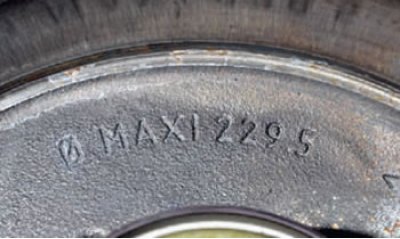
The marking is located on the inside of the brake drum. The maximum diameter is indicated.
Catalog numbers of brake drums and other components see here.
Removal
Place chocks under the front wheels, engage 1st gear. Jack up the car from the desired side.
If the work is being performed on a lift, place the vehicle on a two-post lift and turn off the ignition.
Remove the rear wheel.
Release the hand brake lever.
Raise the vehicle to a height convenient for performing work.
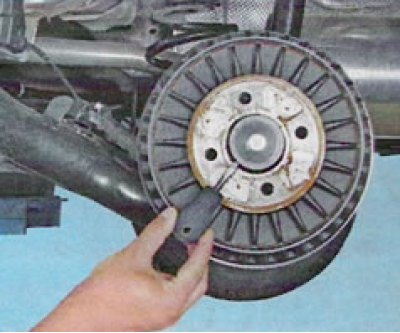
Pry off the brake drum mounting nut plug (mounting shovel, hammer).
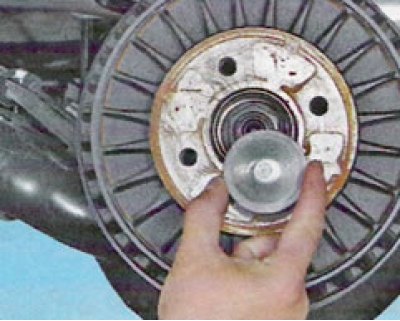
and take it off.
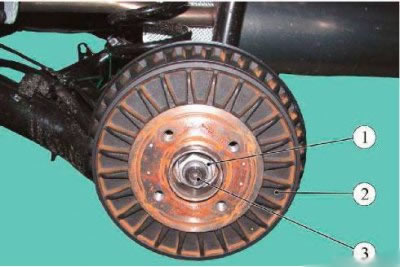
Figure 13-1 - Removing the rear brake drum: 1 - brake drum mounting nut; 2 - brake drum; 3 - rear wheel hub axle
Unscrew nut 1, Figure 13-1, securing the brake drum to axle 3 of the rear wheel hub (replacement head for 36, extension and ratchet).
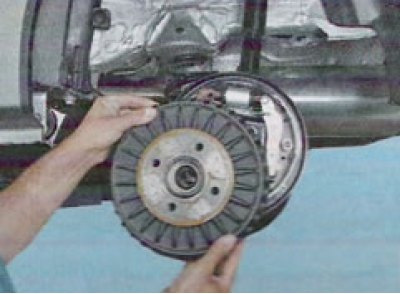
Remove the brake drum.
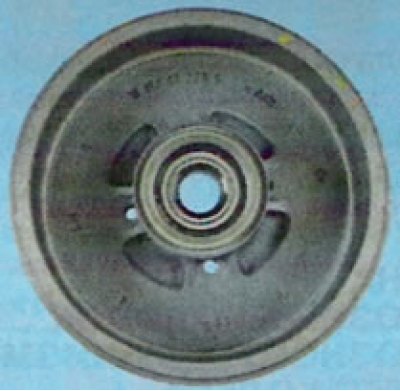
The brake drum is made as a single unit with the hub, onto the flange of which the wheel speed sensor's setting ring is pressed. Do not press the bearing out of the brake drum unless absolutely necessary. The dismantled bearing cannot be reused.
Checking the technical condition
Check the ease of rotation and absence of play in the hub bearing. Replace the bearing if necessary.
Note: Brake drums must be the same diameter. When boring one of the drums, it is necessary to bore the second drum.
Caution: When replacing the brake drum on one side, be sure to replace the brake drum on the opposite side.
Caution: When replacing brake drums, be sure to replace the brake shoes.
Brake drum parameters
Parameter Nominal inner diameter of the brake drum, mm 228.5 Maximum permissible inner diameter of the brake drum, mm 229.5
Measure the inner diameter of the brake drum in two mutually perpendicular directions. Compare the measurement results with the data given in Table 13-1. Replace the brake drum if necessary (calipers).
If there are deep scratches or waviness on the working surface of the brake drum, bore the drum. Take measurements again. Compare the measurement results with the data given in Table 13-1. Replace the brake drum if necessary.
Installation
Clean the rear brake components (metal brush).
When installing the old drum, use a file to remove the ridge on the working surface of the drum that has formed as a result of wear.
When replacing the brake drum, check the outer diameter of the brake shoes and adjust if necessary.
Before installing the drum, the brake shoes must be returned to their normal, original position. That is, if the brake shoes are spread wider than necessary, the brake drum simply will not "sit" on them. How to reset the clearance adjuster (see here).
Install the brake drum on the rear wheel hub axle and secure it with a nut. Tightening torque of the hub nut 280 N·m (28 kgf·m) (replaceable head 36, extension and ratchet, torque wrench).
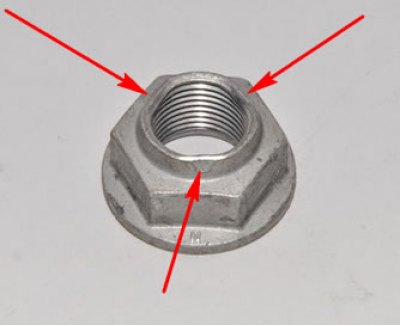
Note: According to technical regulations, a new hub nut must be used (nut dimensions: M24x1.5 key 36), but you can also use a restored old one, by hammering down its flange in three places, as shown in the photo.
Attention: It is prohibited to move the vehicle with the hub nut loose, as this will damage the bearing separator.
Adjust the clearance between the brake shoes and the drum by pressing the brake pedal 10-15 times. Each time you press the button, you should hear a click from the regulator. Once the clicking stops, the gap is set.
Check the operation and adjust the parking brake drive if necessary.
Press the protective cap into the hub.
Install the rear wheel.
Check the ease of rotation of the wheel. Slight contact of the drum with the pads is allowed.
Check and, if necessary, top up the brake fluid level in the brake hydraulic reservoir.
Check the efficiency of the service brake system.