
Removing
Set the car to a working post, brake with a parking brake and turn off the ignition.
Remove floor tunnel lining (see here).
Cut the floor mat at the back of the arm and lay the mat pieces aside.
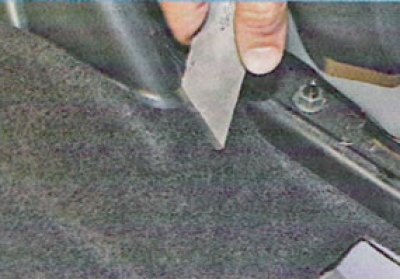
Note. Cutting the floor mat is necessary in order to gain access to the lower part of the parking brake lever without completely removing the front seats and floor mat. The cut part of the mat will not be visible, as it is covered by the lining of the floor tunnel.
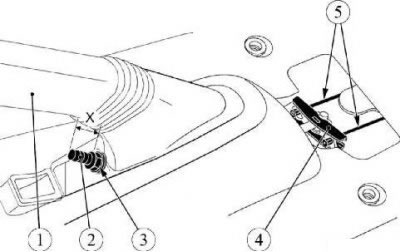
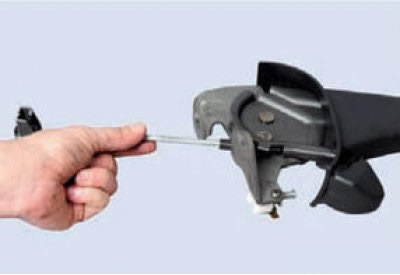
Figure 17-1 - Disconnecting the handbrake lever cables: 1 - hand brake lever; 2 - equalizer cable of the hand brake lever; 3 - adjusting nut of the equalizer cable; 4 - cable equalizer of the manual brake drive; 5 - manual brake cables; X - adjusting dimension for cable tension, X = 16±0.3 mm
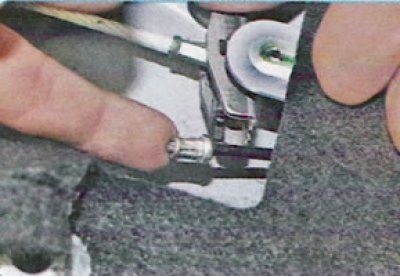
Loosen the adjusting nut 3, Figure 17-1, of the hand brake lever equalizer cable.
... and disconnect both cables 5 from equalizer 4.
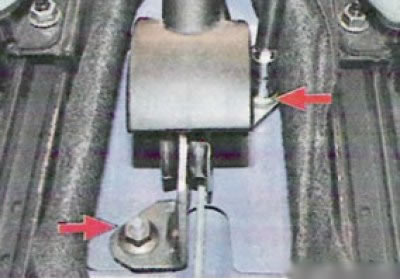
Loosen the two nuts securing the lever to the floor tunnel studs.
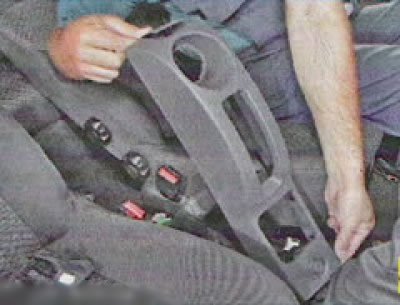
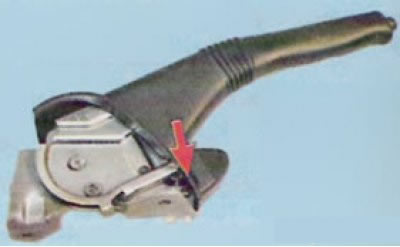
Move the front seats all the way forward, raise the lever, and disconnect the wiring harness connector from switch 2, Figure 17-2, Hand Brake Lever Warning Light (interchangeable head 13, extension and collar).
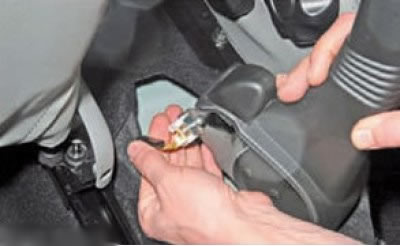
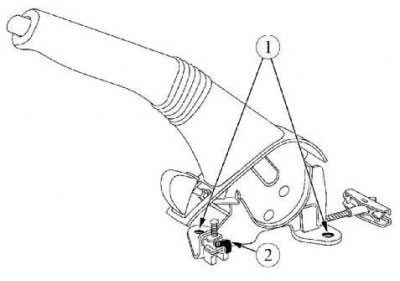
Figure 17-2 - Removing the hand brake lever: 1 - lever attachment points; 2 - signal lamp switch
Remove the hand brake lever.
Loosen the adjusting nut from the end of the front cable and disconnect the short cable from the arm.
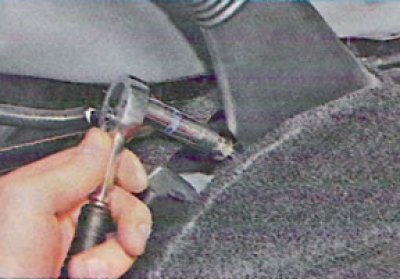
Remove the switch of a signal lamp of inclusion of a manual brake, having unscrewed the screw of its fastening.
Installation
Connect the wiring harness connector to the handbrake lever signal light switch, install the lever onto the mounting studs and secure with two nuts. Nut tightening torque 8 Nm (0.8 kgf·m) (interchangeable head 13, extension and knob, torque wrench).
Install the handbrake cables into the equalizer holes.
Tighten the adjusting nut of the hand drive lever so that the dimension X, Figure 17-1, from the upper end of the adjusting nut to the end of the threaded part of the equalizer cable is 16±0.3 mm (wrench 10, caliper).
Manual drive adjustment (parking) brakes
Note. For more information on adjusting the parking brake, see Here.
Place the vehicle on a two-post lift, apply the parking brake and turn off the ignition.
Lower the hand brake lever.
Tighten and lower the hand brake lever five times to its original position to bring the drive cables into working condition.
Make sure the rear wheels are spinning. If not, check the following items and repair or replace as necessary:
- manual brake cables;
- wheel cylinder piston;
- automatic gap adjustment mechanism.
Remove rear wheels.
Loosen adjusting nut 3, Figure 17-1, cable tension (wrench 10).
Install the hand brake lever on the second notch of the gear sector.
Tighten the adjusting nut until the brake drum stops turning by hand.
Tighten and release the hand brake lever 2-3 times and check the rotation of the brake drum. If the drum does not rotate, gradually loosen the adjusting nut until the drum rotates freely.
Install rear wheels.
Install floor tunnel lining.
Check the efficiency of the service brake system.