
Car repair AvtoVAZ Car repair Renault Car repair Hyundai Car repair Ford Car repair Volkswagen Car repair Audi Car repair Chevrolet
English Русский
Български
Беларускі
Український
Српски
Hrvatski
Română
Polski
Slovenský
Magyar
articles sitemap contacts bookmark
LadaMan.ru


Kalina Granta Priora Vesta Largus XRAY
Largus 1 (2012-2023)

Removal the floor tunnel lining (rear and front) (Largus 1)

  • Main
  • Largus
  • Largus 1
  • Body and interior
  • Interior (internal elements)
  • Removal the floor tunnel lining (rear and front)
0
You will need: a TORX T20 key, a 10 mm socket head, a special plastic mounting blade or a flat-blade screwdriver.

To remove the rear part...


1. Disconnect the negative battery terminal.
1. Disconnect the negative battery terminal.


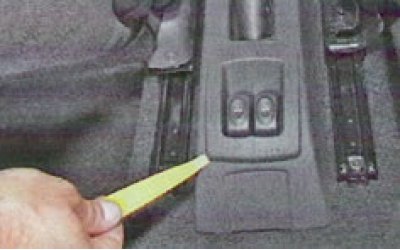
2. Use a special plastic tool or a screwdriver wrapped around it to pry up the rear power window key holder and remove it.
2. Use a special plastic tool or a screwdriver wrapped around it to pry up the rear power window…


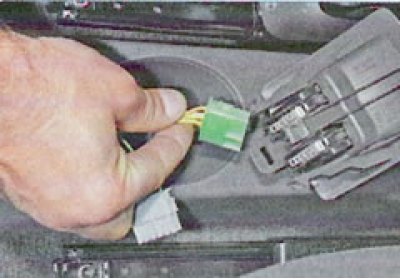
3. Squeeze the latches and disconnect the connector from the keys.
3. Squeeze the latches and disconnect the connector from the keys.


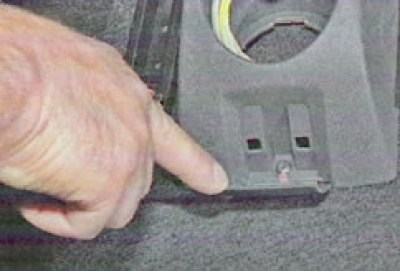
4. Pry and remove the plastic plug from the rear end of the floor tunnel lining.


4. Pry and remove the plastic plug from the rear end of the floor tunnel lining.


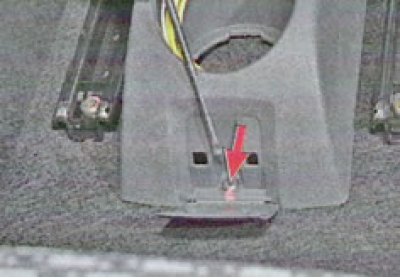
5. Remove the screw securing the rear part of the trim to the base of the body.
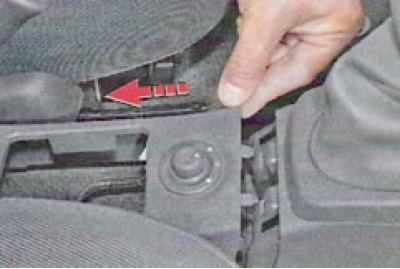
5. Remove the screw securing the rear part of the trim to the base of the body.


6. Slide the rear part of the trim back, disengaging the clips from the front part of the trim, and move the rear part of the trim back as far as the wiring will allow.
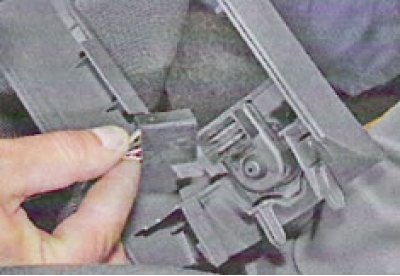
6. Slide the rear part of the trim back, disengaging the clips from the front part of the trim, and…


7. Squeeze the clips and disconnect the connector from the outside mirror switch.
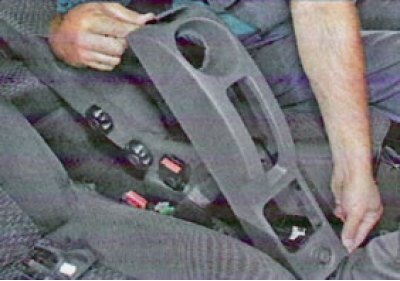


7. Squeeze the clips and disconnect the connector from the outside mirror switch.


... and remove the entire rear section of the tunnel lining

To remove the front part...
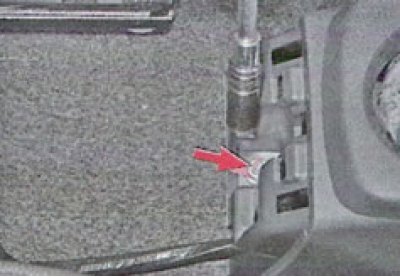


To remove the front part...


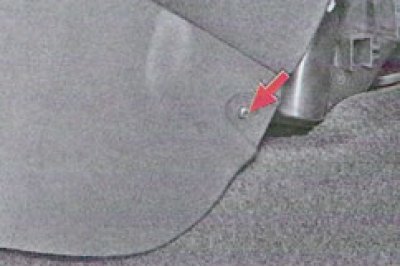
8. Unscrew the nut securing the rear fastening of the front part of the trim to the base of the body.
8. Unscrew the nut securing the rear fastening of the front part of the trim to the base of the…


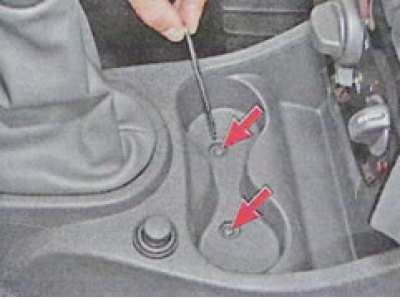
9. Remove the two screws located at the bottom of the cup holders that secure the front part of the trim to the base of the body.


9. Remove the two screws located at the bottom of the cup holders that secure the front part of the…


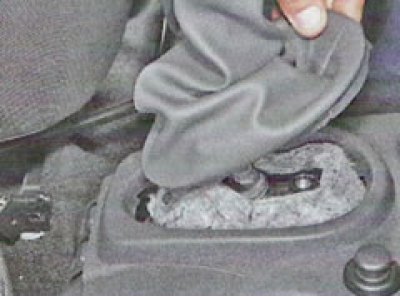
10. Disconnect the gearshift lever boot from the window flange in the trim.
10. Disconnect the gearshift lever boot from the window flange in the trim.


11. Remove one screw on the right and one on the left securing the front part of the trim to the instrument panel reinforcement.
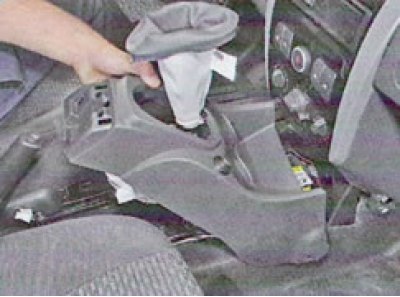
11. Remove one screw on the right and one on the left securing the front part of the trim to the…


12. Lift the rear part of the trim...

12. Lift the rear part of the trim...


13. ...and disconnect the connector from the cigarette lighter.
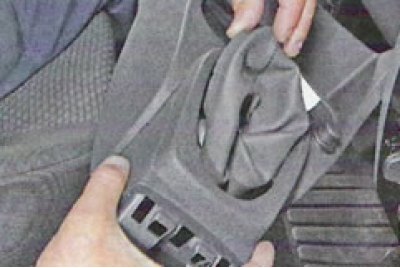


13. ...and disconnect the connector from the cigarette lighter.


14. Remove the front part of the trim by removing the lever with the boot through the window in the trim.

15. Install the floor tunnel lining in the reverse order of removal.


This article is available at russian, bulgarian, belarusian, ukrainian, serbian, croatian, romanian, polish, slovak, hungarian
This article has been reviewed: Daniil Markelov
Share with friends:
◀ Previous
Lada Largus 1: Interior (internal elements)
Next ▶

Elimination of squeaking seats and seat belt buckles
Seat belts — removal and installation
Removal and installation seats
Interior trim (lining) — removal and installation
Instrument panel — removal and installation
Third Row Armrest — Removal and Installation
Removal the side shelf of the luggage compartment
Body Partition — Removal and Installation (Cargo Van)
More articles with information from manuals for Lada:

• Floor Tunnel Lining — Removal and Installation Lada Kalina Hatchback (2004-2013, VAZ-1119)
• Floor Tunnel Lining — Removal and Installation Lada Granta 1 (2011-2023, VAZ-2190)
• Removal and installation of floor tunnel linings Lada Priora 1 (2007-2018, VAZ-2170)
• Adjusting the rear view mirrors Lada Vesta 1 (2015-2023, VAZ-2180)
• Adjusting the operation of front and rear door locks, hood, tailgate Lada X-Ray 1 (2015-2022)
Link to this article in various formats
Reviews and comments of visitors
No comments yet


Add up two numbers: 28 + 30


Largus 1 (2012-2023) 
  • General information
  • Vehicle device
  • User manual
  • Maintenance
  • Power unit
  • Engine repair
  • Cooling and lubrication system
  • Supply system
  • Ignition system
  • Exhaust system
  • Spare parts catalog
  • Transmission
  • Clutch
  • Car gearbox
  • Drive shafts
  • Spare parts catalog
  • Chassis (running gear)
  • Suspension and wheels
  • Steering
  • Brake system
  • Spare parts catalog
  • Body and interior
  • Exterior (external elements)
  • Interior (internal elements)
  • Doors, locks and windows
  • Heating and ventilation
  • Spare parts catalog
  • Electrical equipment
  • Equipment and devices
  • Power devices
  • Lighting and signaling
  • Spare parts catalog
  • Electrical circuits
LadaMan.ru © 2018–2026 | Mobile version | About Lada | Sitemap: EN BG BY UA RS HR RO PL SK HU | Contacts with admin | | Add to bookmarks
Kalina Hatchback (2004-2013) | Kalina Sedan (2004-2013) | Granta 1 (2011-2023) | Priora 1 (2007-2018) | Vesta 1 (2015-2023) | Largus 1 (2012-2023) | X-Ray 1 (2015-2022) |
This site uses cookies to ensure everything runs smoothly.