
Removing
Set the car to work.
Remove from the right and left sides the upholstery 2, Figure 11-1, pillars of the loading door, upholstery 3 of the rear pillar.

Figure 11-1 - Pillar upholstery: 1 - lining of the button for opening the loading door; 2 - upholstery rack loading door; 3 - upholstery of the rear pillar; 4 - upholstery of the central pillar; 5 - side roof upholstery holders; 6 - roof upholstery holders; 7 - ceiling lamp for interior lighting; 8 - rear seat belt medium; 9 - lining of locks for loading doors; 10 - roof upholstery
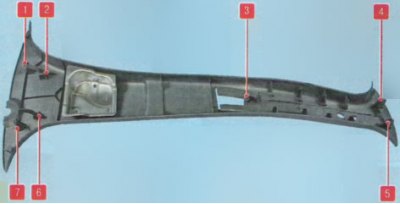
The location of the fastening elements on the lower part of the front pillar trim (view from inside): 1, 7 - holes for the screws of the lower fastening; 2, 6 - lower fastening hook; 3 - hole for the screw of the upper fastening; 4, 5 - top mount latches

Arrangement of fastening elements on the front part of the sidewall lining (view from inside): 1,2,4 - clamps; 3 - hole for the screw of fastening to the rear rack; 5, 6 - holes for screws of the bottom fastening
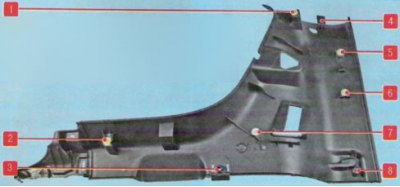
Arrangement of fastening elements on the rear part of the sidewall lining (view from inside): 1,2, 5, 5, 7 - clamps; 3.8 - holes for fastening screws; 4 - upper mount hook
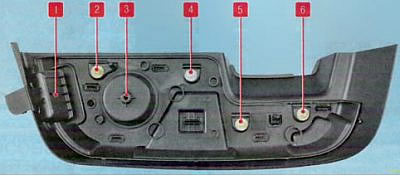
Arrangement of fasteners on the front suit of the sidewall lining (view from inside): 1.3 - holes for fastening screws; 2,4, 5, 6 - clamps
Remove cover 4 for B-pillar on right and left.
Remove cover 1 for tailgate release button. Remove holders 5 on the right and left sides.
Remove cover 7 for interior lighting.
Remove the handrails 2, Figure 11-2 by unfastening the plugs and unscrewing the two screws 1 (Torx T20 screwdriver, flat head screwdriver).
Overcoming the resistance of the holders, remove the upholstery 4, Figure 11-3, wind window pillars, right and left (flat screwdriver).
Remove bracket 3 for sun visor from roof lining, unscrew two self-tapping screws 1 and remove sun visor 2, right (Phillips screwdriver).
Remove the left sun visor in the same way.
For vehicles with top storage shelf 2, figure 11-4 (variant execution), unscrew the four self-tapping screws 1 fastening the shelf, remove the shelf from the brackets.
Remove holders 6 (see figure 11-1) roof upholstery, remove the upholstery 10 and remove through the opening of the loading doors (fixture 7711238605).
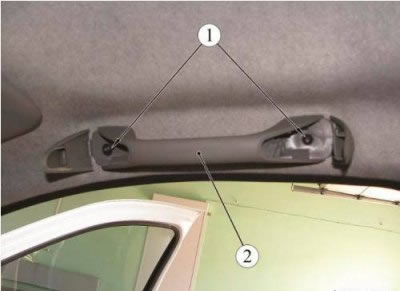
Figure 11-2 - Attaching the handrails: 1 - self-tapping screws for fastening the handrail; 2 - handrail
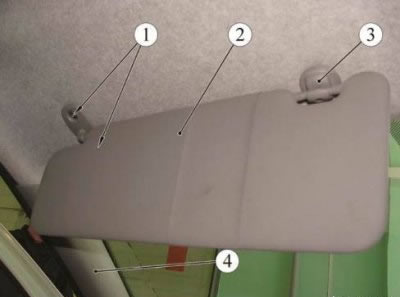
Figure 11-3 - Mounting the sun visor: 1 - screw for fastening the sun visor; 2 - sun visor; 3 - sun visor bracket; 4 - an upholstery of a rack of a wind window
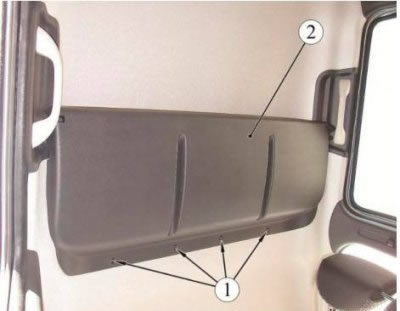
Figure 11-4 - Fastening the upper storage shelf: 1 - self-tapping screw for fastening the upper storage shelf; 2 - top storage shelf
Installation
Install the headliner in the reverse order of removal.