



Removal
Place the vehicle in the work area. Raise the hood, disconnect the ground wire terminal from the battery.
Remove the cap from the head of bolt 1, Figure 19-1, of the upper seat belt anchor point on the B-pillar and unscrew the bolt (flat screwdriver, replaceable head 17, ratchet).
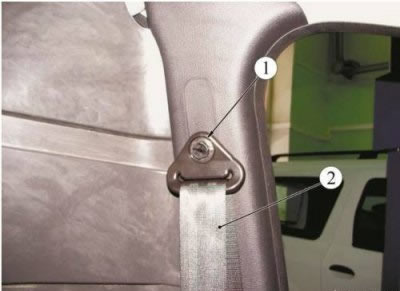
Figure 19-1 - Upper seat belt anchor point: 1 - Upper seat belt mounting bolt; 2 - seat belt
Loosen screw 1, figure 19-2, and, having overcome the resistance of the clamps, remove trim 2 of the left central pillar, similarly remove the right trim (torx T20 replaceable head, ratchet).
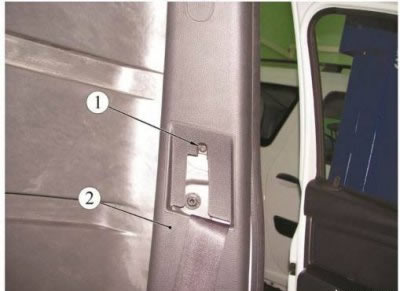
Figure 19-2 - Fastening the center pillar trim: 1 - screw for fastening the center pillar trim; 2 - central pillar trim
Unscrew four screws 1, Figure 19-3, fastening the partition 2 on the left and right (replaceable head 13, ratchet).
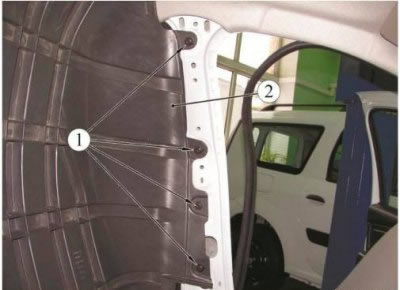
Figure 19-3 - Attaching the partition to the rack: 1 - partition mounting screw; 2 - partition
Unscrew four screws 1, Figure 19-4, of the upper fastening of the partition to the body, five screws 4 of the lower fastening of the partition to the body, five nuts 2 and remove first the right 3, then the left 5 part of the partition (replacement head 13, extension, ratchet).
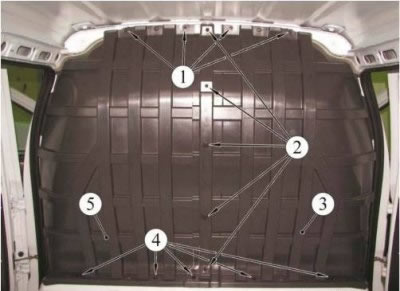
Figure 19-4 - Partition fastening: 1 - screw for upper fastening of partition to body; 2 - nut; 3 - right part of the partition; 4 - screw for lower fastening of the partition to the body; 5 - left part of the partition
Installation
Install the removed parts in the reverse order of removal.