Car repair AvtoVAZ Car repair Renault Car repair Hyundai Car repair Ford Car repair Volkswagen Car repair Audi Car repair Chevrolet
English Русский
Български
Беларускі
Український
Српски
Hrvatski
Română
Polski
Slovenský
Magyar
articles sitemap contacts bookmark
LadaMan.ru


Kalina Granta Priora Vesta Largus XRAY
Kalina Sedan (2004-2013, VAZ-1118) Kalina Hatchback (2004-2013, VAZ-1119)

Installation of antenna, radio and speakers (Kalina 1118)

  • Main
  • Kalina
  • Kalina Sedan
  • Electrical equipment
  • Equipment and devices
  • Installation of antenna, radio and speakers
0
Contents: Installing the antenna ⇣ Installing a radio ⇣ Installing speakers in the front…⇣ Installing speakers in the trunk…⇣
The cars have a place to install a radio instead of a storage box. For ease of installation, the box is equipped with connectors with power and speaker wires, as well as an antenna wire plug.

The antenna is installed instead of the plug in the front part of the roof above the windshield.

The speakers are installed in specially designated places in the front doors and in the trunk shelf. Wiring is laid under the speakers to their installation locations.

Installing the antenna


To install the antenna on your car, you will need an 8 mm wrench.

1. Remove the interior lighting unit (see "Removal and installation the interior lighting unit").

1. Remove the interior lighting unit (see «Removal and installation the interior lighting unit»).


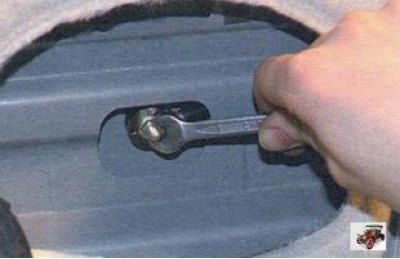
2. Unscrew the stud nut of the antenna mounting hole plug...
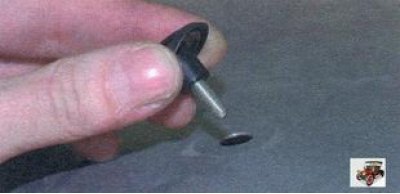
2. Unscrew the stud nut of the antenna mounting hole plug...


3. ...remove the plug and install the antenna in its place.


4. Carry out further assembly in the reverse order of removal.

Installing a radio


To install the radio in your car, you will need a flat-blade screwdriver.

1. Disconnect the wire from the negative terminal of the battery.

1. Disconnect the wire from the negative terminal of the battery.


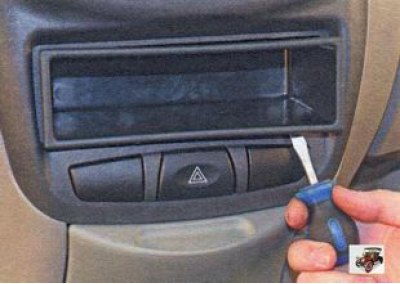
2. Remove the storage box from the installation hole...

2. Remove the storage box from the installation hole...


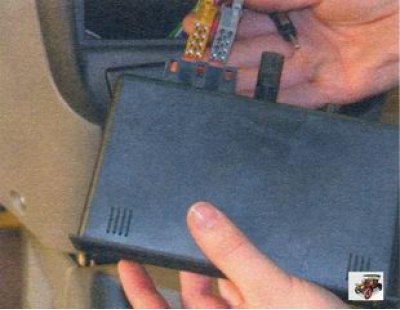
3. ...and disconnect the wire harness connector and the antenna connector from it.

4. Carry out further installation of the radio in accordance with the installation instructions supplied with it.

Installing speakers in the front doors


Note: Before installing the speakers, remove the front door trim (see "Removal and installation the front door trim") and measure all the dimensions necessary for proper installation to purchase speakers of the appropriate size. The installation dimensions of the speakers are usually indicated on their packaging or in the operating instructions.


To install speakers on your vehicle, follow these steps:.

1. Remove the front door trim (see "Removal and installation the front door trim").

1. Remove the front door trim (see «Removal and installation the front door trim»).


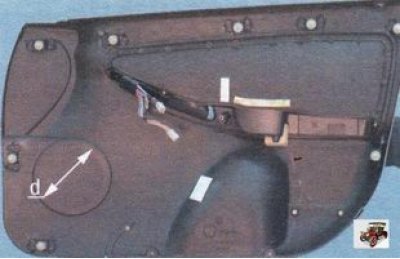
2. To install the speakers, cut a hole in the door trim (the hole diameter d is specified in the speaker installation instructions).

Note: In most cases, there is a special template for installing speakers, which is located on the speaker packaging. To use the template, carefully cut it out of the packaging.


3. Install the speakers according to the installation instructions included with them and connect them to the existing wiring in the car door, observing the polarity of the connection.

Installing speakers in the trunk shelf


Note: Before installing the speakers, please measure all dimensions to ensure you purchase the correct size speakers. Measurements can be taken from the passenger compartment by folding the rear seat, or through the luggage compartment by opening the trunk lid. The installation dimensions of the speakers are usually indicated on their packaging or in the operating instructions.


You will need a knife.

1. Remove the luggage compartment shelf (see "Removal and installation the luggage compartment shelf").


2. Cut holes in the trunk shelf, the diameter of the hole should be slightly larger than the diameter of the speakers.

3. Install the speakers according to the installation instructions supplied with them and connect them to the existing wiring located in the side trims of the trunk in the area of the wheel arches. When connecting wires, observe the polarity of the connection.

4. Reinstall all previously removed parts.

(Source link - website: www.Ladaman.ru)


This article is available at russian, bulgarian, belarusian, ukrainian, serbian, croatian, romanian, polish, slovak, hungarian
This article has been reviewed: Daniil Markelov
Share with friends:
◀ Previous
Lada Kalina Sedan: Equipment and devices
Next ▶

Replacing the Parking Brake Indicator Lamp Switch
Replacing the brake light switch sensor
Replacing the reverse light switch sensor
Replacing the coolant temperature gauge sensor
Replacing the oil pressure drop indicator light sensor
Engine control system diagram for Euro-2 toxicity standards
Car electrical equipment diagram
Engine control system diagram for Euro-3 toxicity standards
More articles with information from manuals for Lada:

• Radio receiver and audio player Lada Granta 1 (2011-2023, VAZ-2190)
• Audio system speakers — removal and installation Lada Vesta 1 (2015-2023, VAZ-2180)
• Radio antenna — removal and installation Lada Largus 1 (2012-2023)
Link to this article in various formats
Reviews and comments of visitors
No comments yet


Add up two numbers: 25 + 16


Kalina Sedan (2004-2013) 
  • General information
  • Vehicle device
  • Operation and maintenance
  • Faults en route
  • Power unit
  • Engine repair
  • Cooling and lubrication system
  • Exhaust system
  • Supply system
  • Ignition and control
  • Transmission
  • Clutch and drive shafts
  • Car gearbox
  • Chassis (running gear)
  • Front suspension
  • Rear suspension
  • Steering
  • Brake system
  • Body and interior
  • Exterior (external elements)
  • Interior (internal elements)
  • Doors, locks and windows
  • Electrical equipment
  • Equipment and devices
  • Power devices
  • Lighting and signaling
  • Heating and ventilation
Kalina Hatchback (2004-2013) 
  • General information
  • Vehicle Details
  • Maintenance
  • Troubleshooting
  • Power unit
  • Engine repair
  • Cooling system
  • Supply system
  • Control system
  • Exhaust system
  • Transmission
  • Clutch
  • Car gearbox
  • Drive shafts
  • Chassis (running gear)
  • Wheels and tires
  • Front suspension
  • Rear suspension
  • Steering
  • Brake system
  • Body and interior
  • Exterior (external elements)
  • Interior (internal elements)
  • Doors, locks and windows
  • Electrical equipment
  • Equipment and devices
  • Power devices
  • Lighting and signaling
  • Electrical circuits
LadaMan.ru © 2018–2026 | Mobile version | About Lada | Sitemap: EN BG BY UA RS HR RO PL SK HU | Contacts with admin | | Add to bookmarks
Kalina Hatchback (2004-2013) | Kalina Sedan (2004-2013) | Granta 1 (2011-2023) | Priora 1 (2007-2018) | Vesta 1 (2015-2023) | Largus 1 (2012-2023) | X-Ray 1 (2015-2022) |
This site uses cookies to ensure everything runs smoothly.