
You will need a multimeter to do the job.
Checking the inclusion of braking signals is carried out with an assistant.
Execution sequence
1. We prepare the car for work (see «Preparing the car for maintenance and repair»).
Comment. To check the brake light switch, turn on the ignition and manually depress the brake pedal to the amount of free play (the brake lights should come on). Release the brake pedal (while the brake lights should go out). If the brake lights are not on, check the switch and the voltage from the battery to the wiring harness block.
2. Turn the sensor counterclockwise by 90°and remove it from the bracket.
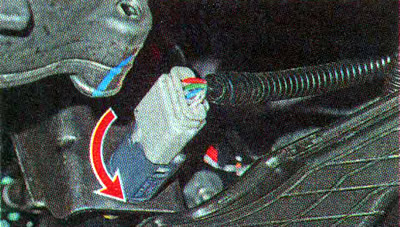
3. Press the latch and disconnect the wiring harness block from the sensor.

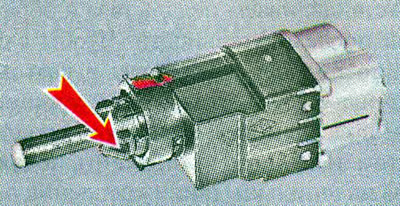
4. To check the sensor with a thin slotted screwdriver, move the stem lock to the right position.
5. We connect the multimeter in ohmmeter mode to the sensor terminals. Circuit 3-4 must be closed (resistance value close to zero), circuit 1-2 open (resistance value should tend to infinity).
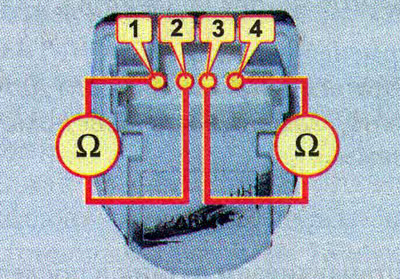
6. We press the sensor rod, circuit 1-2 should open (resistance value should tend to infinity), and chain 3-4 close (resistance value close to zero). Otherwise, the sensor must be replaced.
7. Before installation, move the rod lock to the left position. Connect the wiring harness to the sensor. We install the sensor in the hole of the pedal bracket and turn it clockwise by 90°. The brake pedal must be in the highest position.