
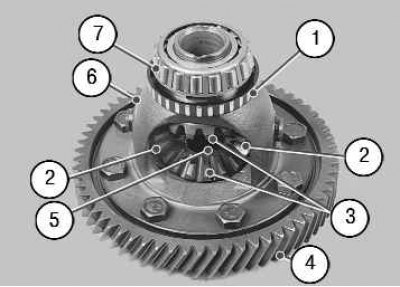
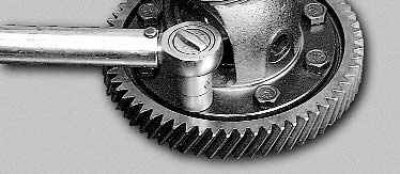
Pic. 6.9. Differential: 1 – setting ring of the speed sensor; 2 - satellite; 3 - side gear; 4 - driven gear of the main gear; 5 - the axis of the satellites; 6 - differential housing; 7 - differential bearing
1. Take out the differential (pic. 6.9) from the gearbox (see «Disassembly of the gearbox and troubleshooting of its parts»).
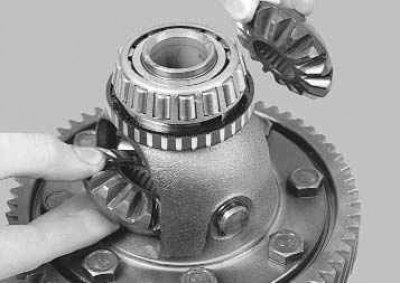
2. Turning 90°around the axis of the pinion gears, remove the side gears from the differential housing.
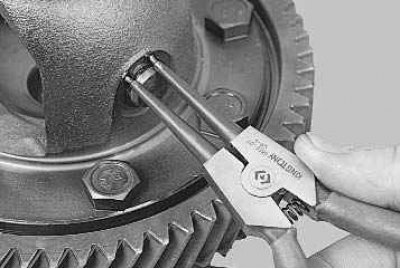
3. Remove the retaining ring from the axis of the satellites.
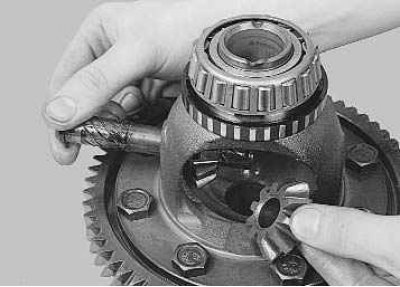
4. Take out from the case of differential an axis of satellites and two satellites.
5. Turn out bolts of fastening of a conducted gear wheel to the case of differential.
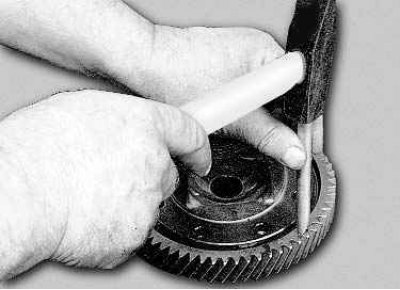
6. Inserting a chisel into the gap between the end face of the inner race of the bearing and the differential box, press the driven gear from the differential housing.
7. Inspect the working surfaces of the satellites, the axis of the satellites, side gears and the spherical surfaces of the differential housing in contact with them. Eliminate small irregularities with fine-grained sandpaper. Replace parts with significant defects.
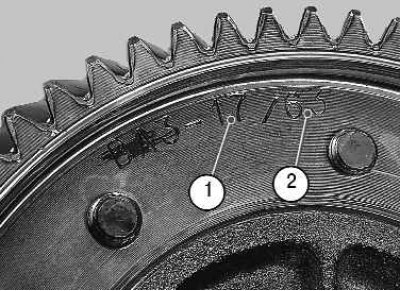
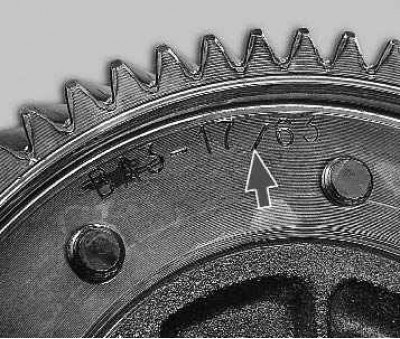
8. Check up a condition of a conducted gear wheel of a transmission. In the presence of chips, chipping and significant development of teeth, replace the gear. On the driven gear, the number of teeth of the driving 1 and driven 2 gears is stamped.
Attention! At the factory, the main gear gears are selected in pairs according to noise and contact patch. Therefore, when replacing the driven gear, replace the drive gear as well (they are sold as a pair). To check, count the number of teeth on the drive gear.
9. Inspect the bearing seats on the differential case. At considerable development of these places replace the case of differential. In the presence of pitting (shells) on treadmills and rolling elements, traces of indentation of rolling elements on treadmills, damage to cages, bearings must be replaced.
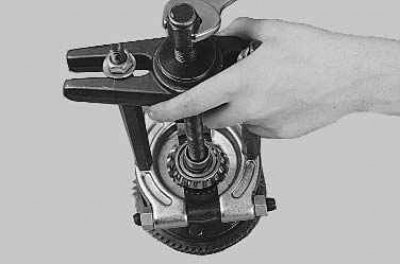
10. To replace the bearings, press them off the differential using a puller. This destroys the bearings.
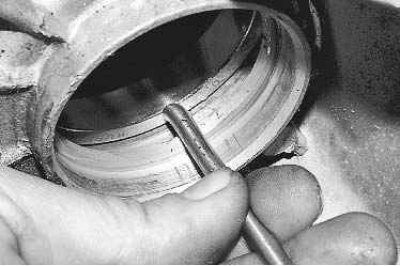
11. Press the outer rings out of the gearbox and clutch housings with a special puller. If there is no puller, first press out the axle shaft seals. Please note that in this case the seals are damaged and must be replaced (see «Replacing gearbox seals»). From the outer side of the crankcases, press out the bearing rings with a beard.
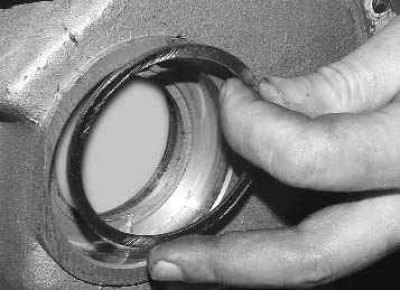
12. Please note that under the ring installed in the gearbox housing, there may be an adjusting ring, which must be re-selected before pressing in new rings (see «Selection of an adjusting ring for differential bearings»).
13. Assemble the differential in the reverse order of removal, having previously lubricated all parts with gear oil. The driven gear must be installed with the teeth markings facing out.