
Car repair AvtoVAZ Car repair Renault Car repair Hyundai Car repair Ford Car repair Volkswagen Car repair Audi Car repair Chevrolet
English Русский
Български
Беларускі
Український
Српски
Hrvatski
Română
Polski
Slovenský
Magyar
articles sitemap contacts bookmark
LadaMan.ru


Kalina Granta Priora Vesta Largus XRAY
Priora 1 (2007-2018, VAZ-2170)

Replacing the rear suspension hub bearing (Priora 2170)

  • Main
  • Priora
  • Priora 1
  • Chassis (running gear)
  • Car suspension
  • Replacing the rear suspension hub bearing
0
The hub is equipped with a double-row ball bearing, which does not require adjustment or lubrication during operation.

If you experience play or noise while driving while rocking a suspended wheel, the hub bearing may be faulty.

Note: If there is increased play in the wheel, loosen the hub nut and check its tightening torque. If the torque is less than required, try tightening the nut to the required torque and lock it. If there is no play, the bearing will be able to work for some time.


To press in the hub bearing, use the appropriate size mandrels from the kit.

Note: If you don't have mandrels, you can use the rings from an old bearing.


You will need: a thin chisel, a socket wrench (head) "for 30", pliers for removing retaining rings, a puller for pressing out the bearing, a universal puller.

1. Remove the protective cap and loosen the hub nut (see "Replacing the front suspension hub bearing").

2. Loosen the wheel mounting bolts and hub nuts.

3. Engage 1st gear and place chocks under the front wheels. Raise and secure the rear of the vehicle on supports.

4. Remove the relevant wheel, brake drum and brake shoes (see section. "Brake system").
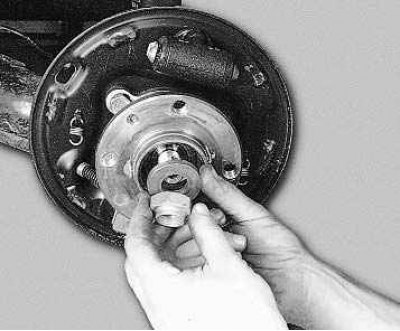
5. Completely unscrew the hub nut and remove the thrust washer.
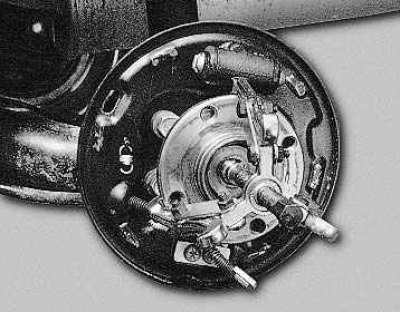

5. Completely unscrew the hub nut and remove the thrust washer.


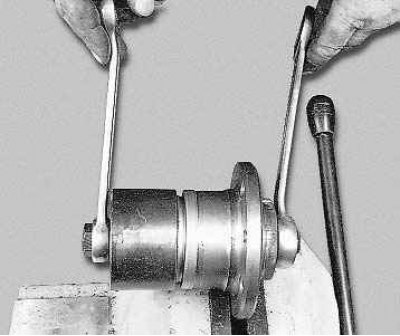
6. Install the puller and press the hub off the axle.

6. Install the puller and press the hub off the axle.

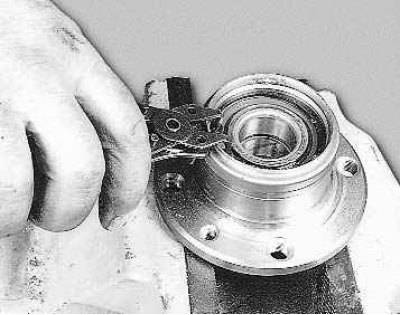
7. Clamp the hub in a vice and remove the retaining ring from it.

7. Clamp the hub in a vice and remove the retaining ring from it.

8. Using a puller, press the bearing out of the hub, clean the inside of the hub, press in a new…


8. Using a puller, press the bearing out of the hub, clean the inside of the hub, press in a new bearing and install the retaining ring.

9. Press the hub onto the axle using a suitable mandrel, applying force to the inner bearing race. Then install the pads, brake drum and wheel.


10. Finally tighten the hub nut and wheel bolts with the vehicle on the ground (replace the hub nut with a new one or a nut from another wheel so that the old, crushed parts of the nut flange do not fall into the groove on the outer CV joint tailpiece when punching).

11. After final tightening, lock the hub nut and install the protective cap.


This article is available at russian, bulgarian, belarusian, ukrainian, serbian, croatian, romanian, polish, slovak, hungarian
This article has been reviewed: Vladislav Voloshin
Share with friends:
◀ Previous
Lada Priora 1: Car suspension
Next ▶

Replacing the shock absorber and rear suspension spring
Possible faults of the rear suspension
Features of the rear suspension design
Replacing the front suspension hub bearing
Replacing the front suspension stabilizer bar components
Replacing the rear suspension beam
More articles with information from manuals for Lada:

• Replacing the rear shock absorber and rear suspension spring Lada Kalina Sedan (2004-2013, VAZ-1118)
• Rear Wheel Hub Bearing — Replacement Lada Granta 1 (2011-2023, VAZ-2190)
• Rear Wheel Hub Bearing — replacement Lada Vesta 1 (2015-2023, VAZ-2180)
• Rear suspension — design description Lada Largus 1 (2012-2023)
• Rear suspension — design features Lada X-Ray 1 (2015-2022)
Link to this article in various formats
Reviews and comments of visitors
No comments yet


Add up two numbers: 24 + 40


Priora 1 (2007-2018) 
  • General information
  • Vehicle device
  • User manual
  • Faults en route
  • Maintenance
  • Power unit
  • Engine repair
  • Cooling and lubrication system
  • Supply system
  • Exhaust system
  • Transmission
  • Clutch
  • Car gearbox
  • Drive shafts
  • Chassis (running gear)
  • Car suspension
  • Steering
  • Brake system
  • Body and interior
  • Exterior (external elements)
  • Interior (internal elements)
  • Doors, locks and windows
  • Electrical equipment
  • Equipment and devices
  • Power devices
  • Lighting and signaling
  • Cooling and heating
  • Electrical circuits
LadaMan.ru © 2018–2026 | Mobile version | About Lada | Sitemap: EN BG BY UA RS HR RO PL SK HU | Contacts with admin | | Add to bookmarks
Kalina Hatchback (2004-2013) | Kalina Sedan (2004-2013) | Granta 1 (2011-2023) | Priora 1 (2007-2018) | Vesta 1 (2015-2023) | Largus 1 (2012-2023) | X-Ray 1 (2015-2022) |
This site uses cookies to ensure everything runs smoothly.